Flamingo Bells Week - Day 2 Video & Card

October 31, 2017


Hello friends,

Katie here with a card and video to share with you today featuring the Flamingo Bells stamp set. I paired the island images from Flamingo Bells with Distress Oxide inks to create a tropical backdrop for Santa's sleigh and his reindeer.


I opted for the Mele Kalikimaka sentiment for the card because of my love for the Christmas song by that name.  If you've seen National Lampoon's Christmas Vacation, I am sure you've heard it too, but just in case, you can listen to the Bing Crosby version here.


I hope you'll take a peek at the video to see how it all came together!  
Thanks so much for stopping by!

Katie


Supplies: 

Flamingo Bells Week - Day 1

October 30, 2017


Hi there.  This week we're featuring a cute holiday set that's a bit out of the norm!  It's Christmas but with a tropical twist.  We have a quick intro video on the set and a project for you to check out today!


I decided to create a little tag using the Shaker Tags Elle-ments (please ignore the fact I took the photo before I added the ribbon to the top of the tag - doh!).  I blended Distress Oxide inks (Picked Raspberry, Spiced Marmalade and Peacock Feathers) to create a sunset backdrop and then die cut the large tag shape from it and stamped the palm tree scene stamp.


After adding some shimmer using Spica Pens I die cut the frame from white using both the tag dies.  I layered this using foam tape over the base tag and finished by adding the sentiment and a festive little flamingo!


Supplies:


Festive Wreath Week - Day 5

October 27, 2017


Hi Everyone!  Happy Friday! I have a quick card and video for you today using our new Festive Wreath stamp and die set!  Enjoy!


Supplies:
 
Thanks for stopping by to take a peek.  Have a great weekend!
 
Jamie 

Festive Wreath Week - Day 4

October 26, 2017


Hey everyone!
It's Heather here and I've got a fun and mass-producible project using the new Festive Wreath.
To create this card, I stamped the wreath, bow and bird (oh my gosh, I love that bird!!!) in Avery Elle New Moon dye ink. Then, I colored them in with Copics.  On my kraft background I stamped some of the smaller accessory images in Avery Elle Kraft pigment ink.   I love this tone-on-tone effect for filling up space but not distracting from the focal point of the card! 

It'd be so easy to stamp a bunch of these wreaths, birds, bow and colors them in while watching your favorite Christmas movies! Then assemble and go! 

Thanks so much for stopping by and sharing part of your day with me! 
Have a great one!

Festive Wreath Week - Day 3

October 25, 2017


Hello friends,

Katie here to share one of my very favorite techniques, No Line Watercoloring,  featuring the Festive Wreath stamp set and the coordinating Festive Wreath Elle-ments die.  


The trick to any "no line" technique is using the right color of ink to stamp your lines.  You want to use a very light color ink so that when additional colors are added, the lines disappear or take on the pigment that you are adding to the image.  For this technique, I like to use Antique Linen Distress Ink, but other light inks work too such as light pinks or light grays. 


I stamped the images from the stamp set in Antique Linen Distress Ink and then I began to watercolor using other shades of Distress Ink.  I smooshed the ink cubes onto an acrylic block and spritzed the ink with water to create an ink wash.  Using a fine point paintbrush, I began adding color to the stamped images.


The most important pieces of advice I can share is to allow layers of watercolor ink to dry completely before going back over the same area with more ink to deepen the color or to color in an adjacent area.  If two wet areas touch, the ink colors will bleed and blend together and that may not me the look you want.


A paper towel to blot us extra water and a heat gun can help speed things along if you are impatiently waiting for your images to dry.  Once everything is colored in, you can add detail back to you images using a fine tip pen.  On the finished card, I used a gray pen to add some detail to the bow and the eye to the cardinal. I used a white gel pen to add some highlights to the ornaments and the bird's wing.


I adhered the wreath to a card base I made using the A Tag for All Elle-ments die.   I stamped the sentiment with black ink and popped up the stars, candy canes, bow, and bird with foam tape.  I adhered some clear sequins to the wreath and added a sweet scalloped border using the Dotted Borders Elle-ments die to the bottom of the card.  I finished off the card with some Midnight Hemp Twine tied into a bow.

I hope this inspires you to try a little "no line" coloring on your next paper crafting adventure!  Thanks for stopping by!

Katie

Festive Wreath Week - Day 2

October 24, 2017


Hi there, Elena here, with a set of tags using the Festive Wreath stamp set.


I started out by coloring and die-cutting the elements: the wreath, the birds and the bows. Then, I die-cut circle Shaker Tags - each tag needs both a full circle base layer, and one with the middle cut out, which serves as the base for the wreath.

To layer the wreath onto the circle tag, you have to widen it a little. I snipped it apart at the very top and adhered it to the circle frame layer. Then, I used foam dots to pop up the wreath layer. I love the dimension this gives the tag!


The seam at the top was hidden by the big red bow. It really looks seamless!

I then grabbed the sentiment from Sledding Critters and stamped it into the banner image from Woodland Wonders.  I added some shading to the edges of the banner with a soft brown copic marker.

The little cardinal perches on top of the banner, and I finished off the tags with lengths of Cherry Hemp Twine.

I hope you like these fun, festive tags! Thanks for stopping by!

♥.

Festive Wreath Week - Day 1

October 23, 2017


Hi everyone!  This week we are featuring projects from our cute Festive Wreath stamp and die set.  I love how this set is so whimsical and fun!  I hope that you enjoy the projects from our fabulous design team this week. 


 Yainea is here to kick this week off!  Take a peek!

Hello there!

It's Yainea here today with a Christmas card featuring the gorgeous Festive Wreath stamps and dies. I started my card by stamping some of the included images on watercolor paper and coloring them with Distress inks. I rubbed the ink pads on an acrylic block and colored the images with a brush adding some water to the inks, using them as regular watercolors.


When the ink was dry, I used the coordinating dies and my die cutting machine to die cut all the images. For the sentiment, I used a banner from and stamped one of the sentiments included in the Festive Wreath set, with a partial stamping techinque.

I then die cut my background paper with the dies and adhere everything on top. As a finishing touch I used my Wink of Stella pen and some Glossy accents on the berries but it's difficult to see the sparkling on the pictures.


I hope you feel inspired to go to your crafty space and create some Christmas cards with this beautiful set! ;)
Have a nice day!

Supply list:
Festive Wreath Clear Stamps
Festive Wreath Elle-ments
Sweet Scallops Elle-ments
Pierced Banner Layers Elle-ments


Snowflakes Week - Day 5

October 20, 2017


Hi everyone.  Happy Friday!  I am popping in with a quick card and video using our new Snowflakes stamp and die set.  I hope you enjoy it!


Thanks for stopping by to take a peek. Have a great weekend!

Snowflakes Week - Day 4

October 19, 2017


Hi! Today I'm sharing Snowflakes! I added a little Festive Wreath light bulbs in for fun too!


I started the card by heat embossing the sentiment. I love the font combination of this sentiments. Next, I blended the background with Distress Inks and then stamped the snowflakes with Distress Oxide. 

I cut the card front and die cut a window using Wonky Stitches dies. Next I stamped and die cut the lights from Festive Wreath. The string is the "tails" from sentiments in Snowflakes dies.


I hope you have a great day!


Snowflakes Week

October 18, 2017


Hello there!
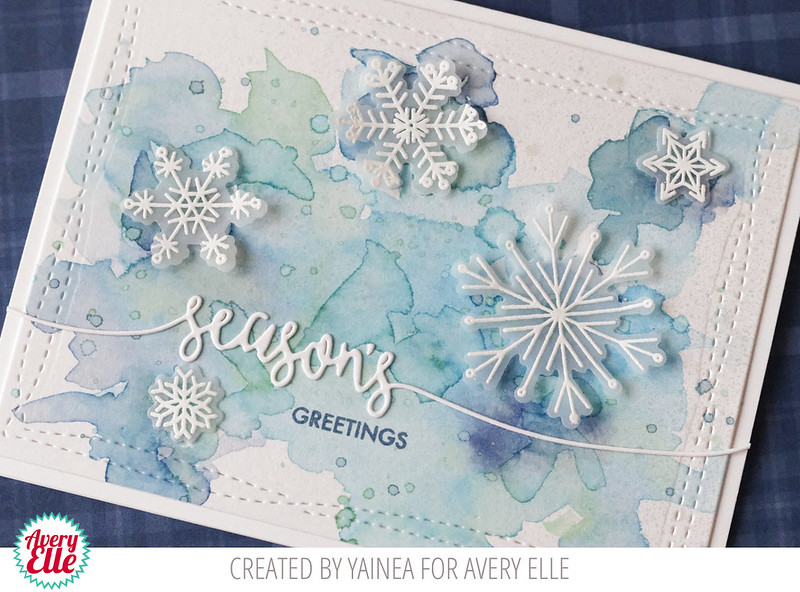
It's Yainea here with a Christmas card featuring the gorgeous Snowflakes stamps and dies. This set is perfect to create a lot of different cards and try different techniques.


I started by stamping the snowflakes with Versamark ink on vellum and then heat emboss them.
I used the Wonky Stitched dies to cut my base panel, I wanted a watercolor background for my card so I took some Distress inks, rubbed the ink pads on my acrylic block, added water and then I just used them like regular watercolors, adding different colors in different layers to achieve that effect.


Then, I used a Perfect Pearls spray on top to add some shine and adhered the sentiment and snowflakes. Finally, I adhered my panel to a white card base and the card was done. So fun! :)
I hope you like it!


Have an amazing day!

Supply list:
- Snowflakes Clear Stamps
Snowflakes Elle-ments
Wonky Stitches Elle-ments
Pure White Fine Embossing Powder

Snowflake Week - Day 3


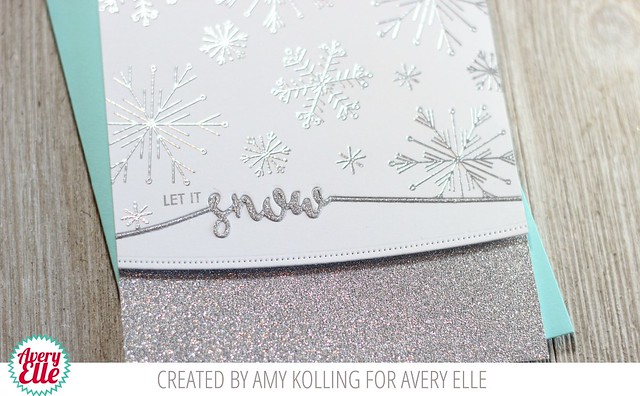
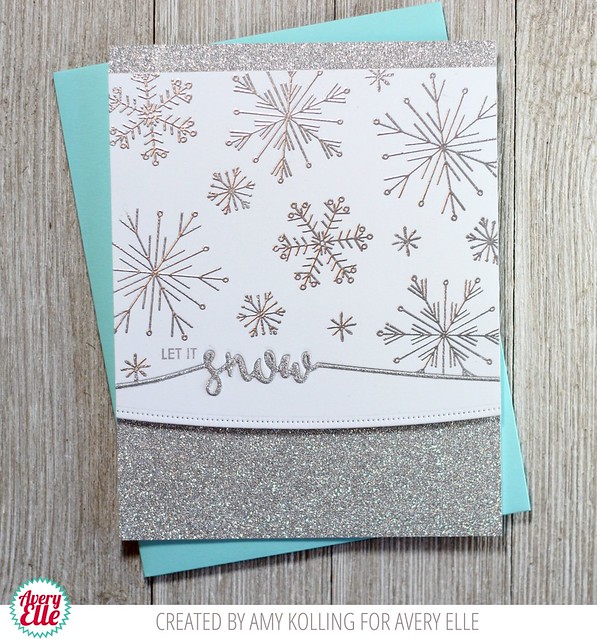
Hello!  Amy K. here with a glittery, metallic winter card using the Snowflakes stamp set.  I started with a white panel and using Silver Embossing Powder, heat embossed the various snowflakes.  I used the dotted border die from Picket Fence Elle-ments as the edge.  I inlaid the Let it Snow from Snowflakes Elle-ments using silver glitter paper.  I left off any embellishments to keep this flat except for the foam adhesive on the curved panel so it is easy to mail!

Snowflakes2Snowflakes

*****************************************************

Supplies:


Thanks for sharing a part of your day with me!


Shaker Tags with Melania

October 17, 2017


Hi all! It's Deasy here. Today I want to share my shaker tags for Avery Elle featuring Shaker Tags Elle-ments. This dies are so versatile and fun so I combine it with another stamps and dies.


Avery Elle supply that I'm using :
Shaker Tags Elle-ments to die cut the tags 
Winter Woodland Wonders Clear Stamps for the images and sentiment
Winter Woodland Wonders Elle-ments to die cut the images
Brring On The Joy Clear Stamps for the images
Brring On The Joy Elle-ments to die cut the images
Pierced Banner Layers Elle-ments to die cut banner for the sentiment
Lucky Hemp Twine and Strawberry Hemp Twine for the twine

I stamp, color the images using copic then die cut it. The sentiment is from silver embossing powder. To color the background, I'm using Dye Ink with blending tool then splash white watercolor with my brush.

Thank you so much for stopping by and happy crafting!

Hugs,

Melania Deasy

Snowflakes Week - Day 1

October 16, 2017


This week we are featuring our lovely Snowflakes stamp and die set.  I hope that you enjoy all of the inspiration this week!


Hi there, it's Caryn Davies here today sharing a bright and festive holiday card featuring the gorgeous Snowflakes Clear Stamps.  I know bright pink isn't the traditional colour you would think to pick for a snow-themed card but it's the holidays - anything goes in my book and the brighter, the better!!

I started with a pink 4 1/4 x 5 1/2" base card and die cut a rectangle mat from white card and heat embossed a flurry of snowflakes onto it in white.  I then took some Magenta Infusions powder from Paper Artsy (available at Simon Says Stamp) and sprinkled it over the snowflakes.  You may think there's nothing there and be tempted to add a ton of powder - DON'T!  As soon as you add a spray of water over the powder the intense pigment just comes alive!  You can add more obviously and dab off where you want but these powders are just so much fun.  


Once it had dried I used the Let It Snow sentiment and heat embossed a strip of vellum in white.  I wrapped it round the panel and mounted it all onto the card base.  To finish I added a few dots of white Nuvo Drops here and there.


Supplies:


Welcome Home Seasons Week - Day 5

October 13, 2017


Hi Friends! Today I'm sharing the super versatile Welcome Home Seasons! Since Halloween is just around the corner I thought it would be fun to create a spooky, but cute Halloween card.


To start my card I stamped the two windows and the tree on card stock. Next, I created a mask for each item I stamped. The masks allowed me to blend ink over the entire card base. Then, I removed the masks and colored the images. Tip: Any background areas around the stamps that didn't get good ink coverage can be colored with a matching marker. It's an easy fix!


Next, I stamped the banner, die cut it out and added color. The card was finished with a frame, created with the Scalloped Pierced Rectangles, and a few sequins.

Thanks for stopping by!

Welcome Home Seasons Week - Day 4

October 12, 2017


Hey everyone!  It's Heather Campbell here and today I've got not only a card to share but also a video explaining a few techniques and how I created my card!

I loved the original Welcome Home stamp set so the new Welcome Home Seasons is a great addition and I know will get a ton of mileage in my house.


Here's my video...


Supplies:

Thank you so much for stopping by today!  I hope you enjoyed the video!

Thanks!
Heather

Welcome Home Seasons Week - Day 3

October 11, 2017


Hello friends,

Katie Gehring here today to share a Halloween House created with the Welcome Home Seasons stamp set.  I adore the original Welcome Home stamp set.  It's so fun to play architect and home designers with stamps and paper.  Now that October is here, I thought I ought to decorate the house for the upcoming Halloween holiday!


I used a combination of images from the Welcome Home and the Welcome Home Seasons stamp sets to create the house.  I love how the yellow door and windows pop against the gray house.   The ghost and cobwebs are adorably spooky- not scary- which is how I like my Halloween!


Adding some detail to the roof line with a white gel pen really brought out the decorative accents on the roof. I colored the potted plants with violet Copic markers and hung a wreath on the front door as a finishing touch.

Supplies:

Now I am definitely in the spirit to decorate my own house for Halloween.  Don't forget to check back this week for even more inspiration featuring the Welcome Home Seasons stamp set!

Thanks for popping in!
Katie

Welcome Home Seasons Week - Day 2

October 10, 2017


Hi Everyone!  I am popping in quickly with a card I created using our new Welcome Home Seasons stamps and dies.  They are so fun and I just love how you can use them to customize your projects for different times of the year.  I created a quick video of my card as well.  


Supplies:

Thanks for stopping by to take a peek. Have a great day!

Welome Home Seasons Week - Day 1

October 9, 2017


This week we are featuring our Welcome Home Seasons stamps and dies.  These sets coordinate with our Welcome Home Stamp and die set and are SO cute.  They can be used all year long.  To see how these sets work together be sure to check out the quick video below and then take a peek at what Yainea has created today!


Hello everyone!

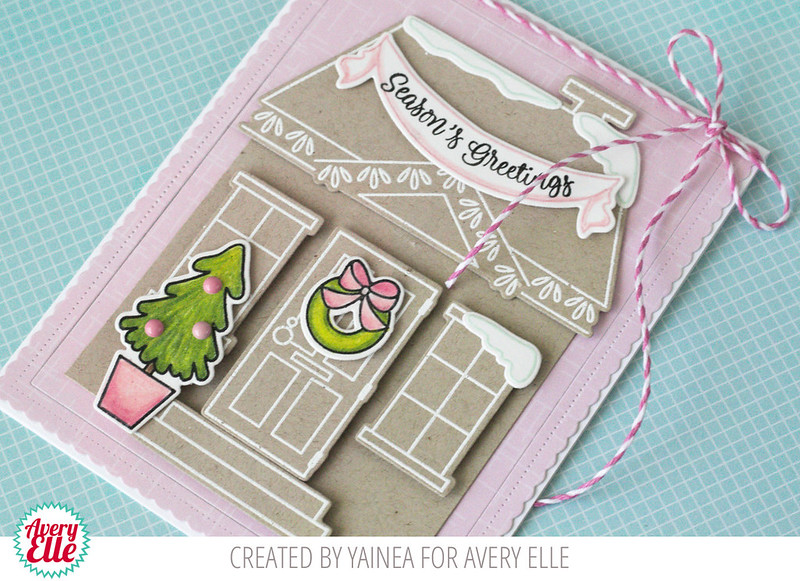
It's Yainea here with a pink Christmas card featuring the Welcome Home Seasons stamps and dies. You can totally use this set on its own but it's a perfect add-on for the Welcome Home set, full of little elements to customize the House for different holidays like Halloween, Thanksgiving, Christmas and Valentine's day :)

Christmas cards are never enough so I decided to decorate the Welcome Home house with Christmas elements and create a pink and kraft Christmas card. I love this non-traditional color combo!


I heat embossed all the elements from the original Welcome Home set using white embossing powder and then I stamped the add-on elements in different colors and colored them with my Prismacolor pencils. I wanted to showcase the Christmas elements and I thought this would be a great way to do it :)


I adhered all the different elements on a card base with a piece of patterned paper from the Sorbet collection that I previously die cut using the Scalloped Pierced Rectangle dies. Finally I tied some pink twine on top and the card is done :)

I hope you like it! Have a nice Monday!

Supply list:
- Welcome Home Seasons Clear Stamps
- Welcome Home Seasons Elle-ments
- Welcome Home Clear Stamps
- Welcome Home Elle-ments
- Scalloped Pierced Rectangle Elle-ments
- The Sorbet Collection paper pad
Raspberry Hemp Twine
Pure White Fine embossing powder

Frosty Friends Week - Day 4

October 5, 2017


Hello Friends! Today I'm sharing the adorable stamp set Frosty Friends. This set reminds me of  beautiful Christmas antique treasures. I did a little searching on Pinterest for inspiration and then started on my card. 


First I stamped, die cut and colored the snow people. I used soft coloring and bold shadowing. I love how they turned out.


Next, I masked and inked a snow hill for the background and stamped the sentiment. Super simple and oh so sweet.

Thanks for stopping by!

 
site design by designer blogs