Hello friends!
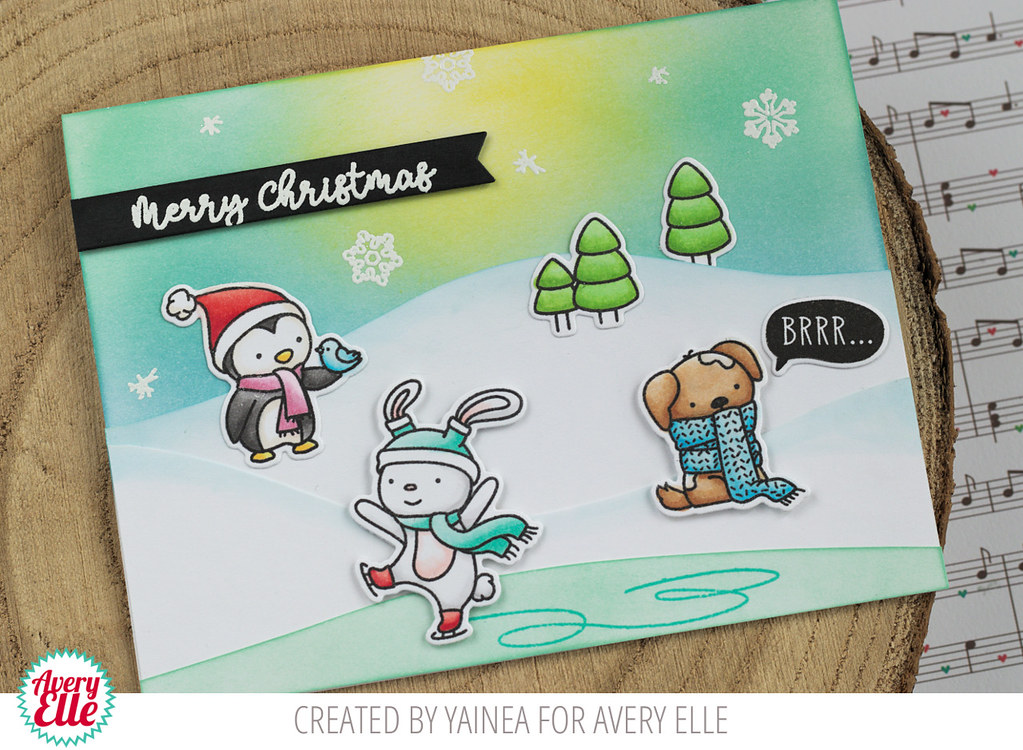
It's Yainea here today with some Winter-y inspiration for you! Where I live now it doesn't snow at all but I remember the joy, when I was a little girl, of waking up in the morning and discover everything covered by the snow. I love snowy landscapes, everything looks peaceful and brand new. And so, I love creating snowy scenes like this one!
Winter friends are the perfect main characters because they are too cute! I love how each one of them are dealing with their own little business so you can use them for a lot of different cards.

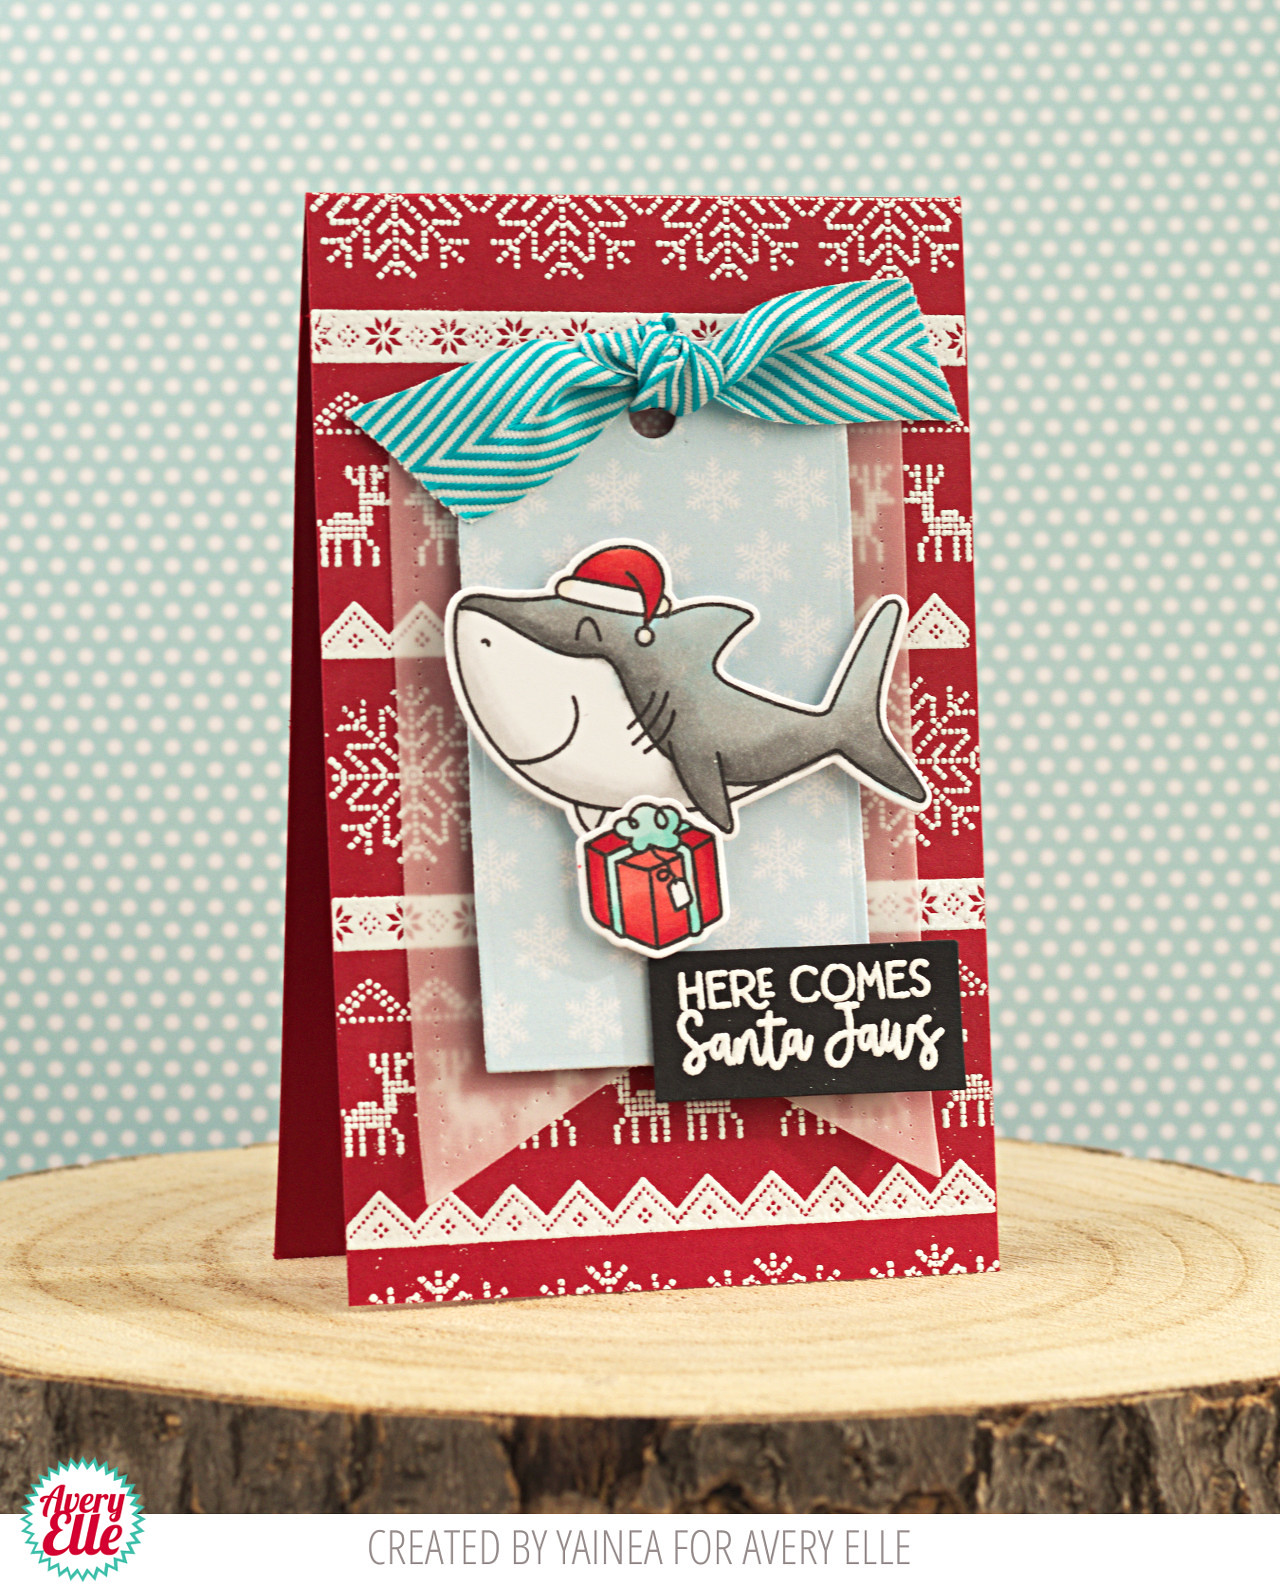
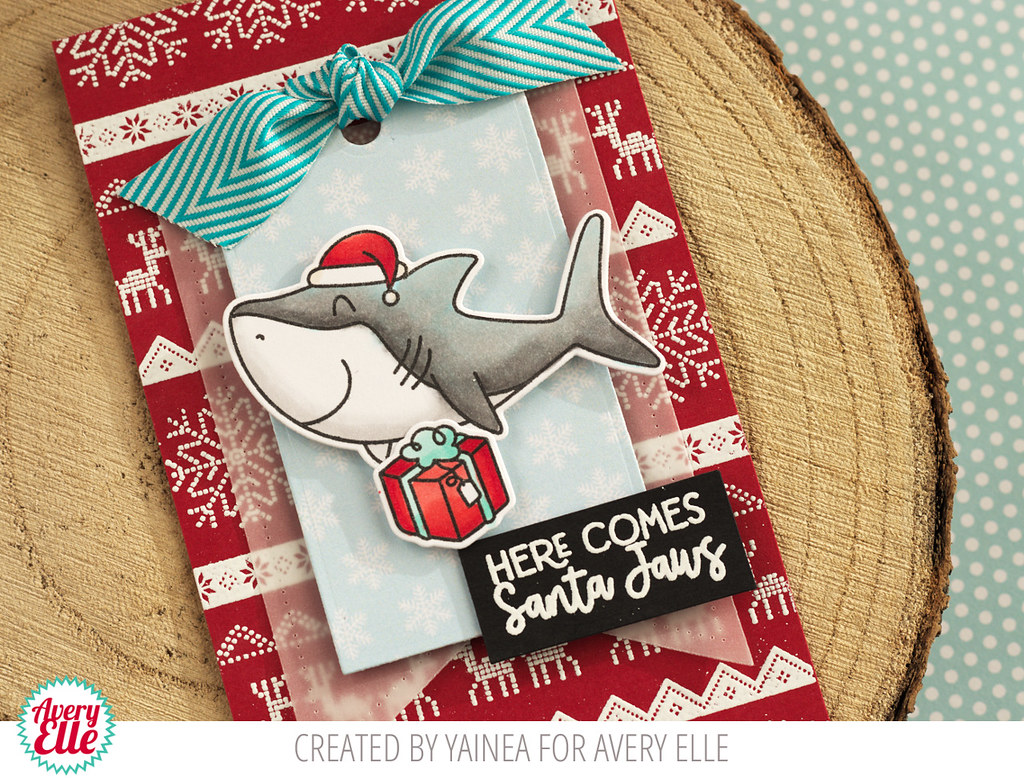
I used Distress inks to create the backgrouns and alcohol markers to color the critters and trees. The sentiment and snowflakes in the background were heat embossed with white embossing powder.
I hope you like my card and feel inspired to create with these cuties!
Thank you so much for stopping by, have a wonderful day!
Supply list: