Sweet Day Week - Day 3

June 30, 2021


Hello!  

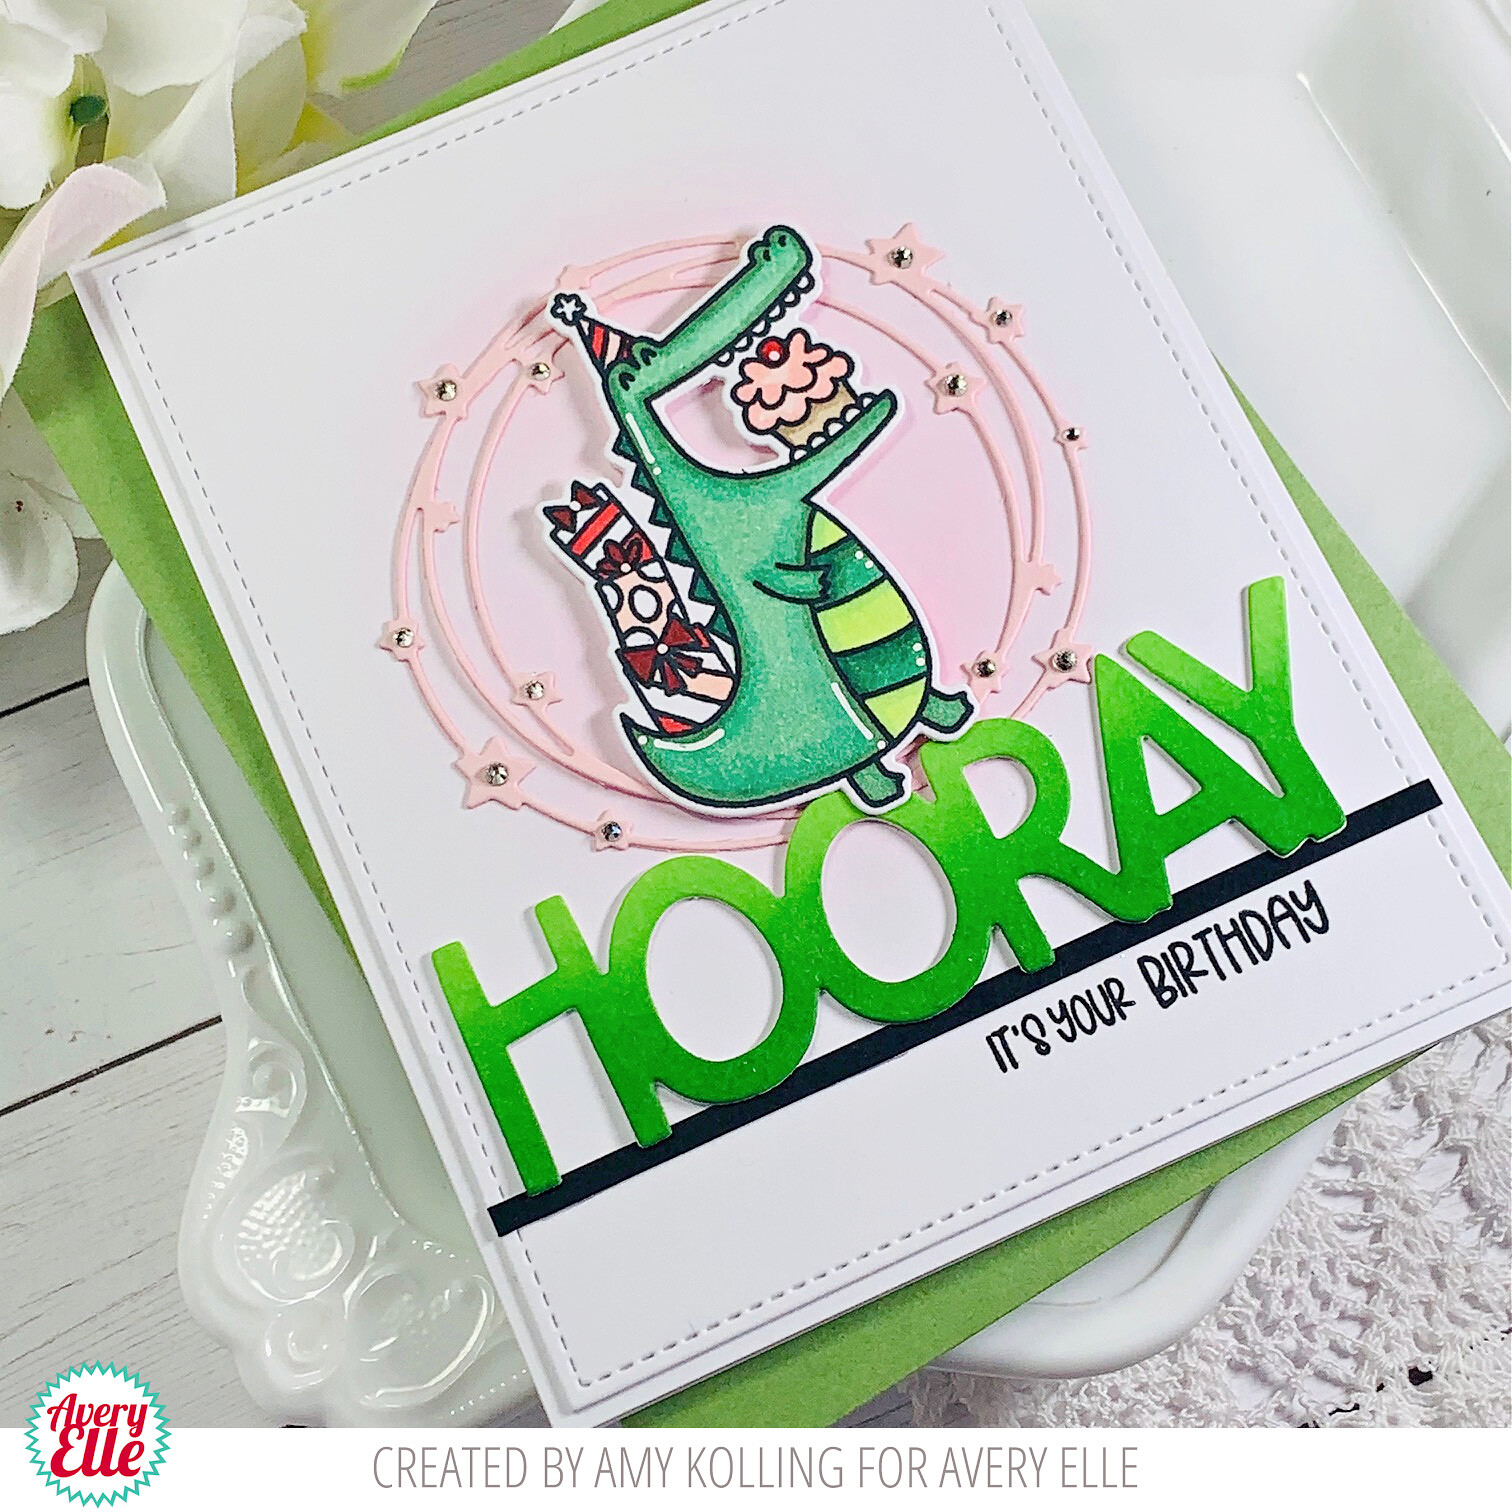
Amy here with a card to "sweeten" you up!  The Sweet Day set is so perfect for those summer birthdays, celebrations, and just because moments.


Sweet Day


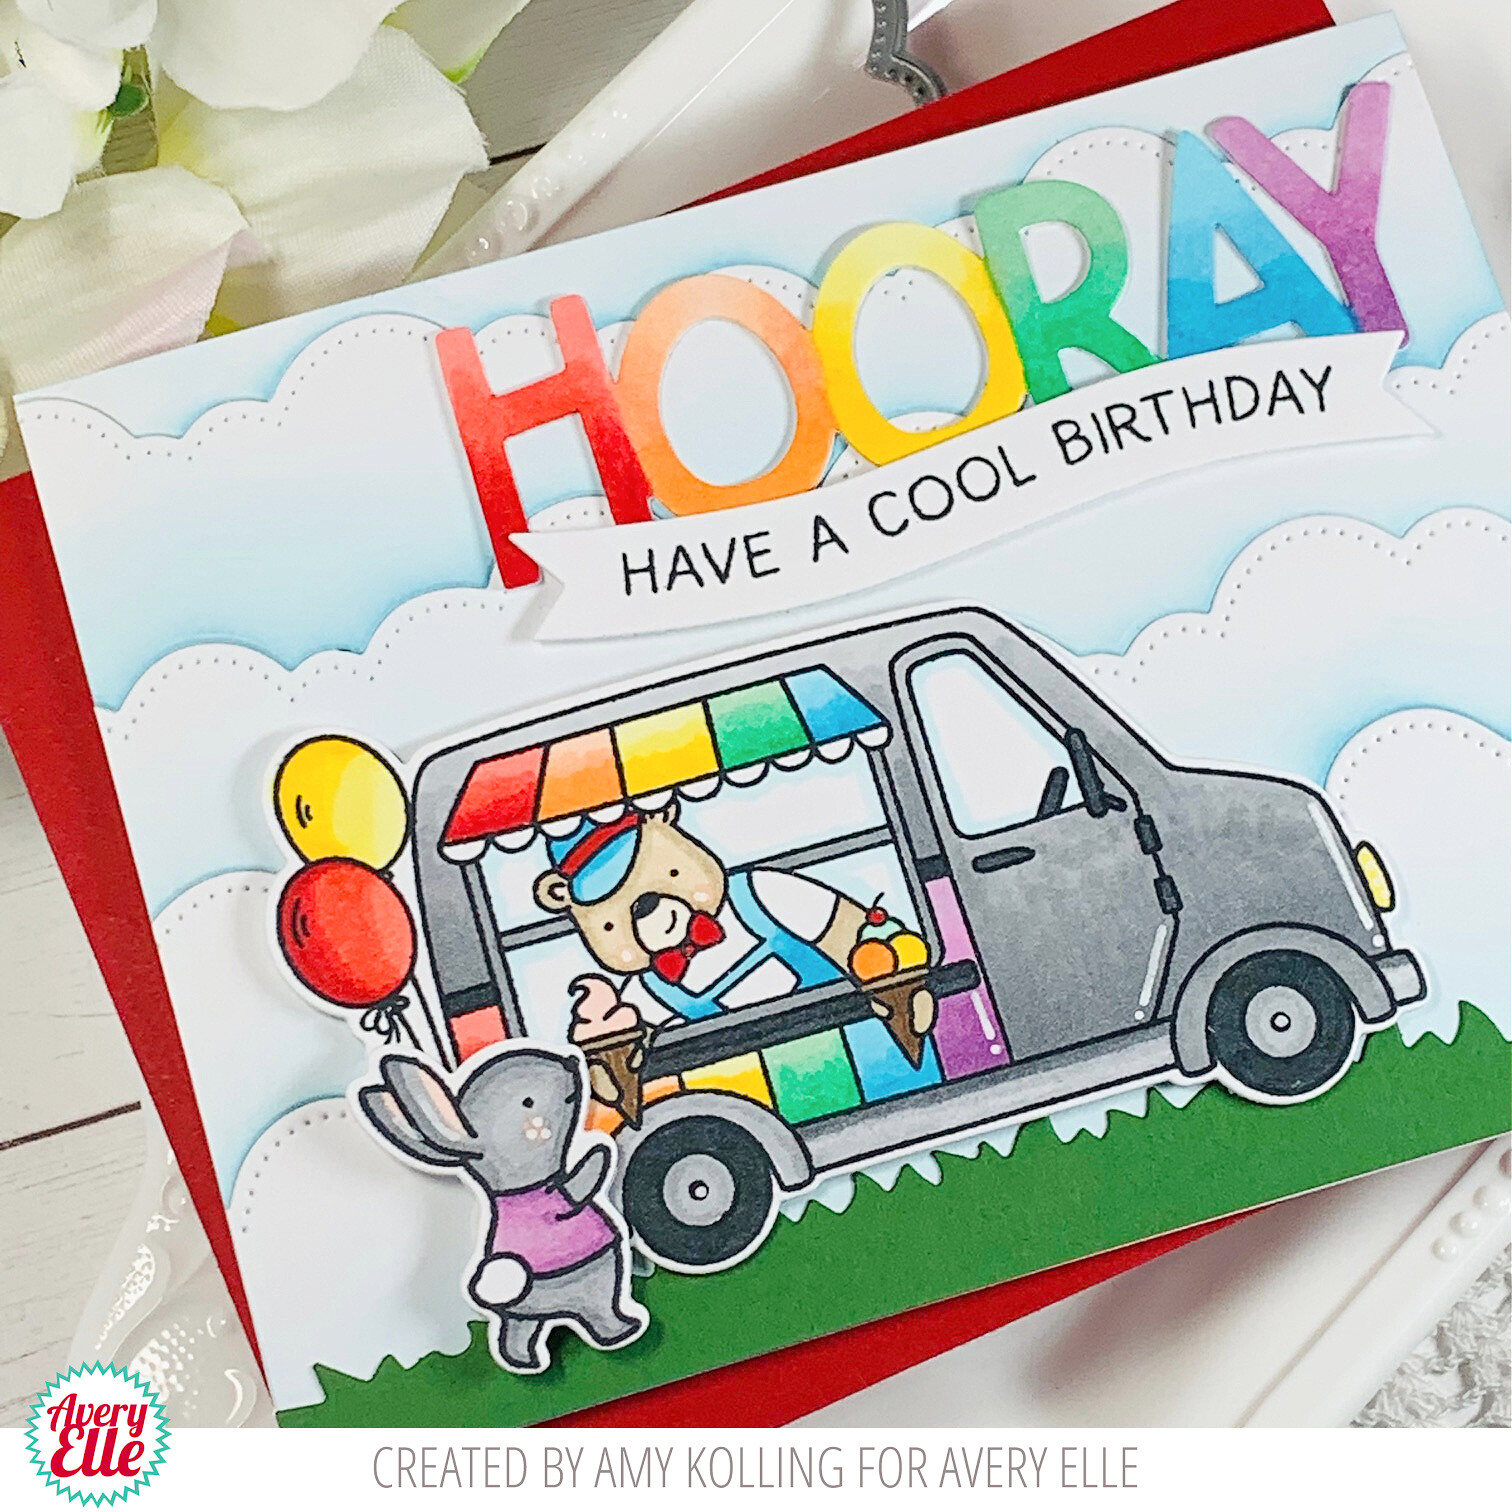
I've paired this set with rainbow color a for a bright, happy birthday card.  My background was done using the Slimline Borders Elle-ments.  Each "cloud" was die cut and inked with Broken China Distress Ink and then pieced back together.  A grassy border, done with the same Slimline Borders Elle-ments, was added at the bottom.  The adorable ice cream truck, from Sweet Day, and bunny was Copic colored, die cut, and added with foam adhesive.  For the sentiment, the Hooray Elle-ments was diecut and then Copic colored with a sentiment banner addition.


Sweet Day2


Supplies:
Sweet Day
Sweet Day Elle-ments
Slimline Borders Elle-ments
Hooray Elle-ments


Sweet Day Week - Day 2

June 29, 2021


Hi all! Today I want to share my card for Avery Elle featuring Sweet Day. This stamp set is super adorable and can be used to create an ice cream truck scene.


Avery Elle supply that I'm using :
Sweet Day Clear Stamps for the images and sentiment
Sweet Day Elle-ments to die cut the images
Slimline Borders Elle-ments to die cut the background line


I stamp, color the images using copic then die cut it. The sentiment is from white embossing powder. To color the background, I'm using dye ink pad with blending tool then splash watercolor with a brush.

Thank you so much for stopping by and happy crafting!


Hugs,


Melania Deasy

Sweet Day Week - Day 1

June 28, 2021


Hi there.  Caryn here today with a card using the cute-as-can-be Sweet Day stamp set and dies.  I love the way Elena illustrated this set with the cute critters and all the different ways to "dress up" the van.


I stamped the images and coloured them Copics in pastel "ice-cream" shades to compliment the theme.   
Instead of using inks for the background I decided to pull out some patterned papers from the Spring Collection Paper Pad and use dies to build up a scene.  I used the grassy border from the Slimline Borders die set and the rectangle layer die from Easy Layers set.   Using papers in this way is a great technique for adding texture and interest in a different way.


To finish I stamped the sentiment onto a strip of white card and added some glitter highlights here and there.

Supplies:


Flamazing Week - Day 4


Hi Everyone! Today I'm sharing Flamazing! Such a cute set!


I stamped, die cut and colored the fun little flamingo snorkeling. Then I stamped the island and sun on colored cardstock. This is a fun way to add color without a lot of work. I added a few quick highlights with ink and markers. Next, I die cut the frame and heat embossed the sentiment. I added a few details with the wave and splashes to finish the card. 


I love how this card turned out! I hope the flamingo is enjoying his island vacation. *wink*


Supplies:

Flamazing Stamps

Flamazing Dies

Hooray Stamps

Flamazing Week -Day 3

June 24, 2021


Hey everyone! Heather here. I'm back with a Flamazing card. 

To create my card, I stamped, colored and die cut the images from Flamazing


From there I used Easy Layers 1 dies and combined it with Waves. I love how the waves play into the card. 

Thanks for stopping by!


Flamazing Week - Day 2

June 22, 2021


Hello Everyone! I hope that you are all having a great week.  I am popping in today with this cute card I created using our new Flamazing Stamp Set.  I  just love this cute little guy!


Supplies:

Flamazing Week - Day 1

June 21, 2021


Hi there!

Elena here with a card featuring Flamazing:


This flamingo really cracks me up! I love how quirky he is, all dressed up for snorkeling. I did some ink-blending in the background, with yellow and pink inks, and built my scene in front of it. I brought in the sand mound and island time sign from Island Time, and added a speech bubble from Speech Bubbles to house the sentiment. I love it when multiple sets work together so well!


I hope you like it, and have a flamazing day!

Supplies:

Flamazing

Flamazing Elle-ments

Speech Bubbles

Speech Bubbles Elle-ments

Island Time

Island Time Elle-ments

Circle Tags Week - Day 4

June 18, 2021


Hi Everyone! Today I'm sharing Critter Circle Tags! These guys are the best!


I stamped all four critters and colored them with Copics. Next, I die cut circles from a white card panel, then colored the panel with Distress Oxides and adhered the critters in the back. Then I added the paws and a few party elements from Unicycle. I finished the card with the Hooray die cut!


Supplies:

Critter Circle Tags Stamps 

Unicycle Stamps

Unicycle Dies

Hooray Die 

Critter Circle Tags Week - Day 3

June 17, 2021


Hey everyone! Heather here.

Do you ever get a stamp set and just know exactly what you're going to do with it? That's what happened to me with this Circle Critter Tag stamp set. I just knew I wanted to create a pattern out of these little animals. 


To create my card, I stamped all of the images on a single layer. Then, I colored them all in and added a sentiment. Super easy and I love how it turned out. 

Thanks for stopping by!


Critter Circle Tags Week - Day 2

June 15, 2021


Hello friends, 

Katie here with a card and video to share with you featuring the new Critter Circle Tags stamp set and the Slimeline Borders Elle-ments die. 


These Critters coordinate with the other Circle Tag sets, but in addition to tags, they look pretty cute on cards too!


I hope you will take a peek at the video to see how it all came together. 


Supplies: 

Thanks for stopping by!
Katie


Critter Circle Tags Week - Day 1

June 14, 2021


Hello!  I am popping in today to share this cute card I created using our new Critter Circle Tags Stamp Set.   I wanted to show how this set is for so much more than tags.  Take a look!


Thanks for stopping by to take a peek. Have a great day!

Oh Snap! Week - Day 5

June 11, 2021


Hi Everyone! It's such a fun week and I'm happy to be sharing the mini stamp set Oh Snap. 


I created lots of layers this week, one of my favorite techniques. With so many fun dies out there the options are endless. Today I used Easy Layers 1 die set. The white mat was cut out using the largest die in the set. I splattered it with pink ink. The small splatters were flicked on and the large splatters were dropped on. I love the two splatter sizes to add to the party look. 


I added to the layers by die cutting the banner twice, once in blue and once in kraft. The grass edge was created by using the Slimline Boarders dies. Next, I stamped, die cut and colored the alligator. I heat embossed the sentiments next, one from Critter Circle Tags , the other from Oh Snap Stamps. "Oh Snap" is outlined with Speech Bubbles. The final layer I added were the felt stars. I've been loving felt lately and the texture it adds to cards. 

Supplies:

Oh Snap Stamps

Oh Snap Dies

Critter Circle Tags 

Slimline Boarders

Speech Bubbles Stamps

Speech Bubbles Dies

Oh Snap! Week - Day 4

June 10, 2021


Hello everyone! It's Heather here and I'm back with an Oh Snap card. I love this little mini. It's so stinking fun and perfect to whip up a good birthday card. 

For my card, I used the new Easy Layers 1 die to create the perfect backdrop. Then, I stamped, die cut and colored in my alligator. 


I love how the die comes with inner confetti dies. I just die cut the confetti with white cardstock and colored it in with a marker. 

That's it for me today! Thanks for stopping by!


Oh Snap! Week - Day 3

June 9, 2021


Hello!  Amy here with a Hooray!  Let's celebrate a birthday!!! 


Oh Snap

I've paired the adorable mini stamp set, Oh Snap,  with the new HOORAY Elle-ments for a simple birthday card.  Spun Sugar Distress Ink was blended in the center of a white notecard.  The Star Frame Elle-ments was die cut from light pink cardstock and layered over the ink blended background.  This panel was die cut using the Easy Layers 1 Elle-ments.

The word HOORAY was ink blended with Mowed Lawn and Twisted Citron Distress Inks and was added to the die cut stitched panel just above a 1/8" strip of black cardstock.  The sentiment was stamped in black ink below.  The alligator was Copic colored, die cut, and added to the Star Frame with foam adhesive.  To finish, a few tiny clear gems were added randomly to the stars on the Star Frame.


Oh Snap2

Supplies:


Oh Snap! Week - Day 2

June 8, 2021


Hello friends, 

Katie here popping in with a card featuring the new Oh Snap stamp set, Hooray Elle-ments die and Easy Layers 1 Elle-ments die. 

I just adore this snappy crocodile. He's so festive and we have lots of celebrations planned for this summer. To make the card, I die cut a panel of Neenah Solar White card stock with the large stitched die from the Easy Layers 1 Elle-ments set. Next, I blended the die cut panel with two shades of Distress Oxide inks- Worn Lipstick and Dried Marigold. I spattered the panel with white ink and set it aside to dry. 


I stamped the crocodile with black ink, colored him with Copic Markers, and die cut the image using the coordinating Elle-ments die. I blended a small rectangle of Distress Heavystock with more Distress Oxide Inks- Worn Lipstick, Dried Marigold, Squeezed Lemonade, Twisted Citron and Salvaged Patina. I die cut the Hooray Elle-ments from the blended panel. 


I adhered the Hooray die cut at the bottom of the large blended panel and set the crocodile on top of the die cut. I pulled out the Speech Bubble stamp set and created a speech bubble to hold the "It's Your Birthday" sentiment. I added a few flat star sequins and attached the completed panel to an A2 card base. 


Thanks for stopping by!
Katie

Oh Snap! Week - Day 1

June 7, 2021


Hi there!

Elena here, with a card featuring Oh Snap:


Using dies from the new Easy Layers, and a sheet of patterned paper from The Holiday Collection Paper Pad, this card came together in a snap (pun intended.) I colored the croc using copic markers, and brought in a balloon from the Unicycle stamp set.


I hope you like it! Thanks for stopping by!


Supplies:

Oh Snap

Oh Snap Elle-ments

Unicycle

Unicycle Elle-ments

Easy Layers Elle-ments

The Holiday Collection Paper Pad

Luau Party Week- Day 5

June 4, 2021


Hi there!  Caryn here today with a card that pretty much screams SUMMER IS HERE!!  

I used the super-cue Luau Party stamp set to create a sweet little beach scene complete with hula-ing critters and a sunny, rainbow backdrop!


I coloured the images with Copics and added some shimmer to the lights and torches.  I don't know about you but I just want to go set up a campfire on the beach, drink cocktails and dance around in a hula skirt!!!!


Supplies

Luau Party Clear Stamps

Luau Party Elle-ments


Luau Party Week - Day 4

June 3, 2021


Hello friends, 

Katie here with a card to share featuring the adorable Luau Party clear stamps. First I stamped the images and colored them with Copic Markers. Once everything was colored in, I cut the stamped images using the coordinating Elle-ments dies. 


For the background, I blended Peacock Feathers and Salvaged Patina Distress Oxide inks onto a panel of Ranger Heavystock. I spattered the panel with water and blotted the water droplets with a paper towel to create the ink-lift effect. 


After I adhered the images in place, I stamped the movement lines near the hula dancers, music notes and sentiment with black ink. I used a white gel pen to add some details to the flowers and highlights to the stamped images. This set makes for such a fun party scene. I will definitely be reaching for it time and again! 

Supplies
Luau Party Clear Stamps
Die: Luau Party Elle-ments

Thanks for stopping by!

Katie

Luau Party Week - Day 3

June 2, 2021


Hello!  Amy Kolling here with some tropical fun!

Creating a scene can sometimes be hard.  I've created a simple background using strips of cardstock and an ink blended panel to create a festive backdrop for my Luau Party critters!


Tip:  Use those cardstock scraps and cut 1/4" strips in the color palette of your choice over an ink blended background.  Distress Oxide inks work well with Bristol smooth cardstock along with splatters of the same color!

Using the Easy Layers 1 Elle-ments, the ink blended panel (done with Salvaged Patina) was die cut along with the stitched sentiment banner.  These little Luau critters were Copic colored and added with foam adhesive over the strips of cardstock which serve to "ground" the scene.


Supplies:


--Amy ♥


Luau Party Week - Day 2

June 1, 2021


Hi all! It's Deasy here. Today I want to share my card for Avery Elle featuring Luau Party. This stamp set is super cute and these adorable critters dancing at tropical scene will bring a smile to everyone’s face!


Avery Elle supply that I'm using :
Luau Party Clear Stamps for the images and sentiment
Luau Party
 Elle-ments to die cut the images
Slimline Borders Elle-ments to die cut the background line


I stamp, color the images using copic then die cut it. The sentiment is from white embossing powder. To color the background, I'm using dye ink pad with blending tool then splash water and watercolor with a brush.

Thank you so much for stopping by and happy crafting!


Hugs,


Melania Deasy

Luau Party Week - Day 1


Hi there friends!

I hope you have a great start of the week! It's Yainea here showcasing the new Luau Party stamps and dies. This set remainds me of summer, vacation and happy moments, I just love how colorful luau parties are :)

For my card I started with a green card base and stamped some of the elements included in the set to create a pattern. Then I stamped die cut and colored the critters, torch and lights, using alcohol markers.

For a fun addition, I adhered the critters using action wobbles, so when you push them, it looks like they're dancing hehe

I hope you feel inspired by my card to create something today! Have an amazing day and thank you so uch for stopping by :)

Supply list:

 
site design by designer blogs