Big Birthday Week Card & Video - Day 2

July 31, 2018


Hello friends,
Katie here with a card and a video to share with you today featuring the Big Birthday Clear Stamps and the Focal Point Stripes Elle-ments die.


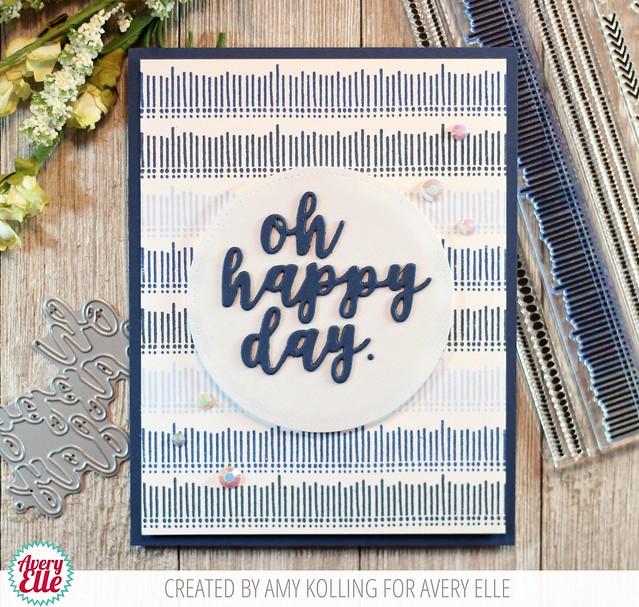
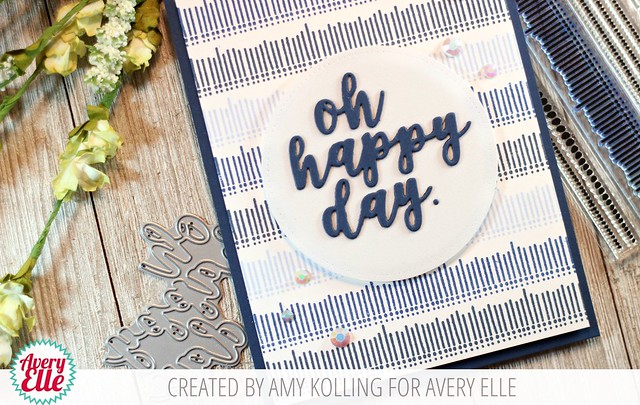
I used wire snips to separate the inner stripes of the Focal Point Stripes die from the outer rectangle and die cut a card panel using the stripes portion of the die to create a shaker window.  I stamped the sentiment at the top of the card and added lots of Avery Elle's Coarse Glitter and other shiny things to the shaker pocket.

A few yellow sequins transformed the stripes into birthday candles and a bit of Hemp Twine adds a finishing touch.


I hope you'll take a peek at my video to see how it all came together. 


Thanks for stopping by!
Katie


Supplies

Big Birthday Week - Day 1

July 30, 2018


Hey there, Caryn here with a card featuring the Big Birthday stamp set paired together with the large bloom stamp from Magnolia and the Hatch Match Elle-ments.

I started with a magenta pink card base so that my I had a frame to pop the die cut background panel gainst.  I love the subtle texture you get with this die.

Nest I stamped the Happy Birthday sentiment from Big Birthday in Fog dye ink over the top half of the panel and then stamped and coloured the flower using Fog dye ink and Clean Colour Brush markers.


To finish I added a light shimmer spray and a few enamel dots.


Supplies:


Thanks for stopping by.

An Adorable Card By Melania

July 27, 2018


Hi all! It's Deasy here. Today I want to share my card for Avery Elle featuring Oval Burst Die. I love this die because it's so versatile and pretty for any themes you can imagine!


Avery Elle supplies that I'm using :
Oval Burst Elle-ments to die cut the oval burst background
Peek A Boo Pals Clear Stamps for the images
Peek A Boo Pals Elle-ments to die cut the images
Chevron Mat Elle-ments to die cut the word Hello on glitter card stock and a white foam then I glue them all together

I stamp the images, color it using Copic then die cut it. I color the Oval Burst background with Dye Ink and blending tool. For the embellishment, I add clear sequins.

Thank you so much for stopping by and happy crafting!

Hugs,

Melania Deasy

Blooming Week - Day 3

July 26, 2018


Hey everyone!  Heather here sharing a card I created with the new Blooming stamp set.

To create my card, I stamped and die cut the floral frame.  Then I colored it in.  

To assemble the card, I die cut a panel using Wonky Stitches and then heat embossed the sentiment to fit perfectly in the window.  Finally I adhered everything using dimensional adhesive and then added rhinestone accents. 

Thanks so much for stopping by and sharing part of your day with me!
Have a great one!

Blooming Week - Day 2

July 25, 2018


Hello friends,

Katie here with a card and technique to share with you today featuring the Blooming stamp set.  The Blooming stamp set features a beautiful and versatile floral frame that can be customized any way you like from the colors to the sentiment inside the frame.

For my card today, I thought I would share with you an easy technique for adding details to watercolor images using colored pencils.  I love the look of watercolors on stamped images, but being a novice, sometimes I find it a bit challenging to get the brush or the paint to create the effect I want- especially when it comes to adding details to small images!  Colored pencils are a great solution and allow me to add fine details while still blending beautifully with a watercolor base.


My first step, since I am attemping a "no line" watercolor look, is to stamp the image using a light ink that is compatible with a water color technique.  Here I used Distress Ink in Antique Linen. 


Next I added a wash of watercolor to the frame using Avery Elle's Liquid Watercolors in Cherry, Fizz, Mimosa, Lemon Grass and Celery.  I started with the greenery before moving to the florals.  Be sure to allow time for the watercolors to dry before switching colors - especially on adjoining images, otherwise the colors will bleed together. 

Once the paint has dried completely, I added some details and shading using Prismacolor pencils.  I am still learning, so I focused mainly on the centers of the flowers, shading beneath the petals, and adding veins to the flowers and leaves.  I colored over the pencil lines with a colorless blender pencil to soften some of the lines and blend out the shading.


To finish the card, I stamped the sentiment with Versamark ink and heat embossed it with Avery Elle's  Rich Gold Embossing Powder.  I die cut the frame and adhered it to a card base that I covered with the Chevron Mat Elle-ments die cut. A few flat sequins add a finishing touch. 

 
Supplies:

I hope you'll consider giving this technique a try next time you watercolor! 

Thanks for stopping by!
Katie

Blooming Week - Day 1

July 23, 2018


Hello everybody, I have a pretty floral card for you today.  'Blooming' (which comes with coordinating dies) is part of the new summer release and it is so useful as it is, or to pair with your other sentiments or little characters you might own.  It would work great as the basis of a shaker card too!


My card started with a panel of smooth watercolour cardstock that I ink blended with distress inks in Worn Lipstick and Squeezed Lemonade and then splattered on a little pink paint.  I adhered this panel to the card base.  Next I stamped and die cut the floral hexagon.


I watercolour painted it then die cut and adhered it to the card using dimensional foam tape.  The sentiments were stamped in the centre and a few assorted toning sequins were glued into place to add a little twinkle for the finish.


I thank you for stopping by the blog today.  I do hope you like the card and feel inspired.

Nicky x


Indigo Week & Video - Day 4

July 20, 2018


Hello and Happy Friday!  I am popping in today with a quick card and video that I made using our Indigo Stamp set.  I hope that you enjoy!


 Supplies:
 
Thanks for stopping by to take a peek. Have a great day!

Indigo Week - Day 3

July 19, 2018


Hi Friends! Ashley here today sharing the Indigo stamp set and a few of my other favorites. 

 I started the card by water coloring a background. Then I used a stamp from the Indigo stamp set several times to create a fun pattern. 

Next I stamped the panda from Peek-A-Boo Pals and added a few balloons from Floating Wishes


It's fun to mix and match Avery Elle stamps. I can't wait to see what you create!

Supplies:

Indigo Week - Day 2

July 18, 2018


Hello!  Amy K. here today.  One of my favorite things to do is stamp my own backgrounds.  The Indigo set is a fantastic set to do this!  (especially if you like to do stripes like me!)

Indigo

I kept with the Indigo look and went with colors of blue for my background.  It was stamped using dye inks using my Misti and just shifting my panel down to stamp each line evenly spaced.  I added this panel to a coordinating navy cardstock.  My die cut sentiment is from the Oval Burst Elle-ments and was layered over a Double Pierced Circles Elle-ments.

Indigo2

Supplies:
Indigo Clear Stamps
Oval Burst Elle-ments
Double Pierced Circles Elle-ments


An Adorable Oval Burst Die Card with Yainea

July 17, 2018


Hello!

It's Yainea here sharing a card featuring the Oval Burst die. I love the way this die frames any scene or sentiment, like its old square version is a total must :)

I used the cute hippo from Peek A Boo Pals stamping it twice and coloring them with Copic markers. I keep using my liquid watercolors wherever I can because I love them very much so I painted the water with them and I really love the results. Then I added some sequins here and there to simulate sparkling water and match the sentiment :)


For the sentiment, I first stamped one of the phrases included in the Peek A Boo Pals set and then I completed it with a die cut from the A Tag For All dies. 
Finally, I used the Oval Burst die to frame the whole scene and sentiment, decorating it with some clouds from the Love is in the Air die set.


Thank you so much for your visit, have a nice day!!

Supply list:


A Rainbow "Indigo" Card With Caryn & A Winner

July 16, 2018


Hey there.  It's Caryn here with a card featuring the gorgeous Indigo stamp set paired up with one of my favourite Avery Elle stamps - the shark from Sea-Prise!

I created a panel for the front of the card by stamping the border stamps from the Indigo set  all together in Versamark then heat embossed in white.  I then blended some of my favourite Distress Oxide inks over the embossing for a resist effect.


Next I stamped the shark using Fog dye ink and coloured him in using Copics before die-cutting him.
To finish I stamped the Happy Birthday sentiment from Banner Bits and layered this up with some patterned paper and some washi tape.


Supplies:

The winner from our Marvy Uchida Giveaway from last week is Lorraine Cantrell.

Anonymous Lorraine Cantrell said...
Purple, always my favorite, would love to try the others.
Congratulations!  Please send us an email to customerservice at averyelle dot com so that we can get your prize out to you.

Have a great day!

Marvy Uchida & Avery Elle Week

July 13, 2018


Happy Friday!  We hope that you have enjoyed the projects that we have shown you throughout this week using Marvy Uchida and Avery Elle products.  We have one last project for you today and a giveaway!

I created this card using our Splash! stamp and die set and Marvy Uchida's Color In Markers.  I used their Jewel Picker to add the little rain drops to the pool.  I love how cute this turned out!


 Supplies:
 
 Would you like to win the Marvy Uchida products that you have seen on our blog this week?  Just leave us a comment telling us your favorite color in the comment section on this post by Midnight PST Sunday, July 15th.  We will select one random winner - must be 18 years of age or older to participate.  No purchase necessary.


Thanks for stopping by to take a peek. Have a great weekend!

A Cute Fuchsia Card with Ashley


Hi Everyone! Ashley here today sharing the Fushia stamp set and dies. This stamp set is so pretty and detailed.


To start my card I water colored a background with several Avery Elle liquid watercolors. Next, I heat embossed the flower stamp with White Fine Embossing Powder and die cut it. Just look at those details! Love it. I finished the card with a sentiment from Banner Bits.


Thanks for stopping by today! 

Supplies:

Fuchsia with Heather

July 12, 2018


Hey everyone!   Heather Campbell here today.


So excited to be sharing this card I made with the new Fuchsia stamp set.
To create my card, I first stamped the images in Versamark and then heat embossed them using Avery Elle Pure White embossing powder.

I love the look of this card plain!  I think the white on kraft is just so striking!  While I could have stopped here, I didn't.  I decided to add some color. 

To color in the images, I used colored pencils and colored right on top of the kraft.  I love how this technique works and it's so fun and easy!

Thanks for stopping by and sharing part of your day with me! 
Have a great one!

More Avery Elle & Marvy Uchida

July 11, 2018


We are continuing to share projects this week using some products that our friends over at Marvy Uchida sent to us.  I have two cards to share with you today so let's check them out.

In this first card I used their Color In Watercolor Pencils and a Blender Pen to color in the images from our Party Pals stamp set.  I used their watercolor pencils and a damp paint brush to create the "grass" that the cute pandas are sitting on.  You can't see in the photo but the white cardstock panel has a dusting of glitter on it that I was able to create by squeezing some Silver Deco Just Glitter Premium pen on a scrap sheet of cardstock.  I dipped my finger in and gently rubbed it across the card front.  The effect is subtle but oh so pretty! 


Supplies:
 

For this next card I used the same watercolor pencils that I did above to color the background and placed the black and white stamped die cuts from our Sea-Prise! stamp and die set on top.  So quick and easy!


Supplies:
 

Thanks for stopping by to take a peek. Have a great day!

Fuchsia with Katie


Hello friends,

Katie here to share a card featuring the beautiful Fuchsia stamp set and coordinating Elle-ments dies.  Fuchsias are among my favorite summer flowers, and I thought I would try my hand at a little no-line watercoloring.


I stamped the two of the floral clusters onto a panel of watercolor cardstock with Antique Linen distress ink.  I watercolored the images using Avery Elle's liquid watercolors and then added some shading and detail using Prismacolor colored pencils.

I die-cut the images using the coordinating Elle-ments dies and arranged them onto a white card stock panel cut with the Hatch Mat Elle-ments die.


I stamped the sentiment at an angle with gray ink and added some clear flat sequins as a finishing touch.

Supplies

I really love how these flowers look with the soft watercolors and the colored pencil details.  
Thanks so much for stopping by!

Katie

Wonky Scalloped Frames with Elena

July 10, 2018


Hi there!

Elena here, with a soft card featuring the cute beaver from Wood You and a Wonky Scalloped Frames die.

I did some ink-blending with distress inks on the card base. I kept the colors very light, blending together Tumbled Glass and Victorian Velvet.

Once I was happy with the way they came together, I set that layer aside and die-cut a Wonky Scalloped Frame. I just love the way the frame polishes off the image and the sentiments! 


I stamped, die-cut and colored the adorable beaver, and added the "love" banner between his paws.

I then added sentiments to flank him, on the top and bottom.

And just because of the beaver, I went through my stash of embellishments and found a wooden heart. Perfect. Chew on this, beaver!

I hope you like what I've created for you today! Thanks for stopping by!

♥.

Supplies:

Peek A Boo Pals with Nicky

July 9, 2018


Hi!  Are you ready for a dose of cuteness?  Look no further than these Peek A Boo Pals and their coordinating dies.


For this card I started out by die cutting a panel of smooth watercolour cardstock.  I die cut it twice using two of the dies from Dotted Border Elle-ments and ink blended with distress inks and distressed each of the 3 portions created with water and paint splashes.  I adhered the sky piece directly to the card base, the middle section with one layer of foam tape and for the lower portion I doubled up the foam tape.  I stamped the sentiment in archival ink.


I took more watercolour cardstock, stamped my images and using an archival pen, I drew in some glasses for the bear and dressed him and the monkey up.  Next I watercolour painted them and die cut them out.  Everything was adhered into position with foam tape for lots of dimension.  I highlighted a few areas in white and I gave each of their cute noses and the eye glasses a dimensional glossy accent for the finishing touch!


Thank you for stopping by the blog today and I hope you enjoyed the card and are feeling inspired.

Nicky x


site design by designer blogs