Superheroes Week - Day 3

March 31, 2021


Hello!  

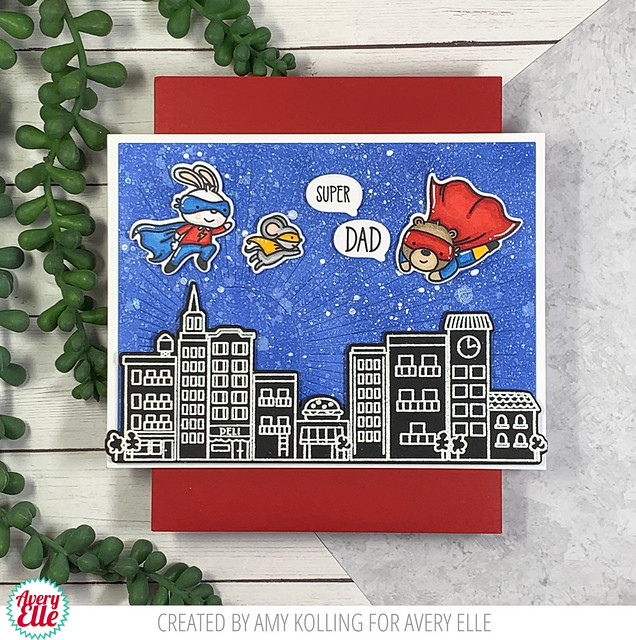
Amy here sharing a fun card for a HERO.  This card could easily be made to give to anyone!  


Superheroes

The background was done with ink blending Blueprint Sketch Distress Ink onto a panel of white cardstock.  Once done, the panel was die cut using the Ray Elle-ments and then splattered with water, Clear Shimmer Spray, and white pigment ink.  It's a fun sparkly background in person!  

The building outlines were white heat embossed onto black cardstock and die cut.  The buildings were added with foam adhesive to a landscape oriented card.  Three superheros were Copic colored, die cut, and added to the scene with foam adhesive.  To personalize this for a DAD, the speech bubble die from this set was stamped with words from the Superheroes stamp set.  


Superheroes

Supplies:

Superheroes Week - Day 2

March 29, 2021


Hello-
I am  popping in today to share with fun Superheroes card with you.  I love this stamp and die set!  It is so cute!


Thanks for stopping by to take a peek. Have a great day!

Superheroes Week - Day 1


Hi there!

It's Yainea here today featuring Superheroes stamps and dies with a fun big tag. I love that you can use this set to thank someone in a variety of occasions. Nowadays it's probable that you know a bunch of people that have been working hard due to the pandemic and totally deserves something like this :)

Also it is super easy to make! First, I colored the background with Distress inks and used the tag die to cut it out (it's the same size of a card so you can totally create a card using this same design).

Then I heat embossed the city using white embossing powder, added yellow with an acrylic marker on some of the windows and stars with white liquid enamel.

While it dries I stamped, colored and die cut the little and adorable superheroes and adhered them to the background. Finally I stamped and die cut the sentiment and tied it with some yellow twine to the big tag and another black tag as background.

I hope you liked it, and thank you so much for stopping by, have a nice week!!

Supply list:

Rainbow Builder and Sunshine Week - Day 5

March 26, 2021


Hi Everyone! Today I'm sharing Rainbow Builder and Sunshine!

I just love these happy stamps! I stamped the rainbow using several die inks. I love how soft it turned out, just like a real rainbow. Next, I cut out the layers of cardstock for the land, sand and ocean.


Next, I stamped the shark from Peek a Boo Boat and cut a small slit in the ocean cardstock to tuck him in to. Then I stamped and die cut the sun and embossed the sentiment. Finally, I put all of the pieces together.

I had so much fun putting together this card!


Thanks for stopping by!


Supplies

Rainbow Builder Stamps

Rainbow Builder Die

Sunshine Stamps

Sunshine Dies

Peek a Boo Boat Stamps

Peek a Boo Boat Dies

Elephantastic Stamps

Rainbow Builder and Sunshine Week - Day 4

March 25, 2021


Hey everyone! It's Heather here today with a fun project using the new Rainbow Builder stamp set.

For my project, I decided to make tags with the stamped rainbows. One thing I really love about this stamp set is all of the stamps slightly overlap so they're super easy to stamp! 

I have so much fun stamping these in different colors and not starting the top of each rainbow with red.  


To turn these into tags, I die cut the rainbow base with white cardstock and then stapled twine to the blank layer. Then I simply adhered the two layers together with adhesive hiding the ends of the twine inside the sandwich of the die cut layers. 

Thanks for stopping by and sharing part of your day with me. 

XO,
Heather 


Raiinbow Builder and Sunshine Week - Day 3

March 24, 2021


Hello!  I am popping in today to share this cute and happy card with you today. It was so fun and easy to make! 


Supplies:

Have a great day! Jamie

Rainbow Builder and Sunshine Week -Day 2

March 23, 2021


Hello friends, 

Katie here with a card featuring the Rainbow Builder and Sunshine stamp sets.  First I built the rainbow using some of the happiest ink shades I could find. All the rainbow arches nest together perfectly, but a stamp positioned definitely helps build this rainbow! 


After die-cutting all the stamped images, I stamped the sun face and the sentiment onto the sun and cloud. I adhered all the die cuts to a panel cut with the Scallop Mat Elle-ments die. All those scallops reminded me of a rainbow shape. 


With all the stamped images in place, I stamped some of the star images onto the scalloped mat as a finishing touch. 


Thanks for stopping by!

Katie

Rainbow Builder Week - Day 1

March 22, 2021


Hi there!  Caryn here today with a fun couple of cards using the gorgeous Rainbow Builder stamp set.  I love the mixture of sizes and textures on the individual stamps for the rainbow - it allows for a lovely, slightly shabby effect.  I've used a nice selection of pastel inks on my cards but the possibilities are truly endless.


For the background I used the cloud die and created a stencil and blended some ink for a cloudy effect.  I stamped some little stars.  I added a couple of strips of patterned paper to "ground" the rainbow and stamped the sentiments in black.  The "hello" is from the Rainbow Builder set and the "I Miss You" is from the Loads of Hello set.


Supplies:


Look For Rainbows and Happy Birthday Week - Day 5

March 19, 2021


Hi Everyone! I'm excited to share Looking for Rainbows and the Happy Birthday die. The bunny has the cutest expression and adds joy to any card!


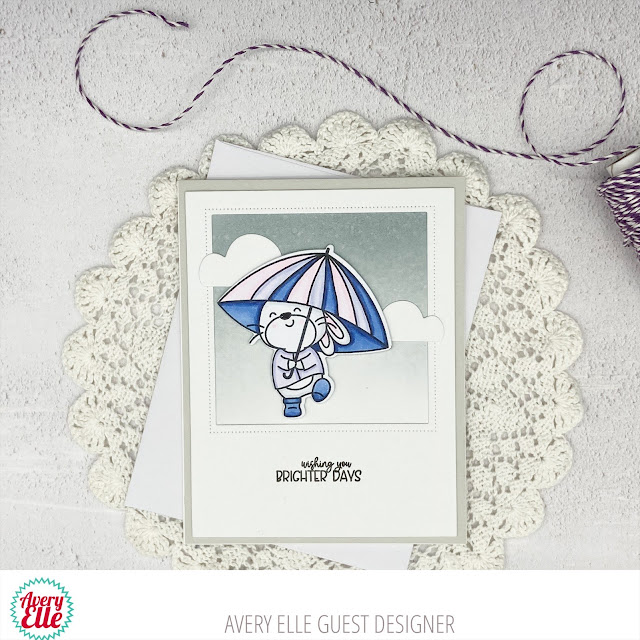
I started by stamping and die cutting the bunny. The umbrella is paper pieced. I used two shades of light pink to add a little variation. I colored the rest of the bunny with Copics. I added the bunny to the Picture Perfect Die cut and then added the Happy Birthday die at the bottom.

I can't wait to use this card for an upcoming spring birthday. I think it will be perfect!

Supplies:

Happy Birthday Die

Look for Rainbows Stamps

Look for Rainbows Die

Picture Perfect Dies

Look For Rainbows and Happy Birthday Week -Day 4

March 18, 2021


Hey everyone! It's Heather here. Today I've got the super cute card to share using the new Look For Rainbows stamp set. I love this little bunny. 

To create my card, I ink blended a background and stamped/die cut my images. 

I added the sentiment to a cloud and thought that was fun to pop up with dimensional foam. 

Thanks so much for stopping by and have a great day!
Thanks, 
Heather 

--

Hi there,

 Caryn here with a rainbow-filled card featuring the Happy Birthday die.  This die is great when you want to create a focal point but allow the background to centre-stage at the same time!  


I started by using Distress oxide inks to create a rainbow background then spritzed it with a little white ink spray.  I then die cut the Happy Birthday die 4 times and stacked them up for a look of dimension.  
I added a strip of vellum behind the die cut and added them to the card front.  To finish I added a few enamel dots here and there.


Supplies:


Look For Rainbows and Happy Birthday Week -Day 3

March 17, 2021


Hello!!  Amy here today sharing a few cards that are rainbow inspired!!  


This first card uses the mini stamp set called Look for Rainbows.  I couldn't let this image go by without coloring the umbrella in rainbow fashion!!  Images were colored with Copic markers, die cut, and added with foam adhesive to a Quilted Frame Elle-ments done in white cardstock and backed with pattern paper from The Holiday Collection Paper Pad.  The sentiment fit perfectly stamped in the open space in the background.  Die cut raindrops with Glossy Accents finished off the card. 


Stamps:

Look For Rainbows
Look For Rainbows Elle-ments
Quilted Frame Elle-ments
The Holiday Collection Paper Pad


*****************************************


This second card uses the Rainbow Builder stamps along with the adorable smiling sun from Sunshine.  My sun and rainbow was stamped, diecut, and added to the Cloud Mat Elle-ments background.  A double layer die cut Happy Birthday Elle-ments was added in bold black carstock with white pigment pen dots to tie in with the dotted clouds.  To finish, a few clusters of stamped and die cut hearts were added.


Stamps:

Sunshine
Sunshine Elle-ments
Rainbow Builder
Rainbow Builder Elle-ments
Cloud Mat Elle-ments
Happy Birthday Elle-ments


Look For Rainbows and Happy Birthday Week - Day 2

March 16, 2021


Hello friends, 

Are you looking for rainbows? I am! Always! I have a couple rainbow cards to share with you today featuring the Happy Birthday Die and Look for Rainbows clear stamps. 

First, I made a shaker card with the Happy Birthday die. I blended Distress Ink on a panel of Distress Heavy stock and die cut the Happy Birthday greeting. 


Next I made a shaker element with the Oval Burst Elle-ment die using lots of sparkly clear sequins! I attached the shaker to a notecard covered with a piece of patterned paper. I adhered the rainbow die  to the shaker and added a few clear flat sequins as a finishing touch. 


My next rainbow card uses the aptly named Look for Rainbows set. First I created the rainbow background with  a cloud edge stencil and Distress Inks. Next, I stamped the Bunny, puddle, and water drops and colored them with Copic Markers. 


I die cut the stamped images with the coordinating Elle-ments dies and arranged them on the background. I adhered the panel to a notecard and stamped the sentiment with black ink. 


Supplies

I hope these rainbow cards brightened your day! Thanks for stopping by!

Katie

Look For Rainbows and Happy Birthday Week - Day 1

March 15, 2021


Hi there!

Elena here, with 2 cards to share today. My first card features the new Happy Birthday die and it was a no-brainer to pair it with images from A Head Above.


This card was so fun to put together. I die-cut Happy Birthday in a graphic black, and added little highlights to the letters by way of a white gel pen. Then, I die-cut a Wonky Stitches rectangle layer and did some blue ink-blending to the top half only. I used a piece of grass ephemera to divide the 2 sections and layered my scene above.


The clouds are from the Cupids set, and I used them to show how tall the giraffe is, with his head in the clouds! 

My second card features the adorable Look For Rainbows set. That bunny is super cute!


I used a piece of patterned paper from The Holiday Collection paper pad, and die-cut it using our Ray die. I then popped up the bunny onto 2 layers of foam squares into the aperture. I added some droplets of rain above the umbrella, and also added some clear Nuvo drops that looks like water droplets. 

I hope you like it! Thanks for stopping by!


Supplies:


Guest Designer Noga Shefer

March 12, 2021


We are so  excited to have our Guest Designer Noga back today with these cute cards!   I just love how sweet these are!

Hi crafty friends!

It's Noga here today and I am so excited to share with you my projects showcasing the super adorable A Head Above and Look For Rainbows stamps and dies.
How cute are those sets??
I really enjoyed creating this slimline card and A2 card :)


To make my first card I took a slimline panel of bristol smooth cardstock. I used  shaded lilac distress oxide ink to blend a sky and glued some clouds from Cupids stamp set.
 I used cracked pistachio distress oxide ink to blend the grass. I was inspired by Elena Roussakis when I made this background :)
The sweet images were colored with copic markers and were glued with foam tape for dimension and the sentence was stamped using black ink.


To make my second card I took an A2 panel of bristol smooth cardstock. I used  pumice stone distress oxide ink to blend a background, next I took another A2 panel of white cardstock and used the Grand Photo Dies to cut this shape and glued this panel on the first panel.
The sweet image was colored with copic markers and were glued with foam tape for dimension and the sentence was stamped using black ink.

I hope you enjoy the projects I created and feel inspired to create some fun projects as well!
Thank you so much for stopping by today! Have a great day!

Supply list:

Peek-A-Boo Birthday Tag Toppers Week - Day 5


Hi Everyone! How is your week going? Today I'm sharing Peek-A-Boo Birthday Tag Toppers. These animals are so fun and easy to create with. Let's check it out...

I die cut the lions from Peek-A-Boo Birthday Tag Toppers. I trimmed the mane off one of them to make a female lion. Aren't they cute? You could make a whole family too! I layered the lion with the mane and then shaded both lions with Copics. 
Next, I die cut the Leafy Frame Die and the Happy Birthday Die. Those cute hearts above the lions were stamped from Rainbow Builder. Finally, I heat embossed the sentiment from Look How Big.


Thanks for stopping by today! I can't wait to see what you create!

Supplies:

Peek-A-Boo Birthday Tag Toppers

Happy Birthday Die

Look How Big Stamps

Leafy Frame Die

Look How Big Stamps


Peek-A-Boo Birthday Tag Toppers Week - Day 4

March 11, 2021


Hello friends, 

Katie here to share a card featuring the Peek-A-Boo Birthday Tag Toppers dies. These cute critters are the perfect size for tags, but they can be used for cards too!


For my card, I used the lion and hippo to make a wild birthday card. I die cut the animals and hats from card stock and assembled the images. Next I die cut the Happy Birthday die from black card stock. 


To pull all these elements together, I used the banner and one of the sentiments from the Peek-A-Boo Jungle clear stamps. I blended a panel of watercolor card stock with a couple shades of Distress Oxide Ink and added a die cut frame from the Fairy Ephemera pack. You can also use the Leafy Frame Elle-ments die to create your own! 

Supplies


Thanks for stopping by! 

Katie

Peek-A-Boo Birthday Tag Toppers Week - Day 3

March 10, 2021


Hello!  

Amy here today sharing a card using a mash up of products!  
It's always fun to break out some older products and mash them up with the new ones!


Peek-A-Boo Birthday Tag Toppers


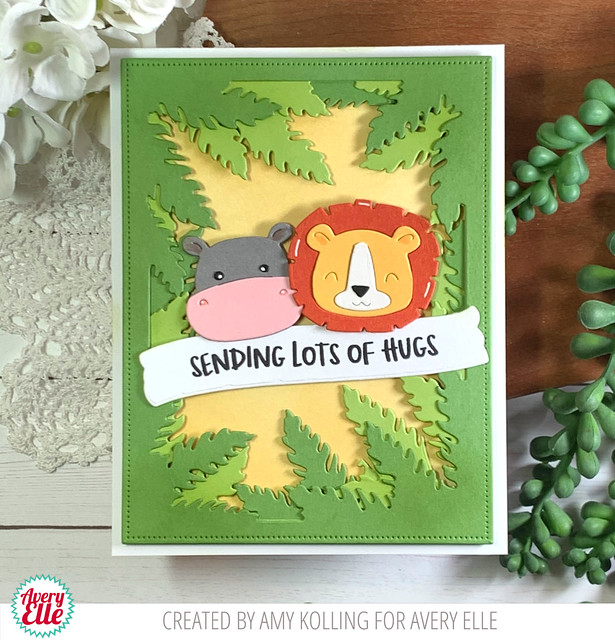
I used the Leafy Frames Elle-ments out of two colors of green cardstock and then also added in "extra leafy bunches" behind the frame for a "fuller" look.  I love how it adds dimension.  To the frame, Shabby Shutters Distress Ink was blended over the top.  The background was ink blended with Scattered Straw Distress Ink.

Using the NEW Peek-A-Boo Birthday Tag Toppers, the hippo and lion were die cut several times out of different colors of cardstock and "paper pieced" back together.  A few white details were added with a white pigment pen.  For the sentiment, I used one from Peek-A-Boo Jungle and stamped it on the banner die from the Peek-A-Boo Jungle Elle-ments.  


Peek-A-Boo Birthday Tag Toppers

So I challenge you, to get out those older supplies and use them in a mash up!!

Supplies:


Peek A Boo Birthday Tag Toppers Week- Day 2

March 9, 2021


Hi all! It's Deasy here. Today I want to share my card for Avery Elle featuring Peek A Boo Birthday Tag Toppers Elle-ments. This dies are so fun and super cute, but I made it as a card and they also look so adorable!


Avery Elle supply that I'm using :
Peek A Boo Birthday Tag Toppers Elle-ments to die cut the critters images then color it using copic
Big Congrats Clear Stamps for the sentiment
Big Congrats Elle-ments to die cut the sentiment congrats


Thank you so much for stopping by and happy crafting!


Hugs,


Melania Deasy


Peek-A-Boo Birthday Tag Toppers Week - Day 1

March 8, 2021


Hey there!  Caryn here today with some cute gift tags made using the fabulous Peek-a-Boo Tag Toppers elle-ments

I decided to create a tag for each of the critters as I just couldn't leave any of them out! I started by creating my tag bases using the Holiday Circle Tags elle-ments (which obviously aren't just for the holidays!).


Once I die cut all my pieces I got to assembling.  Each one of the toppers is die cut with cut lines showing where to cut and place each part of the critter until you've built up the final one.  Aren't they cute!?

I picked some sentiments from the A Head Above stamp set and arched them on a stamping block so they would curve around the edges of the tags. 


For each one wearing a party hat (not the unicorn, a hat would just spoil that beautiful golden horn!) I added some colour using Copics and a puff on the end using Neon Amplify from Tsukineiko which puffs up when you heat it! (If you want to see it in action head to my Instagram  @glittermesilly) to see a reel I did!


I finished off by adding some Midnight Hemp twine and now these guys are ready to PARTAAAY!

Supplies


Look How Big Week - Day 5

March 5, 2021


Hi Everyone! Ashley here today to share Look How Big. This set is just the cutest, let's check it out...


I often start my cards by stamping, coloring and die cutting the images. This gives me the feel for the stamp set and helps me chose the coordinating background colors. After I finished the stamped images, I cut out a circle background and water colored Distress Oxides. Then I created 3 more panels to layer behind the circle. I added the layers and images together, then stamped the sentiment on a banner and added it to the card. I finished by adding the stars.


Thanks for stopping by today! 

Supplies:


Look How Big Week - Day 4

March 4, 2021


Hi there!


Elena here, with a card featuring a set from our current release, Look How Big.


The big owl marking a growth chart in the tree makes me smile big! I started out by stamping, die-cutting, coloring my images. Then, I did some ink-blending on the background layer in a mauve/pink color. To add some dreaminess to the background, I flecked on some pink and white paints.


To build my card, I stamped and heat-embossed a sentiment that I placed under the images. Then, I borrowed another sentiment, "teacher," from the Superheroes stamp set and heat-embossed that as well. In that set, you'll find Teacher, Mom, and Dad - all of which could work on cards with these images! 

I hope you like it! Thanks for stopping by!

Supplies:


Look How Big Week - Day 3

March 3, 2021


Hello! 

Amy here today with inspiration using a darling set called Look How Big.
I think this set could be used for many occasions!

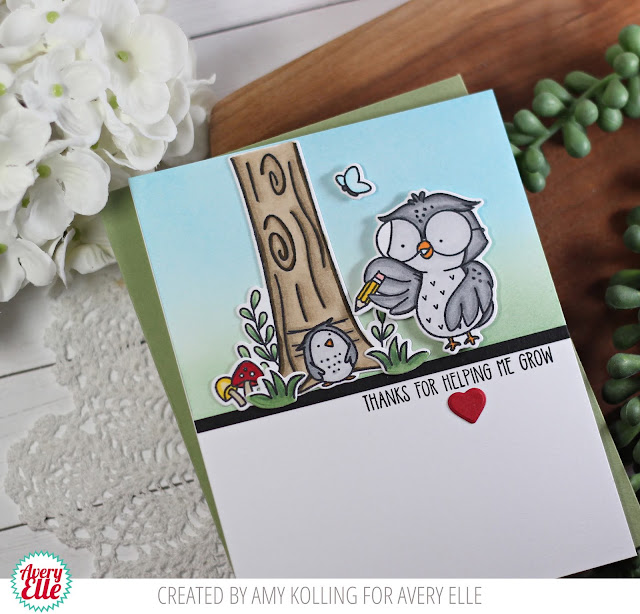
To create my scene, I ink blended Broken China and Rustic Wilderness Distress Inks onto a panel of white cardstock.  I had planned to use this as my card front but when masking off the "grass", the blending kind of got out of hand.  :)  To remedy, I trimmed off the top of the panel and adhered it to a white notecard instead.  To ground the scene, I added a 1/8" strip of black cardstock.

The adorable images from Look How Big were Copic colored and some were added with foam adhesive for dimension.  The sentiment was stamped to the right in bold black ink and a red die cut heart was added below.  ❤❤


Supplies:
Look How Big
Look How Big Elle-ments

 
site design by designer blogs