Hand Drawn Florals Week - Day 1

April 30, 2018


Hey, it's Caryn here sharing a card using the very pretty and versatile Hand Drawn Florals stamp set.  I love the whimsical feel of the flowers and they are so fun to colour.  Today I've used the Sapphire and Mint to Be liquid watercolours mixed with some subtle shimmer and a few Nuvo drops here and there for added bling.


I started with a stone coloured card base and added a white die cut using Horizontal Stripes (my favourite!).  I stamped the flowers using Versamark ink onto the textured side (just for a change) of some Tim Holtz watercolour cardstock and heat embossed them with Avery Elle Silver embossing powder I painted them with the watercolours and then decided to fussy cut them instead of die cut them with the dies. 

 I then simply arranged the flowers how I wanted them to the card front and finished with a sentiment from the Floral Bouquet set and a few clear sequins.


Supplies:

A Cute Card By Melania

April 27, 2018


Hi all! It's Deasy here.Today I want to share my card for Avery Elle featuring Chevron Mat Elle-ments! These die cut is so gorgeous and fun! For my card today, I made a shaker Birthday card by combine it with Party Pals stamp set.


Avery Elle supply that I'm using :
Chevron Mat Elle-ments to die cut the background for the shaker
Party Pals Clear Stamps for the images and sentiment
Party Pals Elle-ments to die cut the images

I stamp, color the images using copic then die cut it. The sentiment is from white embossing powder. To color the background, I'm using Distress Ink Tumbled Glass and Shaded Lilac with blending tool then splash water and white watercolor with my brush.

Thank you so much for stopping by and happy crafting!

Hugs,

Melania Deasy

Loved & Admired Week - Day 3

April 26, 2018


Hey all! Heather here.

Back with another card featuring Loved & Admired.  I adore this stamp set - these sentiments are the best and the floral frame is just too pretty.
For my card I stamped the floral frame on a die cut panel and colored it in with cardstock. 

Then I added a sentiment and popped a toucan up on some dimensional foam.  Easy peasy and super pretty!  

Thanks so much for stopping by and sharing part of your day with me.  Have a great one!

Loved & Admired Week - Day 2

April 25, 2018


Hello!

Katie here with a technique to share with you today using Avery Elle's new liquid watercolors along with the Loved and Admired stamp set.


First, I stamped and heat embossed the wreath image onto a panel of watercolor card stock using Avery Elle's Rose Gold embossing powder.

To watercolor the wreath image, I added drops of Avery Elle's Liquid Watercolors in Mint to Be and Cherry to the chambers of two waterbrushes.  Using the waterbrushes, I easily added watercolor pigments to the wreath image.   If the color is too pale, you can add more drops of the watercolor pigment.  If the mixed color is too intense, add a little more water to the chamber.  Once you are finished with the watercolor in the waterbrush, just rinse out the chamber and the brush to switch colors or go back to plain water.


I die cut the wreath and stamped the sentiment with Versamark and embossed it with more Rose Gold embossing powder.  I die cut the bottom of the white card stock panel with the scallop Dotter Border Elle-ments die before adhering the panel to a mint card base.

I put together a quick video to show you this technique in action and how my card came together.  I hope you'll check it out!


Supplies:


Thanks so much for stopping by!  Have a great day!
Katie

Loved & Admired Week - Day 1

April 24, 2018


Hi there!

Elena here, with a card featuring Loved & Admired. The large-scaled oval wreath and that sassy sentiment are so fun!


I did a watercolor wash on the background using our new watercolors. Then, I colored and die-cut the wreath and figured out where I wanted it. I then white-heat-embossed the sentiment. I obviously can't stop using the little critters from Party Pals - I fit the little bunny behind the wreath at the bottom, and added a heart in front for a pop of color.


This sentiment makes me smile every time I see it. I love out-of-the-box greetings!


I hope you like what I created! Thanks for stopping by!

 ♥.

2018 Mega Sponsor Spring Blog Hop

April 23, 2018


2018 Mega Sponsor Spring Blog Hop Begins Today!


Hi there!
Today is the big day! We are excited to be part of this exciting event. We have partnered with 17 other stamp and papercraft companies to do a special blog hop and will be giving away 18 prizes to 18 lucky winners!

Blog hop begins today, April 23 12 noon EST
Ends Friday, May 4 12 midnight EST
Winners announced: Friday May 11, 12 noon EST


Here's how you enter:


1) Follow this blog and each participating sponsor in the hop
2) Comment at each blog stop


2018 Mega Sponsor Blog Hop


In honor of the hop I am posting some of my favorite design team cards from this past release.  Enjoy!


Supplies:
Chevron Mat Die


Supplies:


 Supplies:
Splash! Clear Stamps for the images and sentiment
Splash! Elle-ments to die cut the images
AE Coarse Glitter for the shaker 


 Supplies:


Supplies:


In honor of the hop we are also offering 20% off anything in our store now through 4/27/18.  Use coupon code MEGA20 at checkout to redeem - not valid on wholesale orders.  


You should now be heading to  Technique Tuesday

Thanks for stopping by to take a peek. Have a great day!

Critter Crew Week - Day 5

April 20, 2018


Hi everyone!  Today I am popping in with a cute Critter Crew card by Nicky!  Don't you just love those cute animals and that double scalloped edge?!


Supplies:
Thanks for stopping by to take a peek. Have a great weekend!

Critter Crew Week - Day 4

April 19, 2018


Hi Everyone! Ashley here today sharing the super fun stamp set Critter Crew. This is one of those amazing sets that packs a ton of cute animals in to the perfect card sized stamp. I love it!


To create my card I started by water coloring the background and flicking on extra color. Next, I stamped and die cut the adorable animals. I paper pieced the box and colored the animals with Copics. To create the box I just used kraft paper and drew the dots with a slightly darker shade of Copic marker.


I finished the card with an embossed sentiment on a die cut banner and some twine. 

Supplies:


Critter Crew Week - Day 3

April 18, 2018


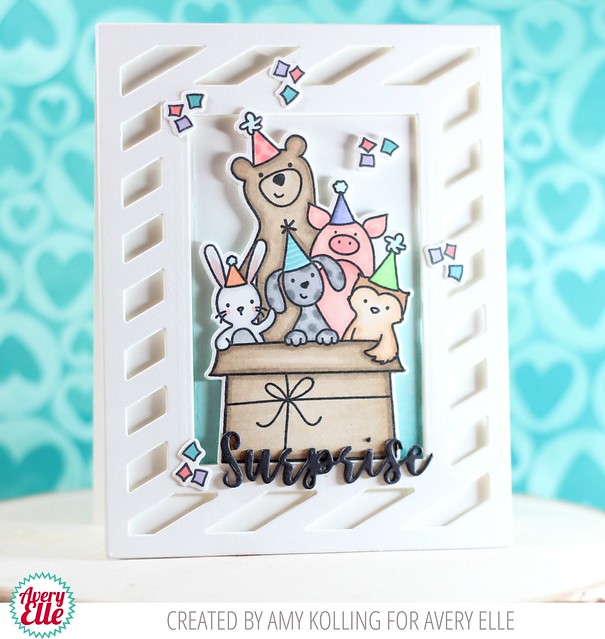
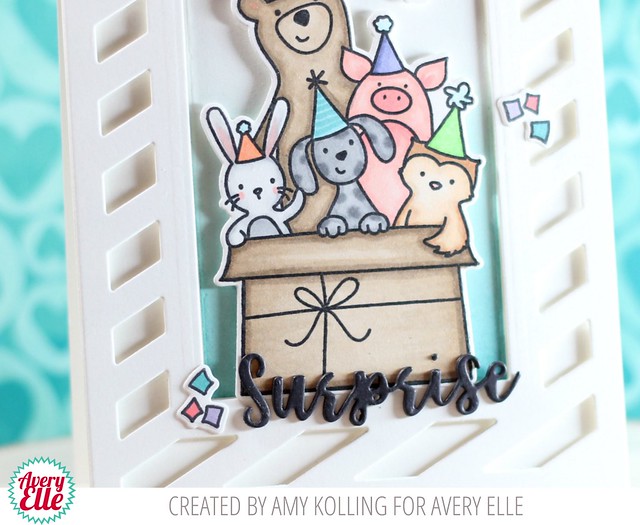
Hello!  Amy K. here sharing some inspiration using the Critter Crew stamps.  This image is just adorable!  

Critter Crew

After stamping my image, I colored it in with Copic markers.  I wanted to make the image the focal point and I did this by using the Diagonal Stripes Elle-ments.  I die cut it out of white cardstock and added it to a white top folding notecard using foam adhesive.  I used the rectangle from the die and ink blended Broken China Distress Oxide ink.  I inset this back into my Diagonal Stripes frame.  I added my image with foam adhesive, added my sentiment, and some coordinating confetti.

Critter Crew2

Supplies:
Critter Crew Elle-ments Dies
Diagonal Stripes Elle-ments Dies

Thanks for stopping by and have a wonderful day!


Critter Crew Week - Day 2

April 17, 2018


Hi Everyone!  I have a fun video for you today created by Iliana from My Sweet Petunia.  She used her amazing MISTI and our Critter Crew Stamp and Die Set.  Enjoy!

 
 Supplies:

Thanks for stopping by to take a peek. Have a great day!

Critter Crew Week - Day 1

April 16, 2018


Hey, it's Caryn here with a colourful card featuring the fun Critter Crew stamp set and co ordinating dies.  I just love these wee guys Heather has created and love to see where they're going to pop up next.  For my card I created a background using Distress Oxide inks splattered with gold spray and adhered a Polka Plate die cut over the top to break up the background a little.


Next I stamped the Critter Crew twice and fussy cut around the front "layer" so I could have them popped up to give a bit more dimension to the scene.   I coloured them all with Copics and for some bling I added Avery Elle glitter to their hats!


For some added sparkle I die cut the Star Frame using gold glitter adhesive paper and placed it onto the card before popping the Critters on top.  To finish I stamped the sentiment in (from Toucan Party) in gold embossing powder and added it to the front of the card.

Supplies used:

Party Pals Week - Day 5

April 13, 2018


Hi Friends! We have lots of great Party Pals inspiration for you today! 


To create this card I started by die cutting the Chevron Mat die. It makes the best background! Next I stamped, die cut and colored several images from Party Pals. I paper pieced the balloon with a water colored paper (I have lots of fun scraps from previous projects). The card was finished with twine. 


Supplies:
Chevron Mat Die
Party Pals Dies
Water Colors
Aquamarine Twine

Hello!

It' Yainea here! I hope you're all doing well! 
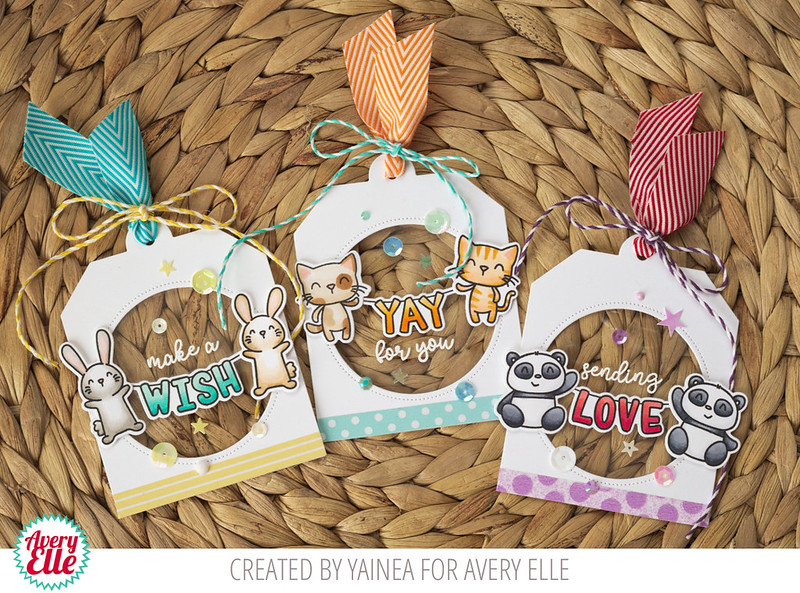
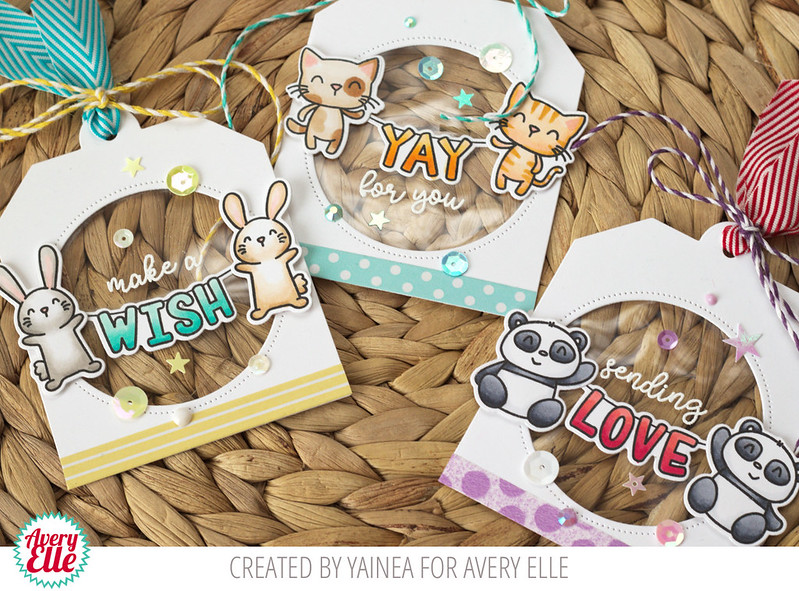
I've been playing with this fun and absolutely adorable set called Party Pals and I decided to make a set of tags to have something ready for any occasion!


I started by creating just one tag but I really enjoyed the process so I decided to create nother two! I started by coloring the critters and banners with my alcohol markers. Are they cute or what?? 

Then I die cut the tags with using the circle die to create a negative space in the center. I adehered a piece of acetate on the back to heat emboss part of the sentiement and hold the sequins.


Finally, I just decorated the tags with the critters and banners, a bunch of sequins some washi tape, ribbon and twine. I love playing with different elements and textures on my projects :)

I hope you feel inspired to get crafty! Thank you so much for stopping by today, have a nice weekend!

Supplies:
Party Pals Week - Day 4

April 12, 2018


Hello everyone!  It's Heather here.
Oh my gosh, Party Pals week is finally here and boy am I excited.  I seriously squeal every time I look at Party Pals.  It's just too cute.  I love all of these critters so much I can't stand it - I can't even pick a favorite critter.  What's your favorite critter in this set?

To my cards, shall we?


For my first card I created a background out of watercolors for my little scene here.  To prevent too much blending of the two colors, I simply put very little water and color where to two colors come together and then dab with a wipe if it gets too crazy.

I also position the banner first when I put these cards together - that helps keep everything centered perfectly. 

Next I used the cats and ink blended a background.


Don't these little scenes look so cute and are so easy to create!  

I'd love to see what you've created with Party Pals - so add your links in the comments and I'll come check them out!
Thanks for stopping by!
Heather

Party Pals Week - Day 3

April 11, 2018


Hello friends,

Katie here with a fun card to share with you today featuring the Party Pals stamp set and coordinating Elle-ments die.  For your convenience, below you can find a list of all the Avery Elle supplies I used on my card.

For my card, I invited ALL the Party Pals to the soirée, so first I stamped all the animals, colored them in with Copic markers and die cut them using the Party Pals Elle-ments dies.  I love all these adorable animals and couldn't decide which ones to use, so they all made the scene.


Next, I prepared the background.  I blended Distress Oxide ink (Tattered Rose, Fossilized Amber) onto a panel of watercolor card stock.  I added some spritzes and spatters and die cut the stars from the Cityscapes Elle-ments set onto the inked background. I also die cut a piece of green cardstock using the Picket Fences Elle-ments die to create the grass. 

Finally, I arranged all the stamped images and adhered them to the card.  I stamped "make a" above the "WISH" balloons to finish out the sentiment. 


That's all for me today, but I hope that you'll think of these Party Pals to help you celebrate your next big occasion!

Thanks for stopping by!
Katie

Party Pals Week - Day 2

April 10, 2018


Hi there!

Elena here with a different take on those cute pandas from Party Pals:


The lines around the eyes are meant to be colored in so that he looks like a panda, but I added some lines using a copic-friendly pen and voila! glasses. After everything was colored, I added glossy accents to those glasses, which is so fun in real life.

Since it was already going a quirky route, I also added a few extra lines to give the bears some sweaters. I know that some of you are experiencing springtime weather, but it just snowed the other day in Montreal. The bears looked cold.


I gave them balloons to hold (from Toucan Party) and set them against a bright yellow background. To make that bright yellow really pop, but also not be super overwhelming, I confined it to the inside of the circle (from the Horizontal Stripes Ellements.) 

I opted to not stamp a greeting, but cut the word celebrate (from Sentimental Ellements) in a fun mint color. 

I hope you like it! Thanks for stopping by!

♥.


site design by designer blogs