You Bake Me So Happy Week - Day 2

January 31, 2023


Hello!
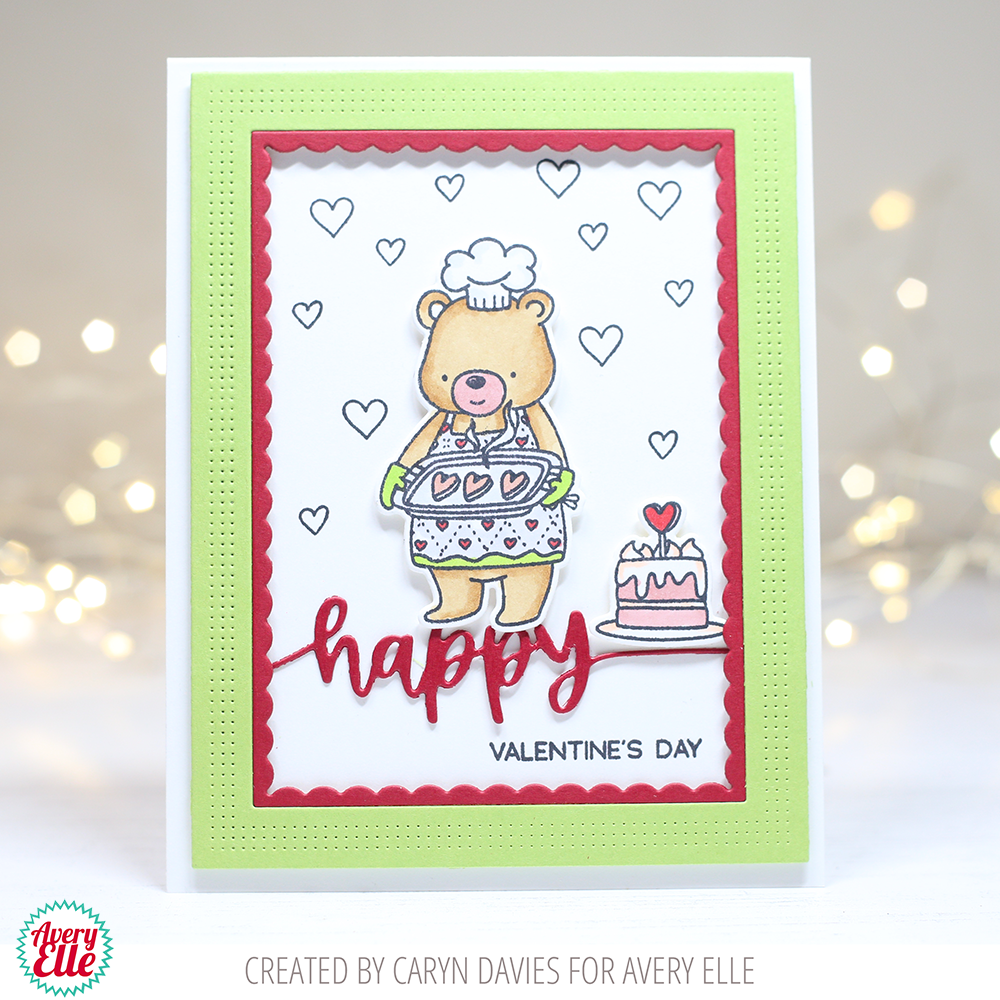
Amy here with a sweet card made with the adorable You Bake Me So Happy.


I started the card with a light ink blended panel using only the ink left on my red blender brush for this soft pink color.  The waving row of hearts was stamped in red ink over the pink blended area.  This panel was layered behind a white panel that was die cut using a standard circle.  The sweet images, the fox and bear, were Copic colored and added to the panel with foam adhesive.  The sentiments were white heat embossed onto black cardstock strips.  This panel was adhered to a notecard layered with red cardstock that was die cut using the Easy Layers 1 Elle-ments.


You Bake Me So Happy Week - Day 1


Hey there, Caryn here with a card I created using the You Bake Me So Happy stamp set.  I love this little cake image and decided to go super clean and simple and just use this one little stamp.  It's been a while since I went with this style and I LOVE it!


I stamped the cake 3 times and did some simple Copic colouring.  I die cut it then adhered the images with foam tape onto a panel cut with Pierced Rectangles.


I mounted it onto an A2 card base with foam tape and then stamped the greeting below.  To finish and add a little more dimension I added some glossy accents.


Supplies:


So Tweet Week - Day 5

January 27, 2023


Hi Everyone! So Tweet is the BEST mini set! I couldn't make just one card so I made a card PLUS a fun tag!


I customized these cuties with sweaters! Eep! After I stamped the images, I drew lines with an Ultra Fine Tip Sharpie, then stamped the hearts with stamps from the set. The sentiments included in the set are perfect for speech bubbles (you'll find many bubble dies in past Avery Elle sets). I couldn't stop there so...


I made a tag! I altered the stamped image again so I could add more colors the the bird. Then I added a die cut rainbow and a sweet sentiment from Banner Celebrations! 

I can't wait to see how you customize these amazing bird friends!

Supplies:
Peek a Boo Pets Dies (Speech Bubbles)
Rainbows Die (Cloud)

Easy Layers 1 (Banner)

So Tweet Week - Day 4

January 26, 2023


Hey there!
It's Heather here. I'm back with a card using the new So Tweet. 

One of my favorite techniques when I'm coloring an image is to add depth by adding different sizes of dots with a darker color. I think it's so fun and super easy but gives it such a different feel! It's just happy, right?

I simply popped this little duo onto some dimensional foam and added a sentiment on some heat embossed cardstock to ground the pair. So fun on a simple background, right? 

Thanks for stopping by! 
Have a great one!

Heather 

So Tweet Week - Day 3

January 25, 2023


Hi there! 

Elena here, with a card featuring the hilarious birds from So Tweet:


I stamped 2 of the googly-eyed birds, and added flowers from an older set called Sending Flowers. To ground the images, I added a banner from Banner Celebrations and stamped a greeting from So Tweet inside.

The birds pop against a purple background, and are framed out in a cream Oval Burst die-cut.

I hope you like it! Thanks for stopping by!

So Tweet Week - Day 2

January 24, 2023


Hello!
Amy stopping in today with a "tweet" card!  


So Tweet is a mini set that has so many possibilities!  After some quick Copic coloring, these cute birds were die cut using the coordinating So Tweet Elle-ments.  The XOXO Elle-ments (retired) works well if you have this in your stash as little "peek-a-boo" places for the birds to stick out of!  Look through your collection and see what large word dies would work for this technique!  I chose a few colors of cardstock that were a bit non-traditional when it comes to Valentine's Day.  I added a supporting sentiment from Love Tags which was white heat embossed onto black cardstock.  To bring some sparkle to this, I added a few white gems.


Supplies:
So Tweet
So Tweet Elle-ments
Love Tags
Easy Layers 1 Elle-ments


So Tweet Week - Day 1

January 23, 2023


Hello! I am popping in today to share these fun cards and tag with you.  I just love this cute mini bird set.  It is too cute!


Thanks for stopping by to take a peek. Have a great day!

Sentimental Occasions Week - Day 5

January 20, 2023


Hi Everyone! I love a set that goes with everything! Sentimental Occasions stamps and dies are just that set!


I combined many current and past sets to create this card. Its fun to look through your stash, give it a try! To create this card I used Sentimental Occasions dies, Banner Celebrations, Banner Bits, Speech Bubbles, Tickled Pink, and two background dies. 

I can't wait to see how you combine many of favorite Avery Elle products!


Supplies:

Sentimental Occasions Dies

Banner Celebrations Stamps

Banner Celebartions Dies

Speech Bubbles Stamps

Speech Bubbles Dies

Tickled Pink Stamps 

Tickled Pink Dies

Banner Bits Stamps

Banner Bits Dies

Sentimental Occasions Week - Day 4

January 19, 2023


Hello! It's Heather today and I've got a card using the new Sentimental Occasions

For my card, I first stamped the big happy sentiment across my card. Then, I added a critter from Banner Celebrations and used a little masking to keep it above the line. 


I added stamped accents and completed the sentiment. Finally I added a pierced edge to it and then mounted it onto some patterned paper! 

Thanks so much for stopping by!
Have a great one. 


Sentimental Occasions Week - Day 3

January 18, 2023


Hi there!

Elena here, with a card featuring Sentimental Occasions:


I love how the long, scripty happy greeting acts to ground the images! I stamped that greeting, and starting at the top of the card, inked a blue sky. The blue fades as you get closer to the bottom. Into the blank space I added images from Forest Dance Party - this set will always be a favorite for me. I love using it for birthday cards!

I scattered musical notes to fill the sky, and added the rest of the happy birthday greeting to the bottom of the card.

I hope you like it! Thanks for stopping by!

Sentimental Occasions Week - Day 2

January 17, 2023


Hello! I am popping in today to share these fun cards and tag that I created.  I love how they turned out.

For this first tag I cut off the tails of the merry die cut and paired it with the Christmas stamp in our new Sentimental Occasions set.  This is a great way to get even more looks out of this set.


Thanks for stopping by to take a peek. Have a great day!

Sentimental Occasions Week - Day 1

January 16, 2023


Hi there, Caryn here sharing a card featuring the Sentimental Occasions stamps and dies.  I've paired them with the You Bake Me So Happy stamps for a cute Valentine's card


I used the Pierced Birthday Frame dies to create a die cut border from green and red card then cut the Happy sentiments and placed it behind the frame before adhering everything to a white card base.


I stamped the images from You Bake Me So Happy and coloured them with Copics and added some stamped hearts on the background.

Supplies:


Banner Celebrations - Day 5

January 13, 2023


Hello there!

It's Yainea here today featuring the Banner Celebrations stamps and dies. I think this is my fav set from the latest release and I had so much creating this card :)

First I added a pair of layers of watered ink to a piece of watercolor paper and then splashed some gold ink. Then I stamped and die cut the cute bear and rabbit and colored them with alcohol markers.

I adhered the Happy Birthday die cut with the banner and colored the border with a black marker to create like a big sentiment banner... or that was the idea, haha

To add a little festive touch I added some golden thread and sequins. I hope you like the final result!

Thank you so much for stopping by, have a nice day!

Supply list:


---

Hi! Ashley here today sharing Banner Celebrations.


To create this card I stamped and die cut the bunny along with the hat and cupcake. Next, I heat embossed the banners with sentiments. I LOVE these banners in black! Then, I used Copics to color the stamped images. I created the background with a few of the small stamps in the set. This is definitely a favorite technique of mine.


Thanks for stopping by!

Supplies:

Banner Celebrations - Day 4

January 12, 2023


Hi there!

Elena here with a fun card featuring Banner Celebrations:


For this card, I cut strips of red and white cardstock and adhered them to a card-sized base layer. I then die-cut a white frame (from the Pierced Ray Frame die set). Into the middle, I stamped the bear from Banner Celebrations (he's too hilarious!) and gave him a cupcake to hold. I flanked him top and bottom with the banner image, so that I could have a 2-part sentiment. It lends balance and symmetry to the card.

I hope you like it! Thanks for stopping by!

Banner Celebrations - Day 3

January 11, 2023


Hi all! It's Deasy here. Today I want to share my card for Avery Elle featuring Banner Celebrations. This stamp set is so adorable and cute! I have so much fun playing with it!

Avery Elle supply that I'm using : 

Banner Celebrations Stamp Set for the images and sentiment

Banner Celebrations Elle-ments to die cut the images

The Holiday Collection Paper Pad for the patterned paper


I stamp, color the images using copic then die cut it. For the embellishment, I add some clear sequins.


Thank you so much for stopping by and happy crafting!


Hugs,


Melania Deasy

Banner Celebrations - Day 2

January 10, 2023


Hello!
Amy here kicking off the new year with a fun card using Banner Celebrations!


I love this sentiment font and choice in this set!  Coloring these donuts was a breeze with some bright pink Copics and I love how they pop off the black background!  The bear and banners were added with foam adhesive.  I assembled the card using Easy Layers 1 Elle-ments for that stitching detail.  


Banner Celebrations - Day 1

January 9, 2023


Hi there, Caryn here with a cute celebration card featuring the Banner Celebrations stamps and dies.

I started with a white card base then created a frame from red cardstock using the Pierced Birthday frame Dies. I put a piece of patterned paper behind the frame and adhered it to the card front.


I stamped the images and coloured them with copics then added them to the card front.with a few added stars for interest.
Supplies:


site design by designer blogs