More Critter Circle Tags Week

December 23, 2021


Hey everyone! Heather here.

Today, I've got a fun tag project using the new More Critter Circle Tags stamp set. 

To start my tags, I stamped and die cut the animal circles. Then, I die cut the scalloped tag layer from kraft. Finally I decided to add a tag behind them and adhered it all together with dimensional adhesive. 


I repeated all of the layers on the backside and added the happy birthday sentiment. 

Super fun, right? 

Thanks for stopping by today!


More Critter Circle Tags Week

December 22, 2021


Hello!  Amy here today sharing some LOVE for the upcoming Valentine season!  The More Critter Circle Tags are adorable and perfect for the occasion and more!


I created a focal point for my cute hippo by using the Holidays Circle Tag Elle-ments.  This panel was added to a top folding notecard with foam adhesive.  The circle area was a perfect place for my hippo!  For the bold sentiment, Love You Elle-ments was done in red cardstock and added with dimension.  A small Strawberry Hemp Twine bow was tied to the Love sentiment and a few red pearls for some shine to finish this card!


Supplies:

More Critter Circle Tags Week

December 21, 2021


Hello!

It's Yainea here today featuring the new set of the Circle Tags series, More Critter Circle Tags stamps. How cute are these jungle animals?!
They're perfect for making fun and colorful birthday cards but sweet Valentine's cards too :)


So my card combines a bit of watercolor, alcohol markers to color the images and some enamel dots here and there. I love those happy colors to celebrate such a happy occassion!


Now it's your turn to go and play with your crafty supplies! Thank you so much for stopping by, have a wonderful day!

Supply list:


More Critter Circle Tags Week

December 20, 2021


Hi all! It's Deasy here. Today I want to share my card for Avery Elle featuring More Critter Circle Tags Clear Stamps. I make a card using this stamp set and turn out the critters look so cute in frames!


Avery Elle supply that I'm using : 

More Critter Circle Tags Clear Stamps for the images and sentiment

The Holiday Collection Paper Pad for the patterned paper


I stamp, color the images using copic then cut with scissors. The sentiment is from silver embossing powder. To color the background, I'm using dye ink pad with blending tool on colorful card stock

 
Thank you so much for stopping by and happy crafting!


Hugs,


Melania Deasy


Thanks for stopping by to take a peek. Have a great day!

More Critter Circle Tag Week

December 17, 2021


Hi Everyone! Today I'm sharing More Critter Circle Tags. These images are some of my all time favorite animals in the Avery Elle collection!


I started by coloring ALL of the circles! I could have easily used them all on one card but I decided to highlight just one (and save the rest for more quick and easy cards)!

I layered the toucan over the Love You die and hand cut fringe. The heart was popped out of the die cut and adds the perfect sparkly embellishment. 


Thanks for stopping by!


Supplies:

More Critter Circle Tags

Love You Die

More Critter Circle Tags Week

December 16, 2021


Hello! I hope that everyone is having a great week!  I wanted to pop in to share these cute tags that I created using our new More Critter Circle Tags stamp set.  I think these are so cute and would look great tied to Valentine's, Birthday or even baby gifts!  They were so fun and easy to make!


Thanks for stopping by to take a peek. Have a great day!

More Critter Circle Tags Week

December 15, 2021


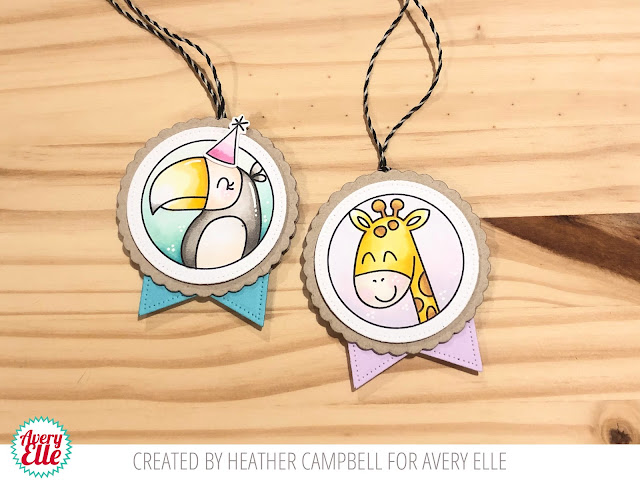
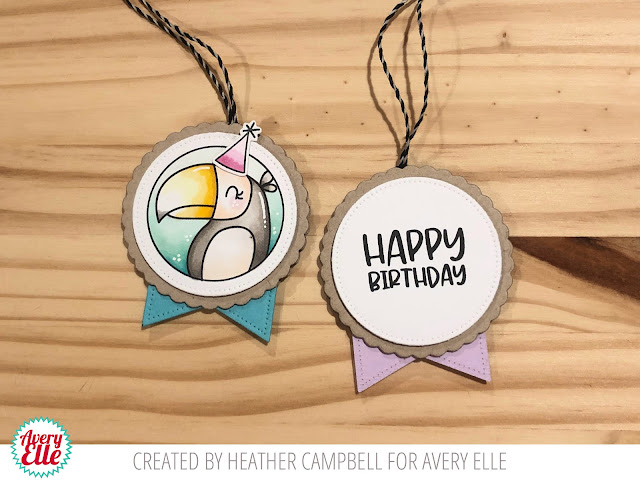
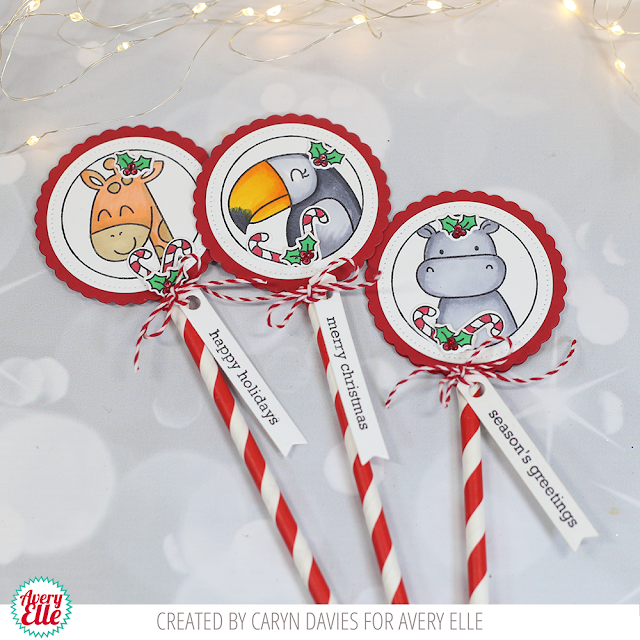
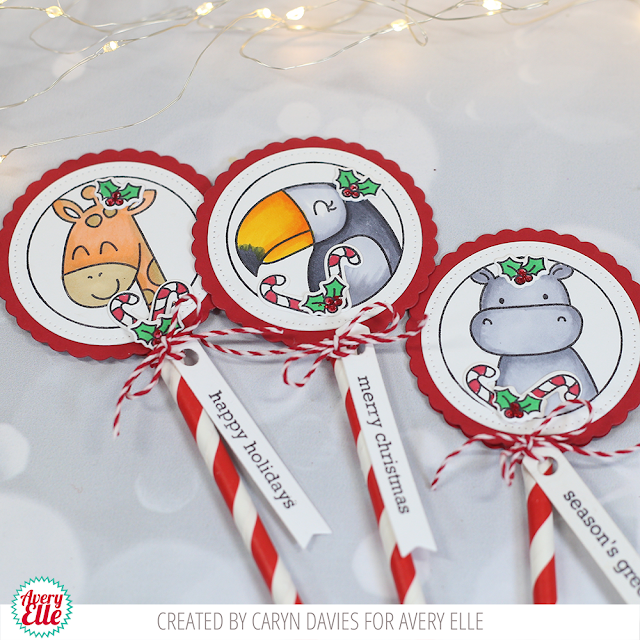
Hi there, it’s Caryn here sharing a fun way to use our More Critter Circle Tags in a different way.  I saw someone on Pinterest who had used our Christmas tags in a similar way but I can’t find the post now so if you’re reading this and this was you, thanks for the inspiration!!


I’m in full Christmas mode right now making lots of last minute bits and pieces for the big day.  So when I sat down to create with the new More Critter Circle Tags from the Winter release I just couldn’t get my mojo on!  So I thought, why not make them Christmassey?  So with a dig through my festive sets I found a wee holly sprig and a candy cane and dressed the critters for the holiday season.


I die cut 6 of the scalloped circles using the co-ordinating dies from the Critter Circle Tags set (2 for each design).  I then stamped and die cut 3 of the circle critter stamps and coloured them using Copics.  I also stamped, coloured and die cut some candy canes from the Santa Jaws set and the holly image from the Peek-a-Boo Train stamp set.


To assemble the project I took some paper straws and flattened one end.  Then I sandwiched this between two red scalloped circle die cuts and adhered the stamped critter circle image to the front.  I added the holly and candy canes and finished off with a tag from the Party Tags die set stamped with greetings from the Seasonal Simple Sentiments set.  I think these would look great as an embellishment on the front of a gift or as table décor for a Christmas party! 


Supplies:


More Critter Circle Tags

Critter Circle Tags Elle-ments

Santa Jaws Clear Stamps

Santa Jaws Elle-ments

Peek-a-Boo Train Clear Stamps

Peek-a-Boo Train Elle-ments

Seasonal Simple Sentiments Clear Stamps

Party Tags Elle-ments


More Critter Circle Tags Week

December 13, 2021


Hi there!

Elena here, with a fun card featuring More Critter Circle Tags:


I went straight for the giraffe! Isn't he so sweet? Once he was stamped and colored, I used the Holiday Circle Tags die set to create the scalloped circle moment around him, and gave him balloons and a party hat. The party hat is from the RAWR stamp set, and I'm so sorry but the balloons are from a retired set.

In lieu of a stamped sentiment, I opted for the Hooray die, and used the wide tip of a copic marker to give it a blue color-blocked look. I set all of the images onto a piece of patterned paper from the Spring Collection pack. 

I hope you like it! Thanks for stopping by!

Supplies Used:


Cherry On Top Week

December 10, 2021


Hey everyone! It's Heather here. 

Today, I've got a fun Cherry On Top card for you! 

For my card, I stamped and masked the cherries. Then, I stamped some simple background dots to create a background and then added a heat embossed sentiment on top of the colored in cherries. Super fun, right?
Thanks for stopping by! Hope you have a great day!
XO, Heather 


Cherry On Top Week

December 8, 2021


Hi everyone!  

Amy here with a fun play on a birthday card using Cherry on Top.


With such a large image, I thought it would be fun to pull out the pattern papers from the Holiday Collection Paper Pad to do the PAPER PIECING technique.  After deciding what patterns I wanted to use, the images were stamped and hand trimmed out.  A full image was stamped and the stem colored with matching Copics.  The trimmed images were "pieced" back together and some with dimension.  The cherry image was layered onto a pattern panel that was die cut using the stitched rectangle from Easy Layers 1 Elle-ments.  The sentiments were stamped with bold black ink onto the striped panel with the word "sweet" stamped and hand trimmed out.  To finish this off, a few silver pearls were added.

Supplies:


Cherry On Top Week

December 7, 2021


Hello there! 

I hope you're having a great week so far! It's Yainea here to showcase the new Cherry on Top stamp set and coordinating dies.

As soon as I saw this cherry stamp, I knew it'd make a great tag for a birthday present! 

I used a pair of Avery Elle patterned papers, stamped the cherries and then cut them out with a pair of scissors. Than I adhered them to a cherry die cut of white cardstock to create more contrast. Finally, I stamped the sentiment on a stripe of carstock using red and black ink.

I hope you like the idea and help thinking of using your stamps in new ways ;) 

Thank you so much for stoping by, have a nice day!!

Supply list:


Cherry On Top Week

December 6, 2021


Hi all! It's Deasy here. Today I want to share my card for Avery Elle featuring Cherry On Top.This stamp set is fun and so easy to make!


Avery Elle supply that I'm using : 

Cherry On Top Clear Stamps for the images and sentiment

Cherry On Top Elle-ments to die cut the images

The Holiday Collection Paper Pad for the patterned paper

Easy Layers 1 Elle-ments to die cut the frame


First I die cut the image without coloring it. I stamp again then color the images using dye ink pad with blending tool, after that I cut it with scissors and glue it to my colorless image. The sentiment is from white embossing powder. For the embellishment, I add some clear droplets and clear sequins.


Thank you so much for stopping by and happy crafting!


Hugs,


Melania Deasy


Cherry On Top Week - Day 4

December 3, 2021


Hi Everyone! Today I'm sharing a card using the fun stamp and die set Cherry on Top!


There are so many fun ways to fill in these cherries. I chose to stamp, die cut and use Distress Inks to fill them in. I masked the image and blended several inks together to get the perfect cherry color!


Next, I die cut a pink shadow for the cherries, placed it on a dotted background and then stamped the sentiment. 

Thanks for stopping by!

Supplies

Cherry on Top Stamps

Cherry on Top Dies


Cherry On Top Week - Day 3

December 2, 2021


Hello! I am popping in today to share this sweet card with you.  I just love shaped cards and this one is the perfect size!  I hope you like it!!


Thanks for stopping by to take a peek. Have a great day!

Cherry On Top Week - Day 2

December 1, 2021


Hi friends, 

Katie here with a video to share with you today featuring a card I made featuring the Cherry On Top stamp set and coordinating Elle-ments die. 

I am crazy about this set because it's so easy to put together cards that pack a visual punch in a simple way. I also appreciate that the set has sentiments for so many occasions. 


I hope you will take a peek at my video to see how my card came together. 


Supplies:
Cherry On Top clear stamps
Die: Cherry On Top Elle-ments
The Holiday Collection Paper Pad

Thanks for stopping by!

Katie

Cherry On Top Week - Day 1

November 29, 2021


Hi there!

Elena here, with a fun card featuring Cherry On Top:


I had no idea I would love this set so much. You know the kind, you see the artwork and it's cute enough. But seriously - don't those cherries look so juicy and lush once they're colored in? I love them. I upped the cute factor by drawing faces onto each one. Then, I used a light, warm grey marker (copic W1) to add shading beneath the cherries. I finished off the card by adding the sentiment, which was made more special by inking the word cherry in a bright red to match the fruit.

I hope you like it! Thanks for stopping by!


Black Friday Sale

Forest Dance Party Week - Day 6

November 20, 2021


Ashley here sharing the same sweet stamp set! I love how these animals come together so easily to make a fun scene!

I stamped, die cut and colored the bunny and bear. Then I stamped lots of the fun extras to add details to the cards. All the stamps you see are from the set except for the clouds (those are from Peek a Boo Flight).

I can't wait to see what you create!

Forest Dance Party Week - Day 5

November 19, 2021


Hi there! 

Elena here, with a card featuring Forest Dance Party:


I haven't done this much masking in so long! I really wanted the card to look like something out of a storybook, and in my mind, it had to be a 1-layer panel. I created masks for all of the critters out of post-it notes and then just colored the critters and the background using copic markers. It was so enjoyable! I really do find coloring so relaxing. Once that was done, all I did was to mount my colored panel onto a card-base. I hope you find it as charming as I do!

Thanks for stopping by!
----


Forest Dance Party Week - Day 4

November 18, 2021


Hello everyone! Heather here. 

Today, I've got a card to share using the new Forest Dance Party. These little critters are so cute! You can just imagine the music they're making! 

To start my card, I first stamped and die cut all of the images. From there I colored them all in and got them ready to put on a card. 

Then I ink blended a background and added the die cut Leafy Frames Die to the front of it all. Finally I secured it all and added gel pen accents. 
Thanks for stopping by!
Heather 

Forest Dance Party - Day 3

November 17, 2021


Forest Dance Party2

Hello, Amy here today!  
What did you think of the newest Avery Elle release?  It's SO good!


This week I am sharing a mini slim card using Forest Dance Party!  I couldn't make a card without using most of these adorable critters!!!  The grass and sky were ink blended with Distress Inks.  The grass was die cut twice using a die from the Slimline Borders Elle-ments.  The sentiment was selectively stamped to create this unique one!  All the critters were added with foam adhesive onto the scene.    

Forest Dance Party

Supplies:


♥Amy

Forest Dance Party Week - Day 2

November 16, 2021


Hello friends, 

Katie here with a card to share featuring the Forest Dance Party stamp set. 


I stamped the images, colored them with Copic markers and die-cut the stamped images using the coordinating Elle-ments dies. Next I blended a panel of watercolor card stock with Distress Oxide ink in Tumbled Glass and Twisted Citron. 


I die cut the blended panel using large stitched rectangle from the Easy Layers 1 Elle-ments dies.  I spattered the sky with white ink and stamped the sentiment onto the grass with Versafine black ink. 

I arranged the stamped images onto the panel and adhered them to the panel. I stamped the music notes and glued a few of the small hearts. Finally I attached the completed panel to an A2 notecard. 

Supplies:

Thanks for stopping by! 

Katie

Forest Dance Party Week - Day 1

November 15, 2021


Hi there! Caryn here today sharing a card using the cute-as-can-be Forest Dance Party stamp set from the brand new Winter release!  Elena always smashes it out of the park with her critter designs and I just love how they all co-ordinate and compliment each other as you can see in this card!


To create a scene for my musical critters I pulled out a previously released Woodland Scene Builder stamp set and co-ordinating dies.  I stamped and coloured the scene stamp using black dye ink and Copic markers.  Next I stamped, coloured and die cut the rabbit and bear from the Forest Dance Party set along with the little bird playing his trusty tiangle!


I wanted the card to have a more natural, earthy feel so to give the feeling of warmth I used a blending brush and some mid-brown coloured ink and went around all the images.  It adds an almost antiquey or aged feel and takes away the stark white outline from around the die cuts.


I cut a couple of strips using the "slope" die from the Slimline Borders die collection and blended the same brown ink along the edges before adhering all my elements to the card using liquid adhesive and foam tape.  
I finished off the card by stamping the sentiment and some musical notes in brown ink.

Supplies used:


site design by designer blogs