You Did It Week

January 31, 2022


Hi all! It's Deasy here. Today I want to share my card for Avery Elle featuring You Did It. For my card today, I combine it with another stamp set to make a fun Birthday card!


Avery Elle supply that I'm using : 

You Did It Clear Stamps for the images and sentiment

You Did It Elle-ments to die cut the images

Monster Love Clear Stamps for the monster images

Monster Love Elle-ments to die cut the monster images

The Spring Collection Paper Pad for the patterned paper


I stamp, color the images using copic then die cut it. The sentiment is from white embossing powder. To color the background, I splash watercolor with a brush on patterned paper. I color the flag using dye ink pad with blending tool.

 
Thank you so much for stopping by and happy crafting!


Hugs,


Melania Deasy

You Did It Week

January 28, 2022


Hey crafty friends! Today I'm creating a card using You Did It and lots of other fun stamps!

I love mixing new and old Avery Elle stamp sets. 


I looked through my favorite Peek a Boo sets and found a fun collection of zoo animals. Check out the supply list below to see what sets I pulled from. You can make this card with any Peek a Boo stamps so look to see what is in your stash!

Next I arranged the animals to hold the flags and put them on a scene of stamped confetti and the Leafy Frames die. 

I hope this card inspires you to mix up your stamp and die sets to create something new! 


Supplies:
Peek a Boo Pals Dies
Peek a Boo Jungle Dies
Peek a Boo Summer Stamps (Flamingo)
Peek a Boo Summer Dies


You Did It Week

January 27, 2022


I  am popping in today to share this fun You Did It card with you.  I love how it turned out!  It will be perfect as a graduation card later this year.

Thanks for stopping by to take a peek. Have a great day!

You Did It Week

January 26, 2022


Hello! Before we get to Katie's card today I wanted to thank her for all that she has done for me and Avery Elle over the last many years.   Not only has Katie created amazing cards for us but she has traveled to Creativation with me where we stayed up late chatting and laughing many nights.  She is just the best.  Sadly this is Katie's last post for us but I know that she is going to continue to inspire us all through her blog, http://katiegehring.blogspot.com/ and all her future endeavors .  Let's check out Katie's card for us today.  

x-Jamie

------

Hello friends, 

Katie here with a card featuring the You Did It stamps. This is such a great festive set. It works for so many celebrations- birthdays, graduations and other accomplishments.

For my card, I decided to play around with a little heat embossing and ink blending. I stamped the pennants with Veramark ink and heat embossed the images using gold embossing powder. 


Next I added some color to the images using Distress Oxide inks. I created an inky background on an A2 card base and added the Oval Bust Frame. I tucked in the pennants and adhered everything to the card with foam tape. 


As a finishing touch, I added a few clear sequins. 

Supplies: 
You Did It Clear Stamps
Dies: You Did It Elle-ments
Dies: Oval Burst Elle-ments

I hope this card added a festive smile to your day. Thanks for stopping by! 

Katie


You Did It Week

January 24, 2022


Hi there,

Elena here, with a fun card featuring You Did It:


The giant flags are so fun! I used them to create a little scene where the fox from Forest Dance Party is riding the wagon around town, trumpeting the good news!

I colored all of the elements using copic markers, and used foam tape to elevate some of the images.

I hope you like it! Thanks for stopping by!

Supplies Used:


Monster Love Week

January 20, 2022


Hi there!  Caryn here today sharing a cute Valentines card using the adorable Monster Love stamp set and dies.  I think that slug could be one of the cutest stamps I've ever seen!


This colour combo (which happens to be similar to the Avery Elle colours) is my favourite of all time.  I use it a LOT!  I took two papers from the Holiday Paper Pad (not just for the holidays) and made a frame using two dies from the Double Pierced Rectangles Die set.  I added a decorative border to the bottom of the blue striped panel using one of the dies from the Slimline Borders die set and set the red polka dot paper behind it before popping it up using foam tape.


I stamped, coloured and die cut the slug from Monster Love and added google eyes (gotta love google eyes).  I added some glossy accents to his dots on his belly for a bit more dimension too.

To finish I stamped the heart balloon from Dragon Love and cut it out then added some resin hearts and the sentiment (also from Dragon Love).

Supplies:

Monster Love Clear Stamps

Monster Love Elle-ments

Dragon Love Clear Stamps

Slimline Border Elle-ments

Double-Pierced Rectangles

Holiday Paper Pad


Monster Love Week

January 19, 2022


Hello!  Amy here with a fun technique for all those critter images using a background die!


The background was created using the Waves Elle-ments once as a stencil using soft ink blending and once as an actual die cut.  TIP:  Using this die as a stencil is a bit tricky but if you go easy (or use Pixie Spray) a fabulous ink blended background can be made!  


The monsters from Monster Love were Copic colored and die cut as well as some supporting images from the set.  The white Waves die cut was adhered over the ink blended background.  The little openings in the Waves die cut are the perfect spot to "tuck" the critters out of!  A few of the images were adhered with foam adhesive and the rest were adhered to make the scene come alive!


Supplies:


Monster Love Week

January 17, 2022


Hi all! It's Deasy here.Today I want to share my card for Avery Elle featuring Monster Love. I love this stamp set because it's fun, super cute and versatile for any themes!


Avery Elle supply that I'm using : 

Monster Love Clear Stamp for the images and sentiment

Monster Love Elle-ments to die cut the images

Slimline Borders Elle-ments to die cut the borders


I stamp, color the images using copic then die cut it. The sentiment is from white embossing powder. To color the background, I'm using dye ink pad with blending tool then splash watercolor with a brush.


Thank you so much for stopping by and happy crafting!


Hugs,


Melania Deasy

Monster Love Week

January 14, 2022


Hi Everyone! 

Today I'm sharing the super fun Monster Love stamp set!


I love incorporating stamped images with die cut words. On this card I combined Monster Love with the Hooray die. This sweet monster is surrounded by a balloon and heart from the stamp set. The finishing step was adding the "birthday wishes" stamp to complete the sentiment.


Thanks for stopping by!

Supplies:

Monster Love Stamps

Monster Love Dies

Hooray Die

Monster Love Week

January 13, 2022


I created this cute card using our new Monster Love stamp and die set.  I love that this set can be used for Valentine's or all year round!  

Thanks for stopping by to take a peek. Have a great day!

Monster Love Week

January 12, 2022


Hello friends, 

Katie here with a simple card to share featuring the Monster Love stamp set. This set is so versatile and the monsters images are perfect for kids (and adults) of all ages!

I really wanted the trio of monster pals to take center stage, so I stamped the images with black ink and colored the stamped images with Copic markers. 


I die cut the stamped images using the coordinating Monster Love Elle-ments dies. I adhered the images to a panel of watercolor card stock blended with a quick circular swipe of Salvaged Patina Distress Oxide ink and cut with the large stitched rectangle die from the Easy Layers 1 Elle-ments die set. 


I adhered the images to the panel and stamped the sentiment with black ink. As a finishing touch, I added a few clear pieces of confetti and attached the panel to an A-2 card base. 

Supplies:

Thanks for stopping by!
Katie


Monster Love Week

January 10, 2022


Hi there! 

Elena here, with a fun card featuring Monster Love:


Isn't he so cute? I'm definitely saving this one for my little nephew's next birthday! I started out by stamping and coloring my favorite monster, with his 3 googly eyes. Then, I gave him a balloon and a cake to hold. I love the extra paw that you can stamp and place on top so it really looks like he's holding onto that cake! The cake is from the Frenchie stamp set!

To color the monster, I used a new-to-me copic grouping: B01, B93, B95 and B97. For the horns, I did a deeper blue blend using B34, B37 and B39.

To frame out my monster, I used the Oval Burst die. It's my go-to for a quick but eye-catching card design! I backed the oval opening with a black paper so that the monster could really pop! To finish off, I stamped the 2-part sentiment, added them to die-cut banners, and placed them on the card.

I hope you like it! Thanks for stopping by!

Supplies Used:


Dragon Love Week - Day 4

January 7, 2022


Hey everyone! Heather here. 

For Valentine's Day, I love to drop little treats off with the neighbors. So, tags are something I use a lot of! I decided to use Dragon Love  to create some adorable tags. 

To create my tags, I stamped the images from Dragon Love and then masked them so I could ink blend a background. Then, I colored the images in and added ink splatter and a sentiment. 


Then, to turn them into tags, I used the Easy Layers Tags die to create the perfect tags. :)

That's it for me today! Thanks so much for stopping by!


Dragon Love Week - Day 3

January 6, 2022


Hey there Avery Elle fans and a Happy New Year to you all.  Caryn here today sharing a card using the adorable Dragon Love stamp set from the Winter 2021 release.  This is the cutest little critter and I when I saw this teeny stamp set, I thought he would look cute stamped as a group!  I used a masking technique to create this (what is the collective noun for dragons?  A flame of dragons? ) "cluster" by stamping repeatedly onto a piece of watercolour cardstock.  


Once my group was stamped I die cut to create a panel using the Double Pierced Rectangle Dies. I coloured each area using Karin Pro Brush pens. - letting each area dry before working on the adjacent image.  It was made slightly more difficult thanks to my assistant!!!


I created a border along the bottom using the cloud border from the Slimline Border Dies and gave it a touch of sparkle using glitter and a shimmer pen.  I stamped Monster from the Monster Love stamp set and Hugs from the same set then finished with a flick of shimmer over the top.


Supplies:

Dragon Love Clear Stamps

Monster Love Clear Stamps

Slimline Border Elle-ments

Double Pierced Rectangle Elle-ments

Dragon Love Week - Day 2

January 5, 2022


Hello friends, 

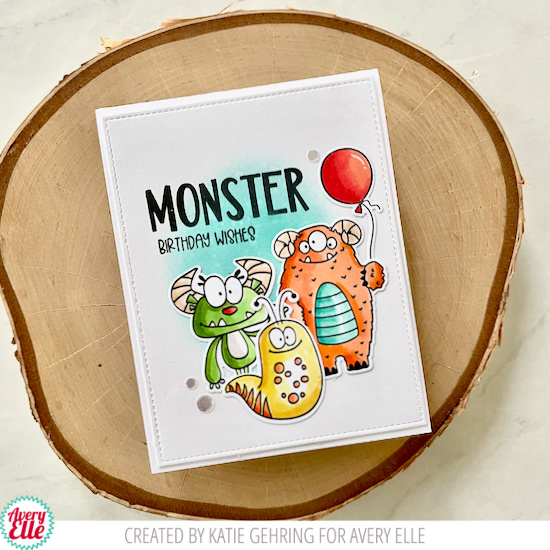
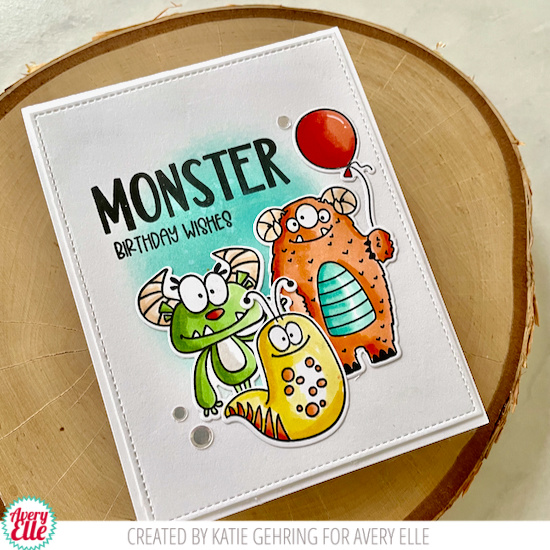
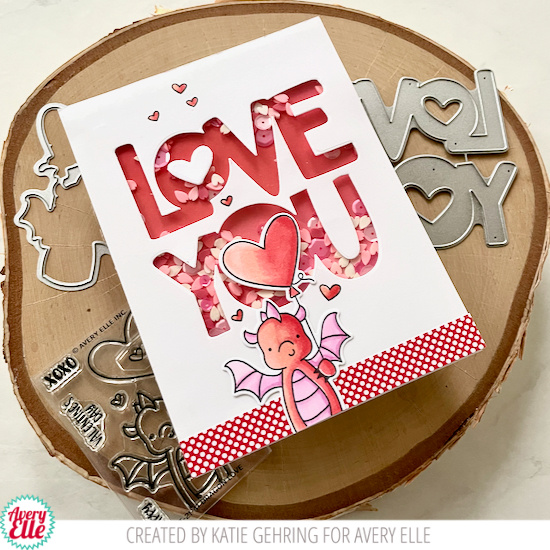
Katie here with a card to share using the Dragon Love stamp set and the Love You Elle-ments die. 

I adore a shaker card, and I thought the size of the Love You die would make for a great shaker window. 


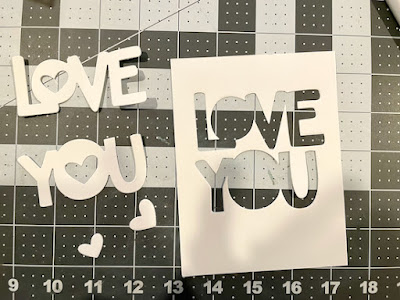
First I die cut Love You from a panel of white card stock. I positioned the die so that the Dragon's balloon would be the center of the "O" in "YOU." 


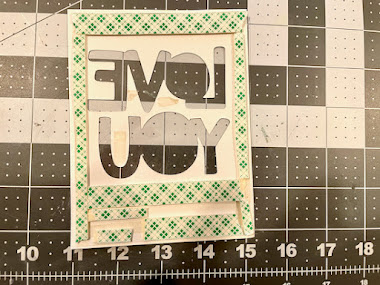
Next I adhered clear acetate to the back of the die cut panel and build a foam border around the die cut. 


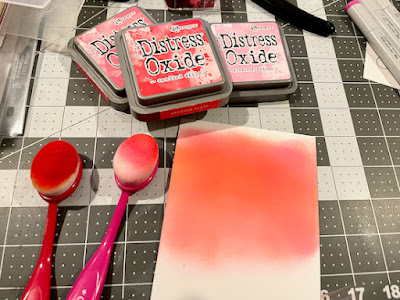
I thought a piece of white card stock backing the shaker window would be too plain, so I grabbed a few pads of Distress Oxides and quickly blended a panel. 


I added some clay sprinkles and sequins to the shaker pocket and sealed it with the blended panel. 


With the shaker window complete, I turned the card over and added a strip of red and white polka dot paper along with the stamped images. 

Supplies:

Thanks for stopping by! 
Katie


*************************************

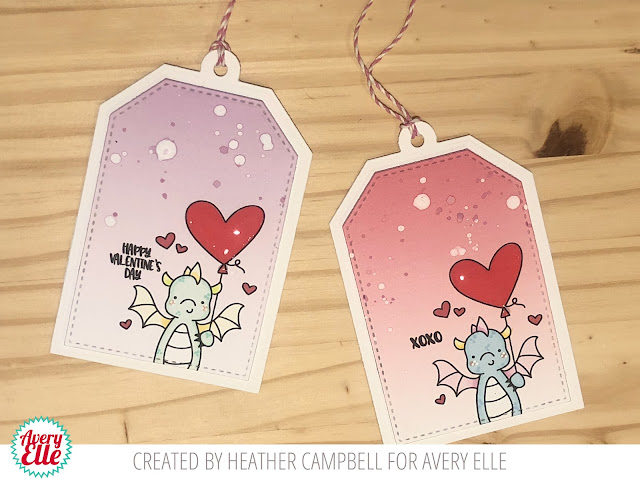
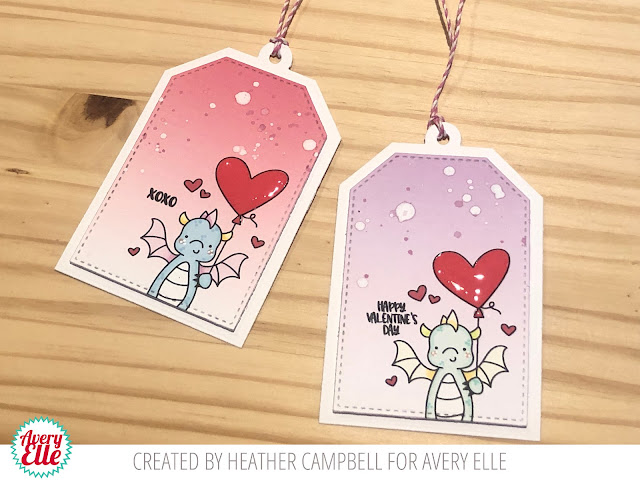
Hello!  Amy here with a non-traditional card size.  Sometimes it's just easy to make an A2 card but it is fun to change things up too! 


I've created a 4 bar sized card which measures 3 1/2 x 4 7/8.  This was the perfect size for the adorable mini stamp set Dragon Love.  The XOXO Elle-ments was ideal for this card size and the Copic colored dragon fit perfectly in the "O" of the XOXO!  Grass and clouds were added using the Slimline Borders Elle-ments to a lightly ink blended pink sky.  For a little dimension, the balloon was lifted using foam adhesive.  To add a little sparkle, a few tiny gems were sprinkled with the die cut hearts.


Supplies:

--Amy ♥♥


Dragon Love Week

January 3, 2022


Hi all! It's Deasy here. Today I want to share my card for Avery Elle featuring Dragon Love. This stamp set is so cute and perfect for Valentine's Day. For my card today, I combine it with Love You dies to make a lovely shaker card.


Avery Elle supply that I'm using : 

Dragon Love Clear Stamps for the images

Dragon Love Elle-ments to die cut the images

Love You Elle-ments to die cut the sentiment

The Spring Collection Paper Pad for the patterned paper


I stamp, color the images using copic then die cut it. I splash watercolor with a brush on the patterned paper.

 
Thank you so much for stopping by and happy crafting!


Hugs,


Melania Deasy

 
site design by designer blogs