Pages

November 30, 2020

A Cute Winter Friends Card By Yainea


Hello friends!

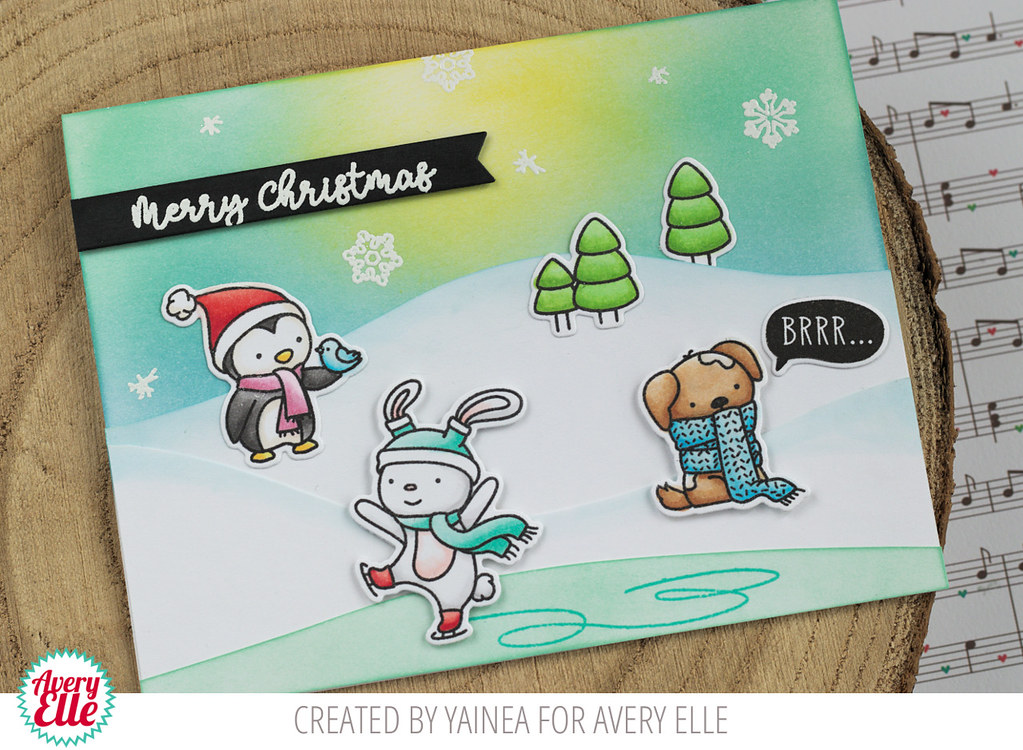
It's Yainea here today with some Winter-y inspiration for you! Where I live now it doesn't snow at all but I remember the joy, when I was a little girl, of waking up in the morning and discover everything covered by the snow. I love snowy landscapes, everything looks peaceful and brand new. And so, I love creating snowy scenes like this one!

Winter friends are the perfect main characters because they are too cute! I love how each one of them are dealing with their own little business so you can use them for a lot of different cards.

I used Distress inks to create the backgrouns and alcohol markers to color the critters and trees. The sentiment and snowflakes in the background were heat embossed with white embossing powder.

I hope you like my card and feel inspired to create with these cuties!

Thank you so much for stopping by, have a wonderful day!

Supply list:


Thanks for stopping by to take a peek. Have a great day!

November 20, 2020

Winter Friends With Amy


Hello friends! 

 Amy here today with a fun scene for the holidays.  

*************************************************

My card for today uses the adorable Winter Friends.  


I created a hill for my sledding squirrel and a hill for my penguin.  Lots of snow capped trees and stamped snowflakes created the scene.  Dimension was added with foam adhesive to the critters and the hills.  Stickles was added to the centers of the snowflakes.


Supplies:

Winter Friends

 Winter Friends Elle-ments

November 19, 2020

Peek-A-Boo Tags With Heather


Hello! Heather here with some really cute tags.  Check out, Peek-a-Boo Holiday Tag Toppers


I had so much fun with these. I cut them in white and added color with my copies. I was really having fun with that Shimmer Spray (oh man I love that stuff!). I also used Peek-a-Boo Tag Topper die for this. Such a great shape. 

That's all from me today! I hope you have a great day! 

November 18, 2020

Cute Christmas Mice With Heather


Hello hello! It's Heather here and I've got a cute project for you! Wahoo! 

Check out, Christmas Mice.


For my card, I stamped, die cut and colored all of the images from Christmas Mice. Then, I ink blended a background and spritzed it heavily with Shimmer Spray


I love how cheery these guys are! 

That's all from me today! I hope you have a great day! 


November 17, 2020

A Cute Joyeux Narwhal Card


Hi Everyone! I am popping in with a cute Joyeux Narawhal Card for you today. I had so much fun making this!   I  hope that you like it!


Thanks for stopping by to take a peek. Have a great day!

November 16, 2020

A Cute Card & Tag by Guest Designer Noga


We are so  excited to have Noga back today with this cute holiday card and tag!   I just love how sweet these are!

Hi crafty friends!

It's Noga here today and I am so excited to share with you another Christmas project showcasing the super adorable O Tiny Tree  stamps and dies.
I really enjoyed creating this cute card :)


To make this card I took an A2 panel of bristol smooth cardstock. I used  spun sugar distress oxide ink to blend a background, next I took another A2 panel of white cardstock and used the Snow Scene Elle-Ments to cut this shape and glued this panel on the first panel.
The sweet images were colored with copic markers and were glued with foam tape for dimension and the sentence was stamped using black ink from Winter Friends Clear Stamps.
I added Raspberry Hemp Twine for a final touch.

Supply list:


I am so excited to share with you my Christmas projects showcasing the super adorable O Tiny Tree and Winter Friends stamps and dies.
I really enjoyed creating those cute card and  tag :)


To make this card I took an A2 panel of bristol smooth cardstock. I used  spun sugar distress oxide ink to blend a background, next I took another A2 panel of white cardstock and used the Snow Scene Elle-Ments to cut this shape and glued this panel on the first panel.
The sweet images were colored with copic markers and were glued with foam tape for dimension and the sentence was stamped using black ink from Winter Friends Clear Stamps.
I added Raspberry Hemp Twine for a final touch.

To make the tag I die cut white cardstock using the Party Tags Elle-Ments. The cute image was colored with copic markers and glued to the tag.
I heat embossed a sentence from Hooray Clear Stamps using gold embossing powder. 

I hope you enjoy those projects I created and feel inspired to create some fun Christmas projects!
Thank you so much for stopping by today! Have a great week!

Supply list:


November 13, 2020

An Adorable Santa Jaws Card


Hi Everyone!  I am popping in quickly to share this cute card with you.  I had so much fun making this and just love our new Santa Jaws set!


Thanks for stopping by to take a peek. Have a great day!

November 12, 2020

Santa Jaws &Joyeux Narwhal With Heather


Hello everyone! It's Heather Campbell here and today I've got another two project post for you! However, I've also got a video for you too - so don't forget to watch that too! 

First up, Santa Jaws. I must say, Santa Jaws is probably the set I was most excited to play with come this release. I could barely decide what shark I wanted to play with when it came time to create this project. 

Here's my first card...

To create this card, I created an ink blended background and then
 
I added some gel pen and glossy accents to top off this card. So fun, right!?

Next up - Joyeux Narwhal!
Instead of a card, I decided to create some fun tags with the very fun Holiday Circle Tags.  

Now for the video... 


November 11, 2020

Santa Jaws & Nordic Patterns With Yainea


Hi there!

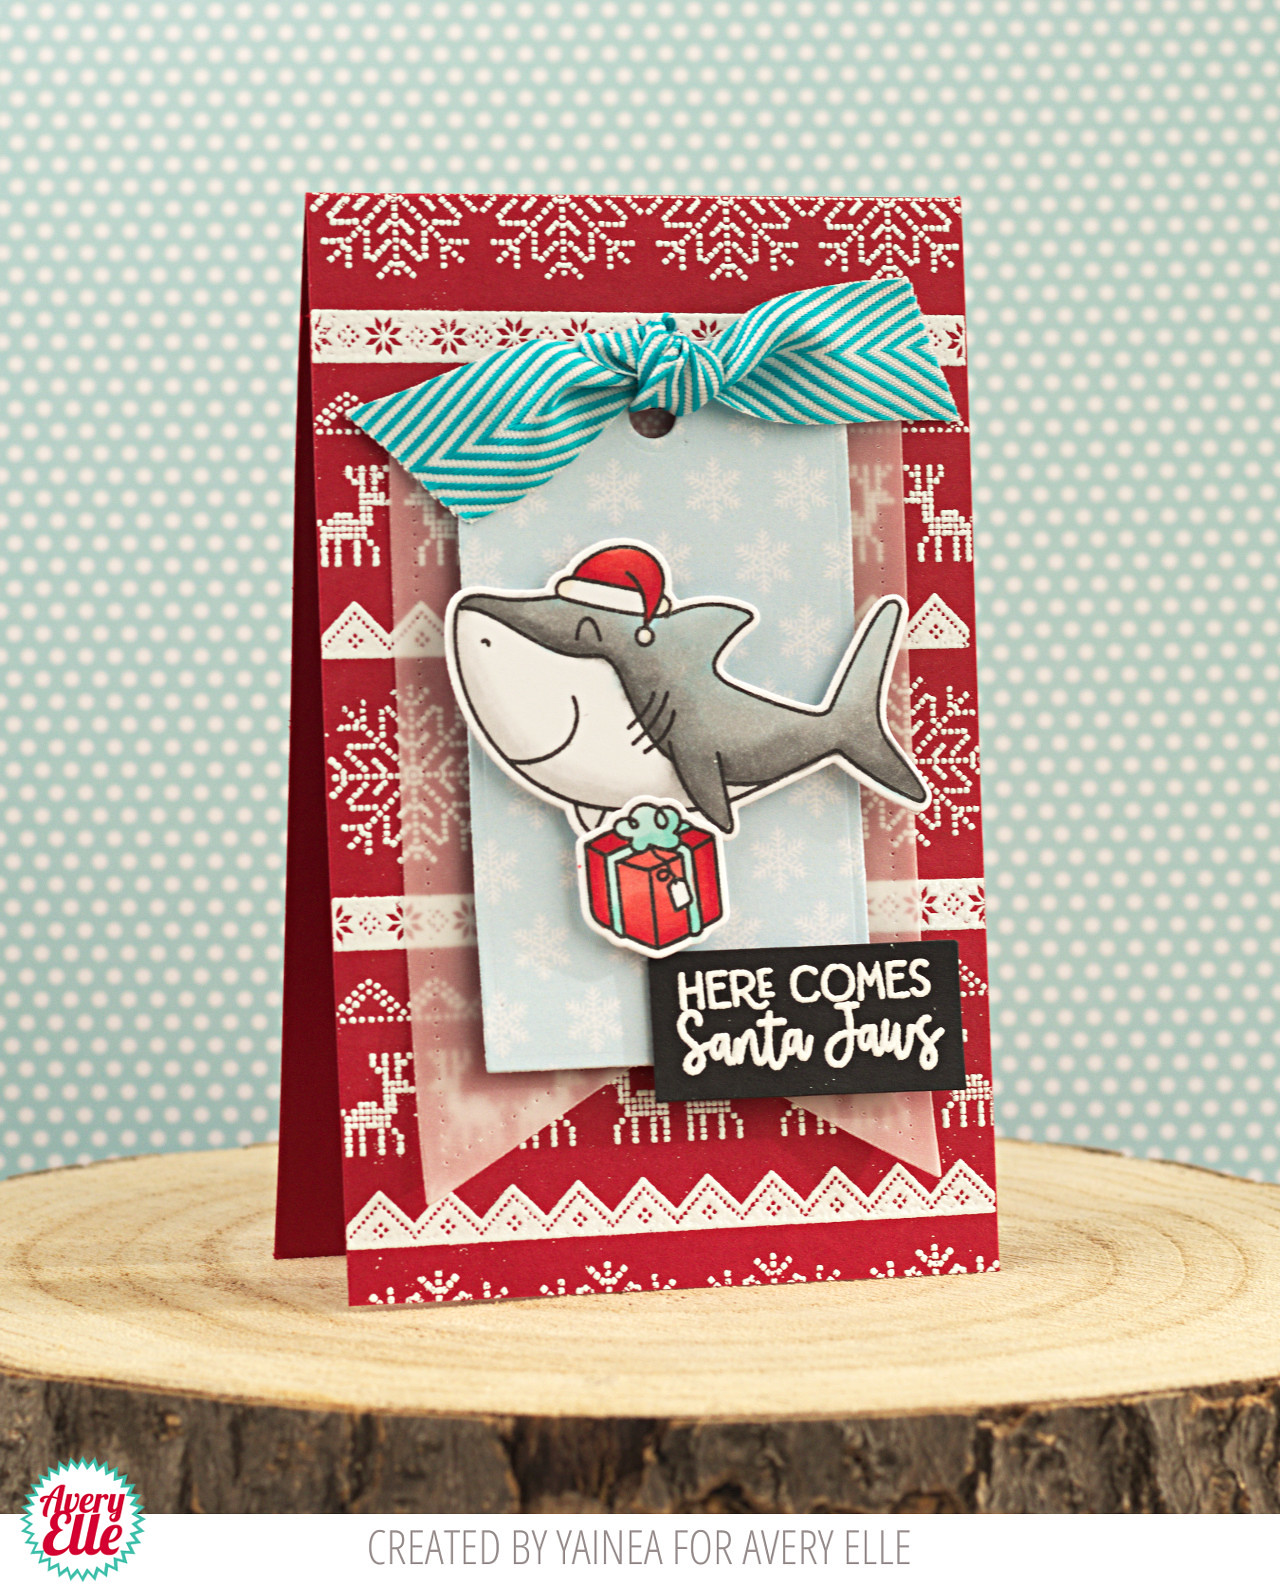
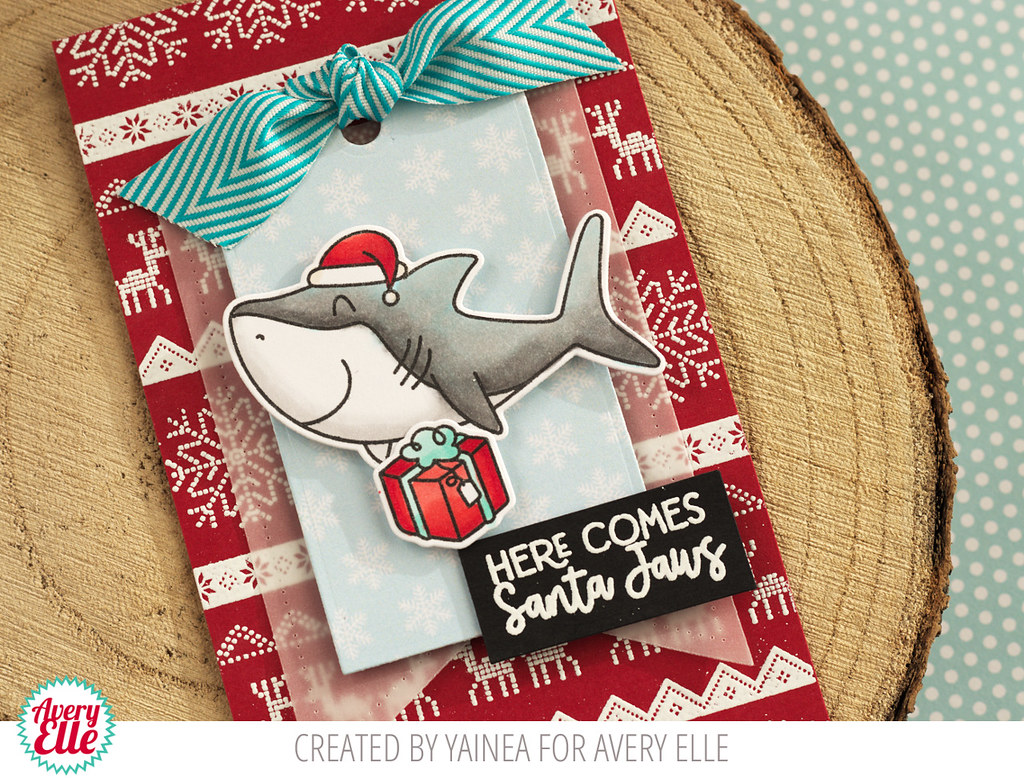
It's Yainea here with a fun Christmas card featuring Santa Jaws stamps and coordinating dies. This set is too awesome, I love all the puns and the cute festive critters.

I wanted to play with Nordic Patterns stamps to create my background, I really love this set, is just perfect for creating Christmas and Winter backgrounds and it does like cool embossed over colored cardstock.


Because of the patterned background I wanted to keep the card simple, I softened it with a piece of vellum and added a tag to place the card, which I colored with alcohol markers. For the card I used some paper from the Holiday Collection paper pack, it's full of colorful and pretty designs!


I hope you enjoyed my project for today and feel inspired to create! Thank you so much for stopping by, have a great day!

Supply list:


November 10, 2020

Santa Jaws & Joyeux Narwhal With Katie


Hello friends, 

Katie here to share greetings of the "sea-son." I have two cards featuring the underwater friends from the Santa Jaws and Joyous Narwhal stamp sets. 


First is a card featuring the friendly sharks from the Santa Jaws set. I stamped the images and some of the accessories on white cardstock and colored in the images with Comic markers. 


I die cut the stamped images and blended a panel of water color card stock with Distress Oxide ink in Salty Ocean. I used the Sea Scene Elle-ments die to cut the blended panel. I adhered the die cut to a white card base, added my stamped images and stamped the sentiment in black ink. 

Supplies: 


My second card uses the Joyeux Narwhal stamp set. I blended a watercolor panel with several shades of Distress Oxide ink and layered white card stock die cut with the Waves Elle-ments die. 


I stamped the critters onto white card stock and colored them with Copic markers before die cutting them with the coordinating Elle-ments die and adhering them to the card. I stamped the sentiment onto a piece of black card stock with VersaMark ink and heat embossed it with white embossing powder. As a finishing touch, I added a few clear sequins. 

That's all for me today! Thanks for stopping by!

Katie

November 9, 2020

Santa Jaws & Joyeux Narwhal With Elena


Hi there!

I have 2 cards to share with you today, and both mix and match 2 sets from our current release: Santa Jaws and Joyeux Narwhal.


This first card is my fave! I did some ink blending on the background layer, darker around the edges, blending to a highlight in the middle. I wanted to really make Santa Jaws the star of this show! All of the other sea friends are coming to see what he has for them, hee hee. 


My favorite animal from Joyeux Narwhal is this sweet sea-turtle. ack! Isn't he so cute? I stamped him x3 and added a sentiment to the bottom of the card to balance things out. Behind the turtles, I used a sheet of bubble paper from The Holiday Collection Paper Pad, and used the Waves die to cut it out. The effect is very "deep-sea" - no?

I hope you like my cards for today! Thanks for stopping by!

Supplies:


November 8, 2020

25 Days of Christmas Tags


Welcome to the 10th Annual 25 Days of Christmas Tags hosted by our friend Tracey McNeely!  Avery Elle is happy to be today's sponsor.  Be sure to check out Tracey's blog at inmycreativeopinion.blogspot.ca for all of the details on the sponsors and how to win prizes during this event!  It is jam packed with inspiration and giveaways!


I created a tag for today.  I can't wait to tie these onto some pretty packages next month!


Supplies:


Thanks for stopping by to take a peek. Have a great day!

November 7, 2020

Peek-A-Boo Christmas Train & Winter Friends With Katie


Hi friends, 

Katie here with a double dose of Christmas inspiration to share with you. First up, a slimline card featuring the Peek-A-Boo Christmas Train stamp set. 


I cut a panel of watercolor card stock to 3.5 x 8" and blended the top third with Distress Oxide ink in Mustard Seed. I spatter the blended ink with white paint to create gently falling snow. 


I stamped the Christmas Engine and a few extra train cars and colored them with Copic Markers. I filled the cars with lots of holiday goodies and some old friends from the Peek-A-Boo Polar Pals stamp set. 

Supplies: 


Next I have a card using the Winter Friends stamps. This set is just so charming and creates the most enchanting scene when paired with Woodland Scene Builder. 


I stamped the Woodland Scene at the top of a card panel and colored it with Copic Markers. I layered  the panel with white card stock cut with the Dotted Borders Elle-ments die. 


I stamped, colored and die cut the Winter Friends and arranged them on the scene skating, sledding and keeping warm from the cold. 

Supplies:

That's all for me today! Thanks for stopping by!
Katie


November 6, 2020

Peek-A-Boo Christmas Train with Amy


Hello friends! 

 Amy here today with a fun scene for the holidays.  The nostalgia of a train at the holidays is one of my favorites.  


Peek-A-Boo Christmas Train is another addition to the Peek-A-Boo series.  This adorable reindeer was Copic colored and added to the engine that was colored with bright red details with a bit of holly to decorate the stack.  The car is hauling a traditional tree along with a sack of goodies.  The scene was added along with a Wonky Scalloped Frame over a snowy sky that was spritzed with Clear Shimmer Spray.  The card was meant to be sentimentless as it can be stamped on the inside along with a personal message.


Supplies:

Peek-A-Boo Christmas Train

Peek-A-Boo Christmas Train Elle-ments

Wonky Scalloped Frame Elle-ments

Clear Shimmer Spray

November 5, 2020

Winter Friends With Yainea


Hello friends!

It's Yainea here today with some Winter-y inspiration for you! Where I live now it doesn't snow at all but I remember the joy, when I was a little girl, of waking up in the morning and discover everything covered by the snow. I love snowy landscapes, everything looks peaceful and brand new. And so, I love creating snowy scenes like this one!

Winter friends are the perfect main characters because they are too cute! I love how each one of them are dealing with their own little business so you can use them for a lot of different cards.

I used Distress inks to create the backgrouns and alcohol markers to color the critters and trees. The sentiment and snowflakes in the background were heat embossed with white embossing powder.

I hope you like my card and feel inspired to create with these cuties!

Thank you so much for stopping by, have a wonderful day!

Supply list:


November 4, 2020

Happy Holidays with Caryn


Hey there.  Caryn popping in with a festive little card featuring the Peek-a-Boo Christmas Train stamp set and the Happy Holidays die.  I decided to take the elements from set and create a scene based around the large Happy Holidays sentiment rather than in the train.  It's sometimes fun to mix and match the sets up!


I die cut the Happy Holidays from red card then to give it a fun, snow-covered look I used a product that's quite new to me - Neon Amplify from Tsukineko.  It's a pigment ink that puffs up like snow when you heat it with a heat gun.  It's very addictive - be warned!


For my card base I used some snowfall paper from the Holidays Paper Pad and set it behind a white Postage stamp frame (now retired).  I added this to the card front then stamped, coloured and die cut my reindeer, tree and presents and tucked them into the frame.  To finish I added some glitter here and there for extra sparkle!

Supplies used


November 3, 2020

Christmas Mice & Peek-A-Boo Holiday Tag Toppers with Jamie


I am so excited to pop in today with these two cute projects.  I hope that you enjoy them!

In this first card I paired our Christmas Mice with our new Happy Holidays Dies.  I love the combination!


I just love our new Peek-A-Boo Holiday Tag Toppers.  They make the most adorable tags - or  even  bookmarks!


Thanks for stopping by to take a peek. Have a great day!

November 2, 2020

Christmas Mice with Katie


Hi everyone!

Katie here with a card to share with you featuring the adorable Christmas Mice stamp set. 


I stamped the mice and accessories onto white card stock and colored them with Copic markers. I die cut the stamped images using the coordinating Elle-ments dies. 

For the background, I blended three shades of Distress Oxide ink (Lucky Clover, Evergreen Bough and Peacock Feathers) and spattered the blended background with white paint. 


I die cut the Happy Holidays Elle-ments die from a panel watercolor card stock blended with red ink. I die cut it second time from white glitter card stock. I layered the two die cuts and offset them slightly to create a three dimensional look. 

I stamped the sentiment in black ink and adhered the mice and accessories to the bottom of the card panel. 

Here is a video of how it all came together.


Supplies: 
Christmas Mice Clear Stamps
Die- Christmas Mice Elle-ments
Die- Happy Holidays Elle-ments

That's all for me today! Thanks for stopping by!

Katie