Pages

July 30, 2020

Peek-A-Boo Boat & Coaster Week - Day 4


Hi Everyone! Today I'm sharing two of my favorite cards from this release! Peek a Boo Rollercoaster and Peek a Boo Boat are so fun!


I started this card by stamping, die cutting and coloring all of the cute images! I LOVE the owl and raccoon!


Next, I made a fun background, added the coaster to place all of my images on and stamped the sentiment. 


 Next up, the Peek a Boo Boat card. I just LOVE these images. It took me back to my younger days of spending hours on a tube behind a boat. So fun! I loved making this a longer card to fit in the thrilling scene.


To make the waves pop I stamped the boat images twice and fussy cut the just the waves out. Once the images were colored I adhered the waves with foam adhesive. I love this extra dimension.

July 29, 2020

Peek-A-Boo Coaster & Peek-A-Boo Boat Week - Day 3


Hey everyone! It's Heather here and today I've got projects using the new Peek-a-Boo sets for this release - both Coaster and Boats!

First up... Peek-a-Boo: Coaster.
Isn't this little roller coaster just so fun!?! I love how you can make the roller coast as long as you want! How fun would a super long card with this set be? 


I mean really, look at those new Peek-a-Boo critters? EEP!  
You can check out a video below of me making this card...


Next, I thought it would be really fun to pull out the original Peek-a-Boo Pals stamp set and put some of these guys in the coaster. 


Fun, right? :)  Again, I love how this works super well on both a vertical or horizontal card. 

Next up... Peek-a-Boo: Boats
This might actually be my favorite Peek-a-Boo add-on set I've designed yet. I mean really - look at that boat! The critters in this set crack me up too. The whale is too cute. 


That's all from me today! Thanks so much for stopping by and checking everything out. Have a great one!
XOXO, Heather


July 28, 2020

Peek-A-Boo Boat & Coaster Week - Day 2


Hello!  
Amy here today with some fun images to remind us that summer is still in full force!  The Peek-a-Boo sets are some of my favorites.  This release included Peek-a-Boo Coaster and Peek-a-Boo Boat.  


I'm a sucker for an awesome roller coaster!  The thrill is so much fun.  Peek-a-Boo Coaster was paired here with the Cloud Mat Elle-ments.  The sky was ink blended with Broken China Distress Ink blending from the center out.  The Cloud Mat Elle-ments was layered over the top leaving out some of the lower clouds.  The roller coaster was added to the bottom along with a white heat embossed sentiment strip.  The clouds as well as the Copic colored skunk, owl, and coaster cars were added with foam adhesive.


Supplies:
Cloud Mat Elle-ments


************************************************************

One of our favorite summer activites used to be to go to Schlitterbahn to float around all day on a tube.  I couldn't pass up this cute whale image paired with the inner tube from Peek-a-Boo Boat!


I started with ink blending several colors of yellow Distress Inks onto a panel and then ran this panel through with the Ray Elle-ments.  I cut a wave for the bottom of my panel using the Summer Scene Elle-ments.  The Copic colored images were added with foam adhesive.  A few droplets and some white pigment dots were added for fun touch!


Supplies:


Peek-A-Boo Boat & Coaster Week - Day 1


Hi there!

Elena here with a couple of fun Peek-A-Boo cards using sets from our current release.

First up, because I can't resist anything nautical, is Peek-A-Boo: Boat.


I crammed in everything I possible could onto this card! ha. I really couldn't leave any image out, they're all so cute. I stamped, colored and cut out all of the images I wanted to use and set them aside. I adhered a piece of blue patterned paper (from The Spring Collection paper pad) only the card base. I thought the scallops looked a little like waves! Then, to keep the flowy, scallop theme going, I added a Wonky Scalloped Frame and then added all of the images inside.

Next up, I used Peek-A-Boo: Coaster.


Aren't they too cute? I started out by ink-blending a blue background that fades as it reaches the top of the card. Then, I used the same blue ink to add color to the actual roller coaster structure. I colored the coaster cars a bright red, and added the critters inside. I couldn't help but add a Speech Bubble for the 1 owl to yell out as he's going on the ride.

I hope you like them! Thanks for stopping by!


July 24, 2020

Dog-Gone Week - Day 4


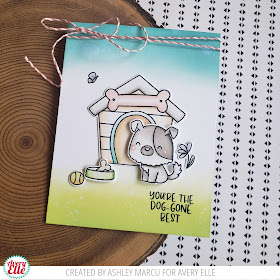
Hi Everyone! Ashley here today sharing the Dog-gone stamp set!


To create my card I stamped, die cut and colored lots of images from the Dog-gone stamp set. There are so many fun details in this set! I used soft brown on the dog house with blue trim, a grey roof and a pink bone. The dog has an adorable spot and I loved adding the bowl, ball, flower and butterfly. 


I did some simple ink blending for the background and stamped the sentiment.

Thanks for stopping by!

Supplies:

July 23, 2020

Dog-Gone Week - Day 3


Hello everyone! It's Heather here. Today, I'm sharing projects with the new Dog-Gone stamp & die set.

I'm a dog person so this set really got me going. For my first card, I stamped, die cut and colored in the images and mounted them on an ink blended background. 

To ink blend this background, I simply tore masking tape and masked off part of the card. Isn't that effect cool?

Next, I have been dying to try out using a layout of Nicky's card HERE to create a card and these dogs just seemed perfect for it!
I love how I was able to fit most of the images together on one card here!

Finally, I had to play with the dog house. I love that there's sentiments that fit inside the bone on the house. So fun, right?

It really creates the perfect little scene.

That's it for me today. Ha! Thank you so much for stopping by and sharing part of your day with me! Have a great one!
xoxo, Heather


July 22, 2020

Dog-Gone Week - Day 2


Hello friends,

Katie here. Puppies are the best. They're so fuzzy and sweet. All of that darling puppy goodness is captured perfectly in the new Dog-Gone clear stamp set.

Sometimes, colored images can look a bit flat, but there's a very simple technique that you can use to add a little texture and dimension to stamped images colored with Copic markers.

First, stamp and color your images as usual.  If there are any parts of the image that you don't want to texturize, leave that area uncolored. See the dog collar and tag in the bottom left image below.


Next, grab a terry cloth towel and Copic Colorless Blending Solution and add a few drops a small area of the towel. 


Press the towel on the colored images and the blending solution will lift the ink leaving behind the texture of the towel.


Super fun and simple too! Now here are all these fuzzy cuties on a card.


I used a cloud stencil and the Dotted Borders Elle-ments die to create a little background for the puppy party. I added some of the accessories and smaller images from the stamp set to round out the scene.  


Supplies: 

I hope you'll give this technique a shot next time you'd like to add some faux fur texture to your colored images.

Thanks for stopping by!
Katie

July 21, 2020

Dog-Gone Week - Day 1


Hi everyone! It's Melania Deasy here. Today I want to share my card for Avery Elle featuring Dog-gone. This stamp set is so super adorable and so fun! It's full of cute dogs and accessories.

Avery Elle supply that I'm using : 
Dog-gone Clear Stamp for the sentiment and images
Dog-gone Elle-ments to die cut the images
The Holiday Collection Paper Pad for the patterned paper
Wonky Stitches Elle-ments to die cut the banner for the sentiment and the frame

I stamp the images, color it using COPIC then die cut it. The sentiment is from white embossing powder.

Thank you so much for stopping by and happy crafting!


Hugs,


Melania Deasy

July 20, 2020

Avery Elle and Ellen Hutson Summer Of Stamping Blog Hop


We are so excited because today is the day that some of our Design Team members are hopping along with the Ellen Hutson team to celebrate our exclusive The Summer of Stamping Peek-a-boo Pals Camp Wanna Stamp set for Ellen Huston. Be sure to go through the entire hop below to see all of the amazing inspiration using this set. 

A little more info about the Essentials by Ellen Summer of Stamping...
They are hoping to spread a little crafty sunshine with a month of new releases and a whole lotta’ fun!!! Each week there will be new Essentials by Ellen releases and bunches of cardmaking inspiration!

I created this cute card using this exclusive set and had so much fun making it. These little critters look so adorable in their evening canoe ride!  I love it!


Be sure to check out all of the other inspiration using this set!  It is amazing!

Here is the hop order:

And there is a prize too...
We’ve got a super fun prize!!! One random & lucky commenter will win $25 to the EH shop!!! To enter for a chance to win, make sure to leave comments at each stop along the hop! And don’t forget to comment here too for a bonus entry! Comment before Saturday, July 25th at 11:59pm PDT. The winner will be notified by email.


If you love what you see, you can get a set of your very own here!


Thanks for stopping by to take a peek.  Have a great week!

July 17, 2020

Unicycle Week - Day 5


Hi there! Elena here, with a few cards using the new Unicycle stamp set:


 My 1st card is a 1-layer panel. I got the stamps in the mail and was too impatient to wait for the dies! There was a bit of masking involved but it wasn't difficult. I kind of love all of the images from the stamp set on this one card! They look like a birthday parade coming through... I backed the main panel onto a piece of polka-dotted paper from The Holiday Collection paper pad.


My next card uses the dies (yay!) I used the extra little die that cuts a slit into the rhino's body so that you could tuck the cake or the present in there. I gave him a balloon too, and a party hat, and sat him on his unicycle. I threw confetti all around and framed him out using the Burst die. I finished off the card with a sentiment from another new set, Peek-A-Boo Coaster.


I went a lot softer with the color palette on this last card. I used the tower-o-monkeys (hee hee) and gave them the pennant flag to hold. I dotted the sky with puffy clouds from Cupids and gave them a little bee friend (from Beary Good Friends) to look at.

I hope you like my cards for today! Thanks for stopping by!

July 16, 2020

Unicycle Week - Day 4


Hi Everyone! Ashley here sharing the very sweet and fun Unicycle stamp set. 


 I created this 4" x 6.5" card (my favorite size!) by stamping the rhino and several other images. Next, I die cut and colored them. They are such a fun centerpiece to this card! Then I prepped the background by distressing the edges and splattering light blue ink. Then, I cut a strip of card stock for the ground and added the sentiment. Finally, I adhered all of the pieces to the card and stamped and colored the confetti.

This is such a festive set and I can't wait to stamp the other critters on another card! I love all of the options.

Thanks for stopping by!

Supplies:

July 15, 2020

Unicycle Week - Day 3


Hello!  Amy here sharing some FUN with the set Unicycle.  


Unicycle 


The images were Copic colored, die cut, and set aside in order to assemble my card background.  

Using the Best Day Ever die out of white cardstock.  The various pieces were pieced back into the frame "temporarily" in order to lay the pieces back in correctly.  Once done, the frame was removed.  This panel was added to the note card which was layered with a cherry red cardsock.  

I added my Copic colored images to the lower right of my card and added the large die cut sentiment from Best Day Ever.  I haven't used enamel dots in a long time but this card screamed enamel dots!  

Unicycle2 


Supplies:
Unicycle Clear Stamps

July 14, 2020

Unicycle Week - Day 2


Hello friends!

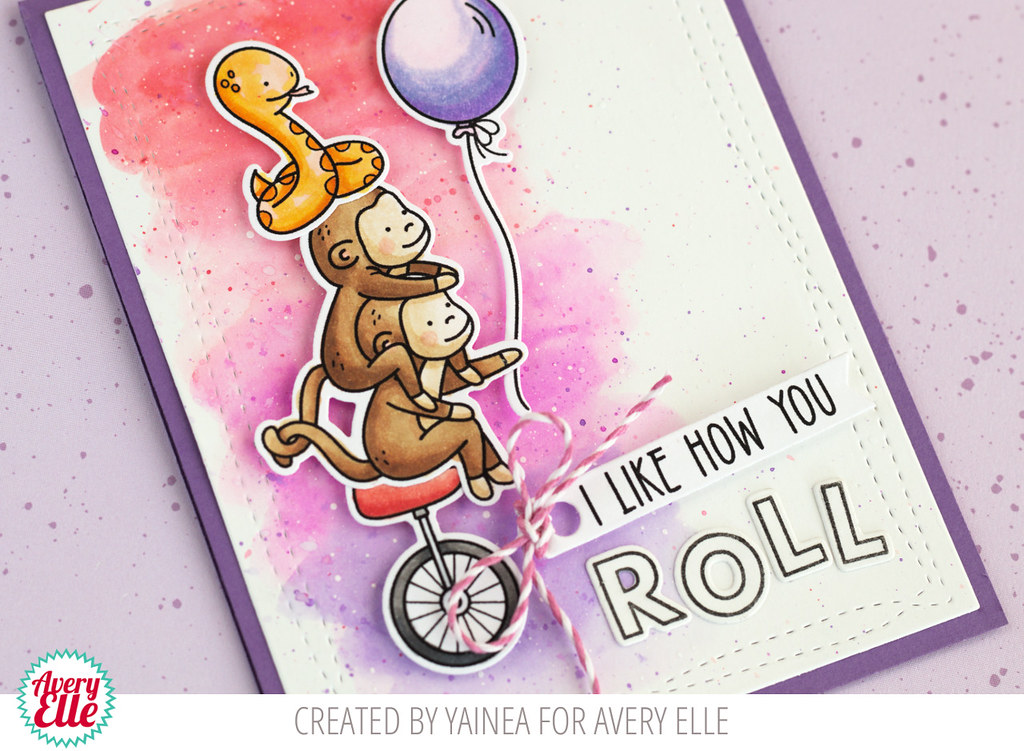
I hope you're enjoying Summer! It's Yainea here today sharing a cheerful card using the Unicycle stamps and dies from the latest Summer release.


I used Tombow markers and a water brush to create the background. Then I colored the critters with alcohol markers and added the sentiment combining the words from Unicycle and the Modern Alphabet stamps.


I hope you like it and feel inspired to create something today! Thank you so much for visiting the blog today, have a wonderful day!

Supply list:


July 13, 2020

Two Fabulous Cards By Caryn


Hello there, Caryn here today sharing two cards featuring some fabulous products from the latest Summer release.  

The first card features two new sets - Big Congrats and Poppies.  I thought it was high time I dusted off my Avery Elle Liquid Watercolours and the Poppy images in this set are perfect to show off the delicate colours and effects you can create. 

First I stamped the the poppy garland image in Versamark and heat embossed it in white.  I "coloured in" the image with plain water to begin with so I could drop tiny amounts of the liquid watercolour onto the design.  I love the way the two colours merge and mingle together creating an almost translucent appearance - just like a real poppy!  I used Cherry and Fizz liquid watercolours on the flowers and a combination of Lemongrass and Jungle  for the foliage.


I set the image aside to dry and then die cut the Congrats die from the Big Congrats set in white.  I was going to leave. it like that for a tone on tone effect but I decided it needed a bit "more" so added versamark to the bottom half and then heat embossed it in gold for a dipped effect.  I stamped and heat embossed the "So Happy For You" block also.


Finally I assembled my card.  I wanted the card to be a bit bigger than the standard A2 size so I created a custom size of 4' x 7'.  This gave my design a much better look and allowed me no avoid the card looking crowded.  Sometimes we forget we can create a card ANY size we like, lol!  I added the die cut floral image using foam tape and the congrats sentiment die cuts using liquid adhesive.  For a final flourish I added some enamel dots to tie in the gold on the sentiment.


My second card today is a bit more childlike and features the fabulous Unicycle stamp set.  It would be great for a little boy and I happen to have a nephew with a birthday coming up soon so this should come in handy!


I cut a panel of the blue star paper from the Spring Collection paper pad and adhered it to the A2 white card base.  I then stamped the cute rhino and unicycle along with the wee birthday cake and coloured them using Copics.  


I die cut the images, adhered them to the card and stamped the sentiment.
Whenever I see the chance to use a pom pom on a card I don't waste it so his hat just had to have one!


Supplies used:

Card 1

Card 2