Pages

February 28, 2018

Banner Bits Week with Katie


Hello,

Katie here with a card to share with you featuring the Banner Bits stamp set. This set is filled with so many great sentiments, I pulled out a bunch that sounded like a party and put them together to create this rainbow birthday card.


I used Versafine to stamp the banners onto the different colors of card stock and embossed them with Avery Elle's clear embossing powder.  I adjusted the sentiments to follow the curve of the banner and stamped them onto the banners with Versafine followed by more clear embossing powder.


I die cut the Polka Plates Elle-ments die from white card stock and attached it to a white A2 notecard.  Finally, I used foam adhesive dots to adhere all the banners to the card.


Supplies: 

Thanks for stopping by! 
Katie

February 27, 2018

Banner Bits Week - Day 1


Hi Everyone!  Starting today and for the rest of the week we will be featuring our new Banner Bits Clear Stamps here on the blog.  I can't wait for you to see all of the cute projects!  To kick off the week I created this cute project and I even have a  quick video for you.  Enjoy!


Supplies:

Nicky also created this fantastic card for today.  I love the pastel colors she used and those cute bouncing critters! Check it out!


Supplies:
Banner Bits
 
Party Pals

Pierced Clouds


Thanks for stopping by to take a peek. Have a great day!

February 26, 2018

Toucan Party With Yainea


Hello!
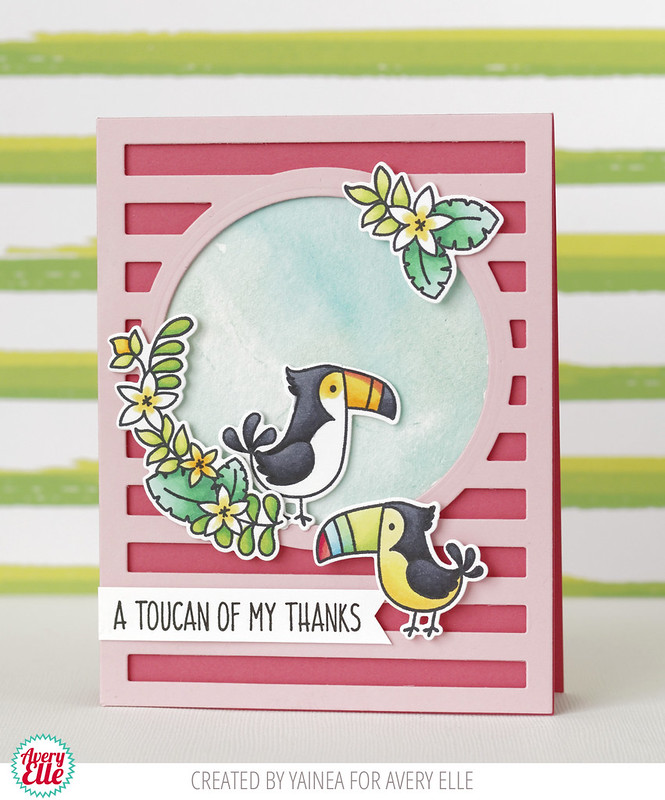
It's Yainea here sharing a colorful thank you card using one of the sets from the new release: Toucan Party. I absolutely love this set because the cards created with it will be cheerful and colorful for sure!

I decided to create a thank you card because it's always great to have a bunch of them in case you need them ;)


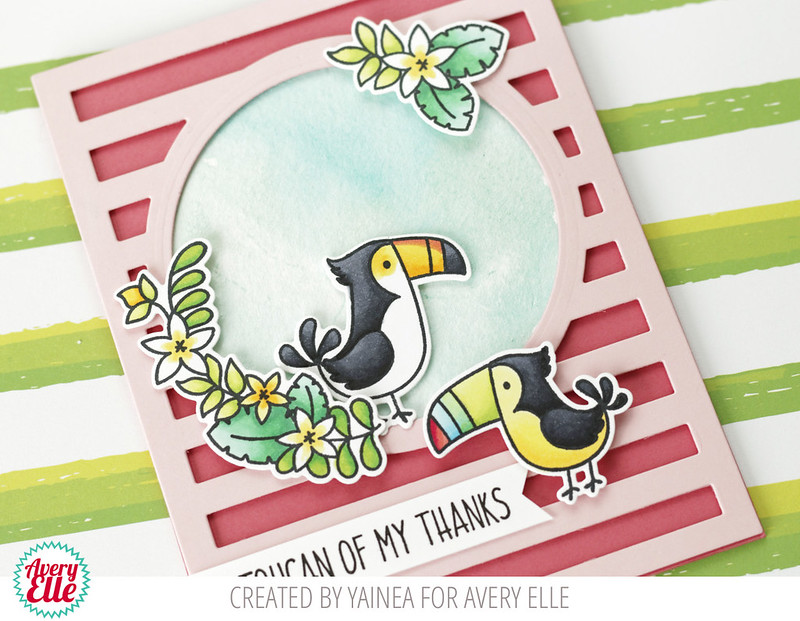
First, I colored the images using Copic markers and die cut them. Then used the Horizontal Stripes die to die cut a pretty pink background to adhere to a darker pink cardbase. I cut a circle out of watercolor paper and used the new super cool Liquid Watercolors to color the sky.

I stamped my sentiment on a white stripe of cardstock and finally, I adhered everything together. So fun to create and a fun surprise for a friend!


I hope you like it and feel inspired to use this set! Thank you so much for stopping by, have a wonderful day!

Supply list:
- Toucan Party Clear Stamps
- Toucan Party Elle-Ments Dies
- Horizontal Stripes Elle-Ments Dies
- Aquamarine Liquid Watercolor
- Mint to Be Liquid Watercolor


February 23, 2018

Toucan Party Week & Video - Day 5


Hi everyone!  I am popping in with a quick card and video using our Toucan Party Stamp and Die set.  I hope you enjoy!

Supplies:


Thanks for stopping by to take a peek. Have a great day!

February 22, 2018

Toucan Party Week - Day 4


Hi crafty friends! Ashley here sharing Toucan Party I INSTANTLY fell in love with this set when I received it and I love it even more now that I've created with it. Check it out...


To create my card I started with the background. I painted it with Celery Liquid Watercolor. These new watercolors are amazing. The best colors, beautiful coverage and blending...perfect.


Next, I stamped and colored the branches and the two birds. Finally, I finished my card with the sentiment embossed in Rose Gold Metallic embossing powder. Wow, such a gorgeous color.


I love this set and I know you will too! Thanks for stopping by!

Supplies:

February 21, 2018

Toucan Party Week - Day 3


Hello!
Are you ready for a little "toucan party"?  This new stamp set has you covered when it comes to sentiments.....birthday, thanks, and just "tropi-cool"!

Toucan Party

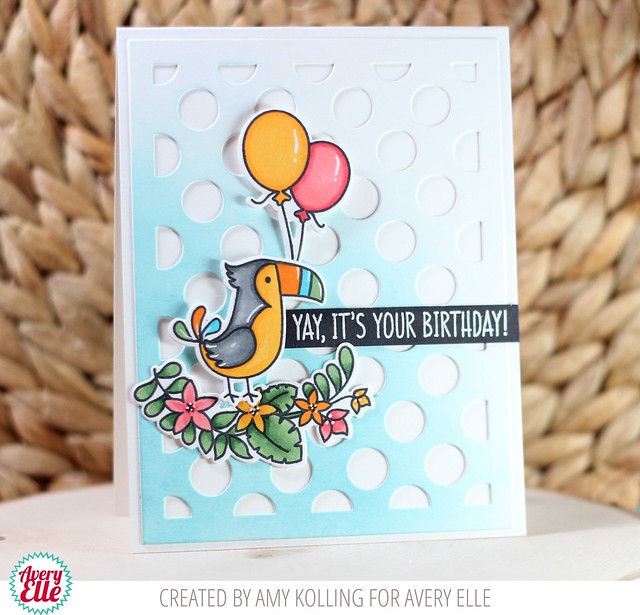
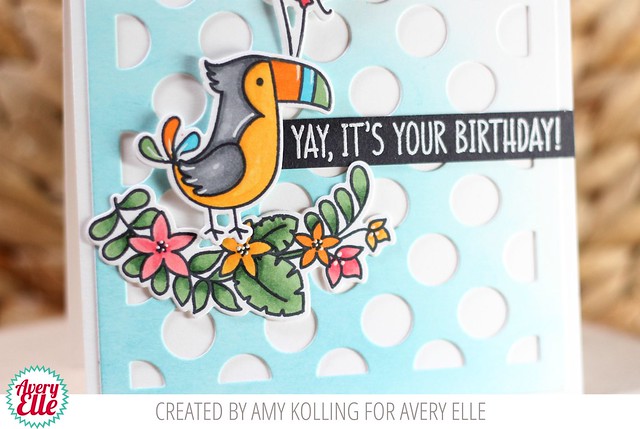
To a panel of white cardstock, I ink blended some Broken China Distress Oxide ink to one corner (this does not have to be perfect).  To this panel, I used the Polka Dot Plate to die cut the polka dots.  

Toucan Party2

I stamped my images using New Moon Dye Ink, Copic colored, and die cut using the Toucan Party Elle-ments.  My sentiment was white heat embossed using Pure White Fine Embossing Powder.  I simply layered my images, some with foam adhesive, to my white notecard that was layered with the polka dot panel.

Supplies:

February 20, 2018

Toucan Party Week - Day 2


Hi all! It's Deasy here. Today I want to share my card for Avery Elle featuring Toucan Party stamp set. This set is so cute and versatile for any theme. For my card today, I made a fun birthday card. I hope you enjoy it :)


 Avery Elle supply that I'm using :
Toucan Party Clear Stamps for the images and sentiment
Toucan Party Elle-ments to die cut the images
Diagonal Stripes Elle-ments to die cut the frame on a yellow card stock and a white foam then glue them all together

I stamp, color the images using copic then die cut it. The sentiment is from white embossing powder. To color the background, I'm using Dye Ink Pad with blending tool then splash watercolor with my brush.

Thank you so much for stopping by and happy crafting!

Hugs,

Melania Deasy

February 19, 2018

A New Design Team Member & Toucan Party Week - Day 1


Hi Everyone!  I am so excited because today I get to introduce a new design team member to you!  Nicky Meek is a fantastic card maker that creates the cutest scenes out of stamps and dies.  You can check out her work on her fantastic Instagram page - @nickynoocards .  She also has the cutest etsy shop, www.etsy.com/shop/nickynoocards , that you don't want to miss.  I cannot wait to see what she is going to create next!


 Just check out her cute Toucan Party card!  It is too cute!!


 Supplies:

In addition, Caryn has a really cute new card to share with us today too.  Let's take a peek.


"Hello, it's Caryn here with a couple of cards I've made using the gorgeous Toucan Party Clear Stamps and dies.  This is such a cool set to play with and is perfect for all kinds of occasions.  

I stamped all the images out using New Moon dye ink (I stamped extras of the foliage images so I'd have enough for the two cards) and coloured them all with Copics before die-cutting them.  


I used an orange card base and cut a mat using the Pierced Mats Elle-ments.  I layered my images using foam adhesive and finished by adding a good coating of Diamond Glaze (my favourite new/old thing to do!)


The second card uses a technique to get even more from your dies - by creating a stencil!  I made a stencil (using the Chevron Mat Coverplate die) from card but you could easily use acetate so you can re-use it again and again.  I taped the stencil down over a piece of green card (die cut using the Double Pierced Rectangles Elle-ments) and then used a spatula to spread the texture paste onto the card. 
  

Once this had dried I added my coloured images and finished it off with a sentiment from the Banner Bits stamp set and die collection."


Supplies Used:


February 17, 2018

Toucan Party Card & Video


Hello!  I am just popping in to share this great video that Iliana from My Sweet Petunia created.   As you may know, she is also the inventor of the MISTI!  Be sure to check it out!  It is terrific!

 Supplies:

Thanks for stopping by to take a peek. Have a great day!

February 16, 2018

Spring Bouqet Week - Day 5


Hi Everyone! Ashley here today sharing the new stamp set Spring Bouquet!


I started my card by stamping and die cutting the main flowers from Spring Bouquet. I colored them a soft shade of pink and green. I balanced the color by adding them  to a blue water colored background. 


I finished the card by embossing the sentiment at the bottom of the card on black card stock. 

Thanks for stopping by!

Supplies:

February 15, 2018

Spring Bouquet Week - Day 4


Hey everyone!  It's Heather here with a card using the new Spring Bouquet set.
I absolutely love this new set.  These lilies are gorgeous!

To create my card, I heat embossed the lilies on my card base and also on vellum.  I die cut the vellum lilies using the coordinating dies.  On my card base, I ink blended to add color.  On my lilies, I used Copics on the reverse side of the vellum (the non-stamped side) and added color to my lilies. 


I absolutely am obsessed with adding color to vellum stamped images using this technique - especially with flowers because it's so soft this way!

Thanks so much for stopping by and have a great day!

February 14, 2018

Spring Bouquet Week - Day 3


Hello friends,

Katie here to share a card with you featuring the gorgeous Spring Bouquet stamp set and Avery Elle's new liquid watercolors.


To make the bouquet, first I stamped the the floral images with Versafine black ink and then I heat embossed the stamped images with clear embossing powder.  I watercolored with Mimose and Lemongrass allowing the colors to dry completely before going back with additional layers of pigment.  For the darker shades at the center of the lilies and in the shaded areas of the stems and buds, I used Fizz and Celery watercolors.


The two stand alone lily images in the stamp set coordinate with two of the flowers in the bouquet, so I took the opportunity to add some dimension to the bouquet by adhering the coordinating flowers over top of the bouquet with foam tape. I tied the bouquet with some twine before adhering the bouquet to a circle cut with the Pierced Circles Elle-ments die and stamped with the "thank you" sentiment included in the set.   I adhered the circle to an A2 notecard that I matted with the new Chevron Mat Elle-ments die.  I love how the circle gives the mat a whole different look! 

Supplies: 

Thanks for stopping by!
Katie


February 13, 2018

Spring Bouquet Week & Watercolor Video - Day 2


Hello Avery Elle fans!  It's Caryn here today and I'm SO EXCITED to be able to share a couple of cards I've created using the Spring Bouquet clear stamps and dies.   This set particularly lends itself (as do all our other floral sets) to our brand new Liquid Watercolours.  These come in 10 delicious colours and here I've used a few of my favourites (Cherry, Fizz and Mimosa).  I've also created a third card in another colour variation in the video below (look out for the bonus card too!!!).


Both cards use the same main supplies and are just variations of each other.  Both start off as blank 41/4" x 51/2" white cards with Worn Lipstick and Picked Raspberry Distress Oxide inks (on the pink version) and Wild Honey Distress Oxide ink blended on the orange one.


I used the brand new Polka Plate Elle-ments but added a twist by using two of the circle dies from the Burst Elle-ments to die cut an aperture and circle frame.  I pieced in the "frame" which I cut from another piece of white card into the negative space and adhered the die cut to the card front.


I stamped all the flower elements onto water colour cardstock using Versamark ink then heat embossed them using Avery Elle fine white embossing powder.  My preferred method for watercolouring heat embossed images is to cover the area inside the embossed outline with clean water to saturate the paper then pick up the colour and drop it onto the wetted paper.  This allows the paint to flow freely and naturally but you can also fiddle with it to get it looking exactly how you want it.   For the pink lilies I used Cherry Liquid Watercolour and for the orange lilies I used a combination of Mimosa, Fizz and Cherry.  They mix beautifully and a tiny amount really does go a long way.

You can't really see it in the photos but as always, I have added a touch of shimmer to the images using a Spectrum Noir glitter brush.


Supplies:


February 12, 2018

Spring Bouquet Week - Day 1 & Winner


Hello!  I hope that you all had a wonderful weekend!  We are working hard to get your new release orders out.  Thank you SO much for all of your kind words, enthusiasm and support!  I have a fun card and video to show you today.  Enjoy!

Supplies:


The winner of our blog hop from last week is Arianna Barbara.  Congratulations!  Please email us at customerservice at averyelle dot com so that we can get your prize to you!
Pierce
Arianna Barbara said...
1. Awww!!! Stunning release!!! Love so much these adorable creations! Critters are my fav!!!

Thanks for stopping by to take a peek. Have a great day!

February 8, 2018

Spring 2018 Release Designer Blog Hop


I am so excited because our Spring 2018 Release is finally here!!  We have an amazing blog hop full of inspiration today and we are so glad that you are here. Thank you so much for all of your comments and likes during our previews this week.  We read each and every comment and it really makes our day!!

For a summary of all of our new products that are available for purchase right now check out this section in our store .  Be sure to scroll all the way to the end of this post to read about the fun giveaway we are having.  We will be showcasing projects using our new sets starting today and will continue to show them throughout the next few months.  I can't wait!

 Let's get to the hop.  I have a ton of projects to share with you today!


Hop on over to Caryn next to see even more inspiration!

Avery Elle / Jamie - you are here
Caryn Davies - go here next
Heather Campbell
Yainea
Melania Deasy
Katie Gehring 
Amy Kolling 
Ashley Marcu
Elena Roussakis

To celebrate our Spring 2018 Release Blog Hop, Avery Elle is giving away a $25 Gift Certificate to one random winner.  To enter to win just comment on this post.  There is no purchase necessary and you must be 18 years of age or older to enter.  This giveaway is void where prohibited.  You can also do options 2, 3, 4, 5 or all 6 of the following to increase your chances of winning. You have until midnight Sunday, February 11th to enter.  The winner will be announced on the Avery Elle Blog on Monday, February 12th .  All products are available for purchase in the Avery Elle store right now.
To enter to win you can do 1, 2, 3, 4, 5 or all 6 of the following to increase your chances:


  1. Comment on any of the design team's posts and/or here on the Avery Elle Blog
  2. Follow us on Twitter and tweet the contest (we are @averyellestamps )
  3. Follow us on Facebook (we are www.facebook.com/AveryElle ) and share us with your friends - make sure they tell us you sent them.
  4. Follow us on Pinterest
  5. Become a blog follower through email (comment on the Avery Elle blog if you already follow us)
  6. Join our Flickr group (comment on the Avery Elle blog if you already belong)

Thanks for stopping by to take a peek. Have a great day!